In this article, we will set up a Git-Server on a NAS available on a local network. For the server we will use Gitea, which we will installed via Docker on a QNAP NAS.
Dennis Schlösser
27 Aug 2021
Updated on
08 Oct 2025
30
min read
Content
What is Git
Git (not to be confused with GitHub) is a versioning system to enable collaboration within a team. Unlike incremental storage, a versioning system always displays the latest version in the file browser and stores all other snapshots in a database. Git was originally developed by Linus Torvalds and is constantly being developed as an open source project. It is the most widely used versioning system in software development. Platforms like GitHub, or GitLab offer hosting solutions for Git-based projects. GitHub is the largest hosting platform that hosts numerous open source and private projects. Git is also capable of versioning game projects, as it can now work well with large binaries.
Why should I self-host a Git-Server?
Game and animation projects need a lot of storage space to store 3D models, textures and audio data. Platforms like GitHub and GitLab can store this data, but they are designed for software development, which uses less storage space compared to game development. Thus, there are sometimes storage limitations or storage space has to be purchased at a high price. If a team works primarily on-site, a self-hosted Git-Server can be a good alternative. The advantages are saved costs and a faster data transfer on the local network. The disadvantages are the installation and update effort. A locally hosted Git-Server can also be made accessible from outside via https if you want to give remote users access.
The choice of server software
GitHub's server software is proprietary and cannot be used. However, there are many alternatives such as GitLab, Gitea, Bitbucket or Gogs. The most comprehensive system here is GitLab, which can be used free of charge in the form of the Community Edition. It is very well suited for large scalable projects, but consumes a lot of resources. In our case, we will use Gitea, since it is a light weight software and is completely sufficient for QNAP systems with limited CPU and memory. Gitea also offers features such as user management, an issue tracker, a wiki, and various language packs. Gitea is an open source project and is constantly being further developed by a community.
Git for non coders
Built-in LFS support, no complicated configuration and an artist friendly user interface.
For simplicity reasons, we recommend to use the namings of folders and settings we are using in this tutorial.
1. Install or upgrade Container Station
Container Station is the service to install Docker containers on a QNAP NAS. Docker Containers are similar to virtual machines and therefore can be easily setup, started, stopped and updated. We will install Gitea as such a Docker Container in the Container Station in the next steps.
Open your Qnap Web-Interface (default localIpAdress:8080/cgi-bin)
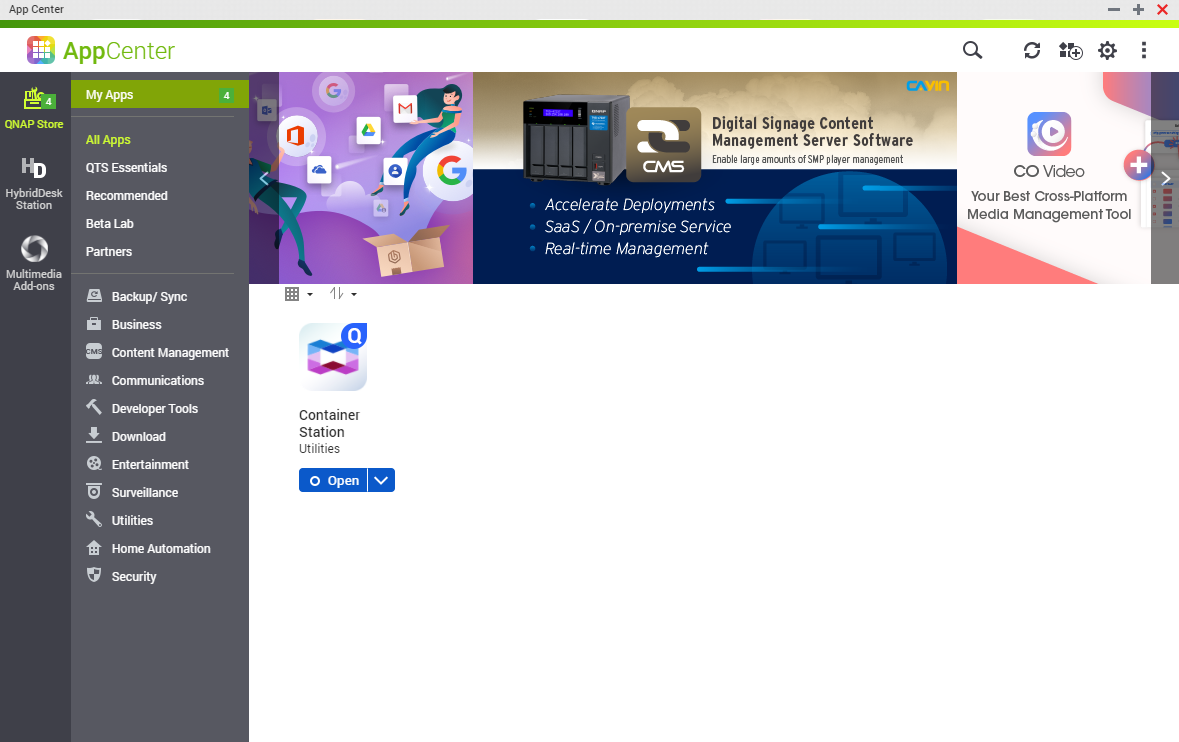
Navigate to the App Center
Search for Container Station
Press Install or Update if it is not already installed in the latest version
Container Station should be visible in App Center once these steps are completed.
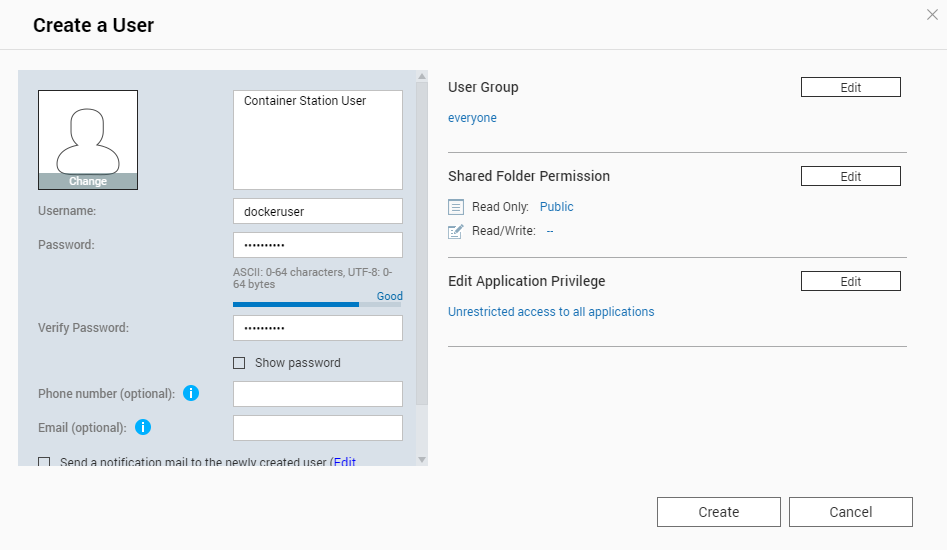
2. Create a user for Container Station
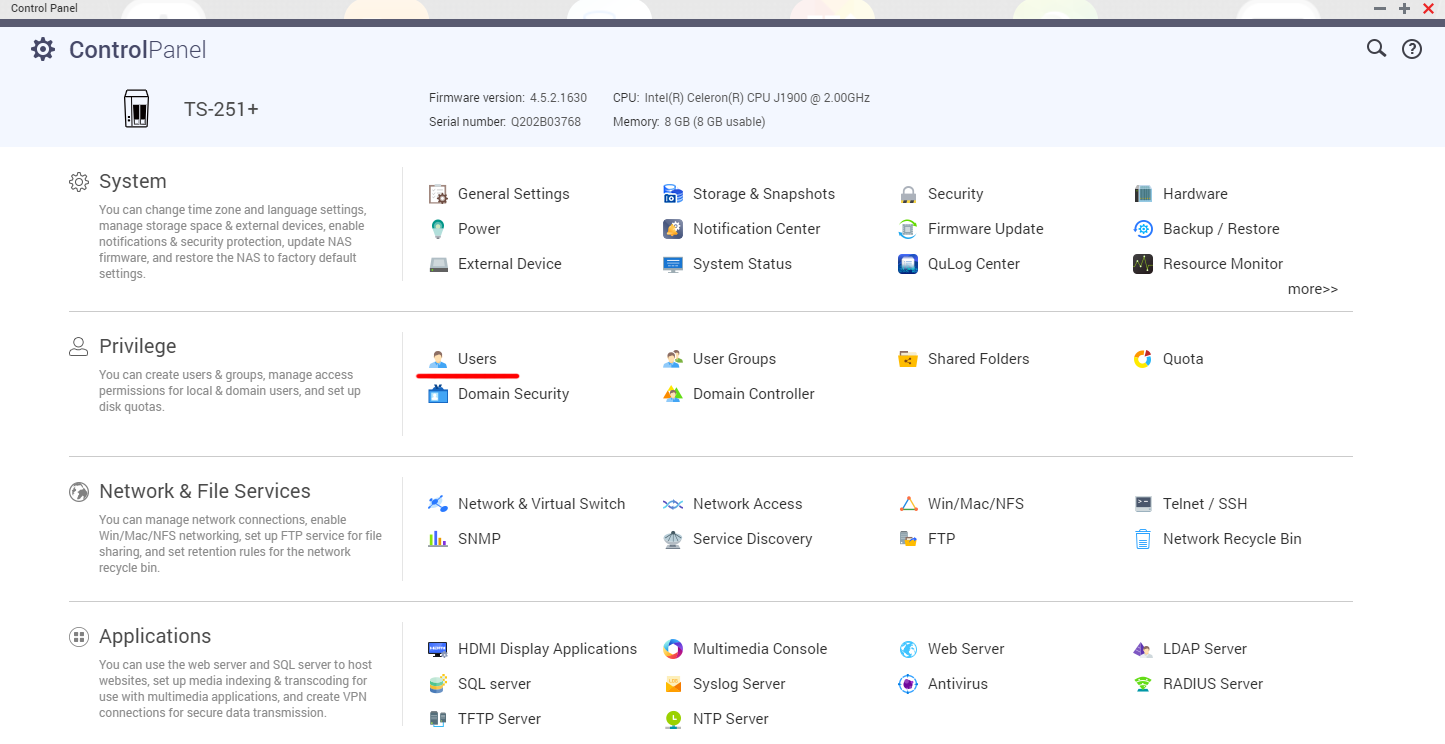
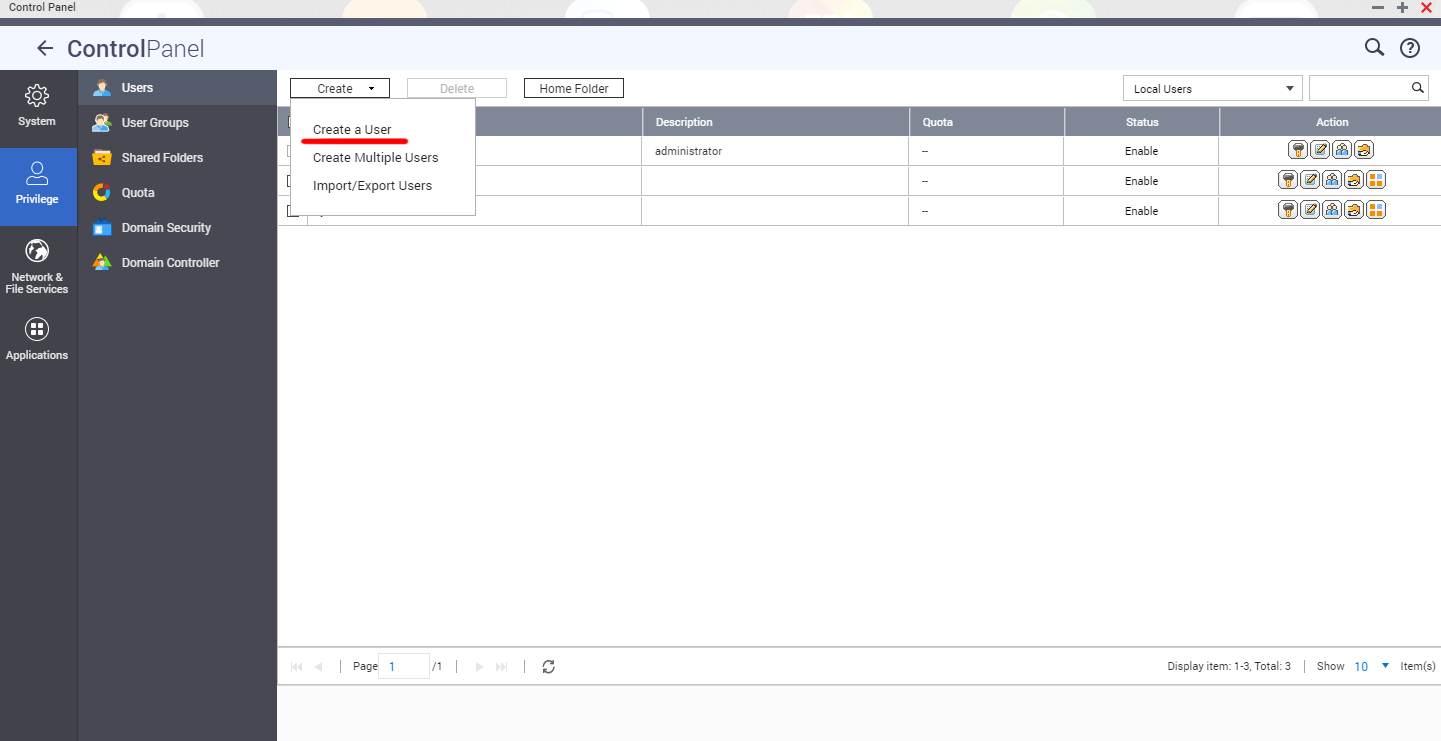
In the first step we need to create an account.
Navigate to "Users"
Press "Create a User"
Leave all parameters on default and fill the user information on the left.
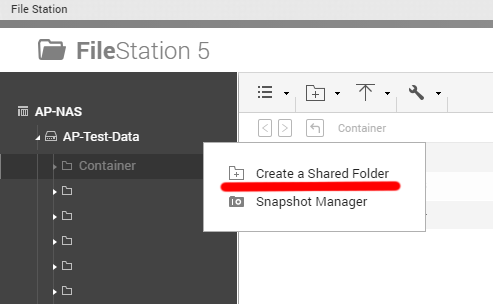
3. Create a shared folder
We need a shared folder to store the Gitea application and the database there.
Navigate to "File Station"
Press "Create a Shared Folder"
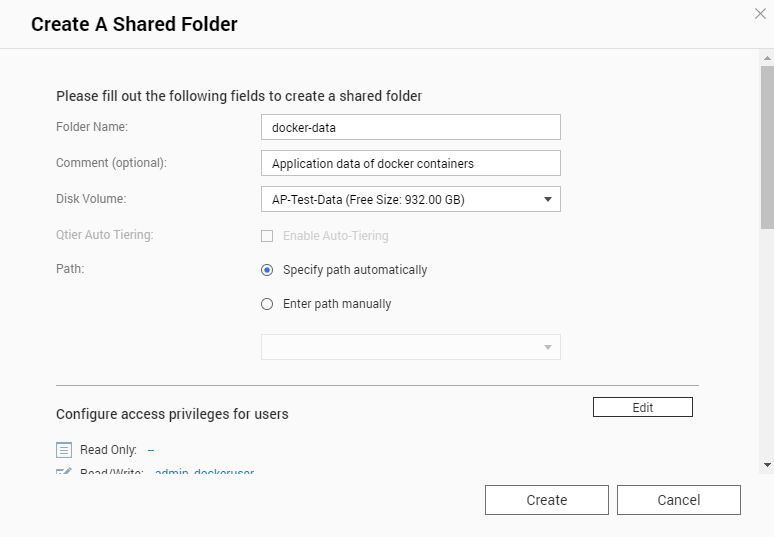
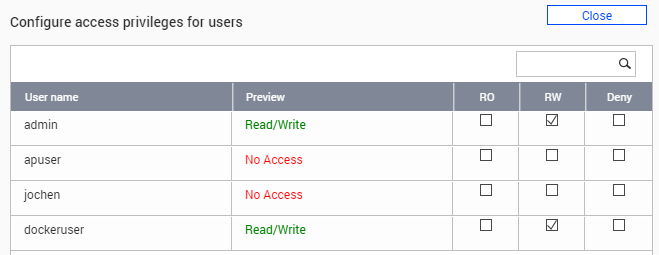
Create a shared drive "docker-data" (or any suitable name you want) and for the "Configure access privileges for users" provide your newly created user "Read/Write" access to the folder. Choose the disk volume where you want to store the data. Every other parameter can be left as default.
Don't forget to provide "Read/Write" access for your newly created user.
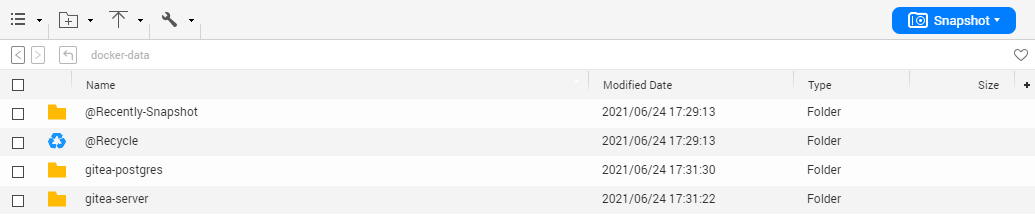
After that, navigate to the new shared folder. You need to create two subfolders, one for the server and one for the database. In the first folder Gitea will store all your large files and in the second folder the database with all meta information from Gitea is stored. You can name the server folder "gitea-server" and the database folder "gitea-postgres".
This is how your folders can look like
4. Get user ID (UID) and group ID (GID) of the created user
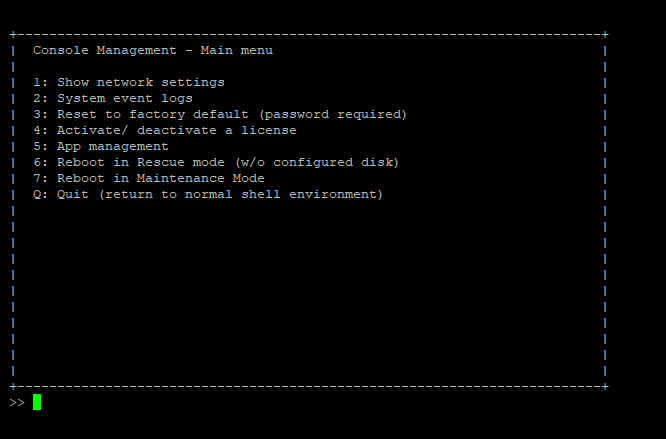
To get the user id and group id of your newly created user (in this example "dockeruser") we need to connect via SSH (Secure Shell) to the NAS and run a console command. This article explains how to connect to the QNAP NAS via SSH.
When you are connected via SSH you will see the following window
Do the following steps:
Type "Q" and press ENTER
Type "Y" and press ENTER again
Type "id dockeruser" and press ENTER again
Your result will look similar. Write down the UID value (1002 in the example) and the GID value (100 in the example).
5. Create Containers in Container Station
Open "Container Station"
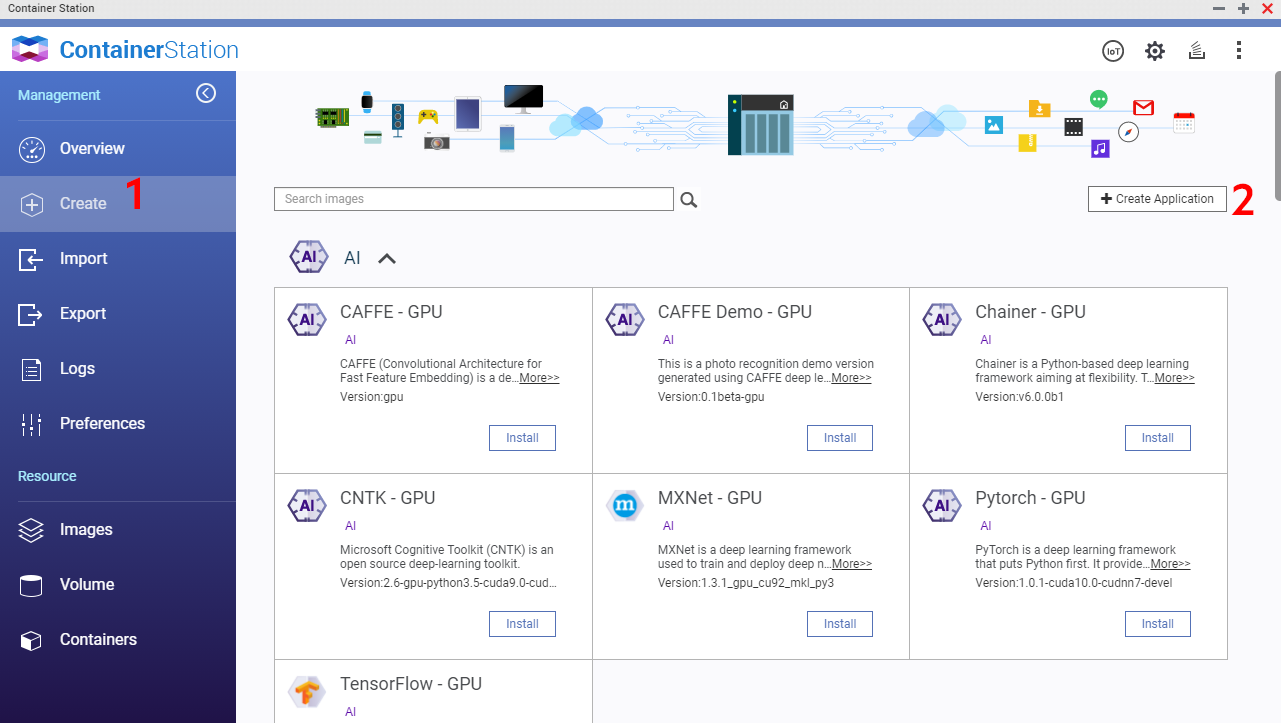
Navigate to "Create" and then press "Create Application" in the upper right of the window.
You will see the following screen. Setup an application name e.g. (giteaserver) Only numbers and small letters a-z are allowed here.
Now, copy the following YAML code and paste it into the "YAML" textarea. Keep in mind that the "USER_ID" and the "USER_GID" have to match to the values from step 4. If you used different paths, then you have to adjust them as well.
Change the line "GITEA__database__PASSWD=gitea" and "POSTGRES_PASSWORD=gitea" to a custom password. These passwords need to be the same.
If you encounter problems with the script, use another DB with this script:
services:
  gitea:
    image: gitea/gitea:latest
    container_name: gitea_web
    restart: always
    environment:
      USER_UID: 1004
      USER_GID: 100
      GITEA__server__DOMAIN: "102.20.22.2"
      GITEA__server__ROOT_URL: "http://102.20.22.2:3000/"
		# replace the DOMAIN ip and ROOT_URL with the IP to your DB.
    volumes:
      - /share/Container/Gitea/gitea-server:/data
    ports:
      - "3000:3000"
      - "222:22"
Replace the DOMAIN ip and ROOT_URL with the ip of your DB.
About this compose file
This is a so called compose file which will setup two docker containers
first gitea from gitea/gitea:latest
note that under volumes of "server": the first path describes the folder inside the shared folder we created in step 3 (/share/docker-data/gitea).
second postgres from postgres:13
note that under volumes of "db": the first path describes the folder inside the shared folder we created in step 3 (/share/docker-data/postgres).
The containers are set to restart always. So on restart of the QNAP they will automatically start. If they are stopped explicitly via the Container Station they will not restart automatically.
Line 28 maps the internal ssh port 22 to outgoing port 222 to prevent a clash with the ssh 22 port of the Qnaps own ssh server. If you really need to use the default ssh port 22 as outgoing port, please see Giteas tutorial for ssh pass through
Do the following next steps
Press "Validate YAML"
Press "Create"
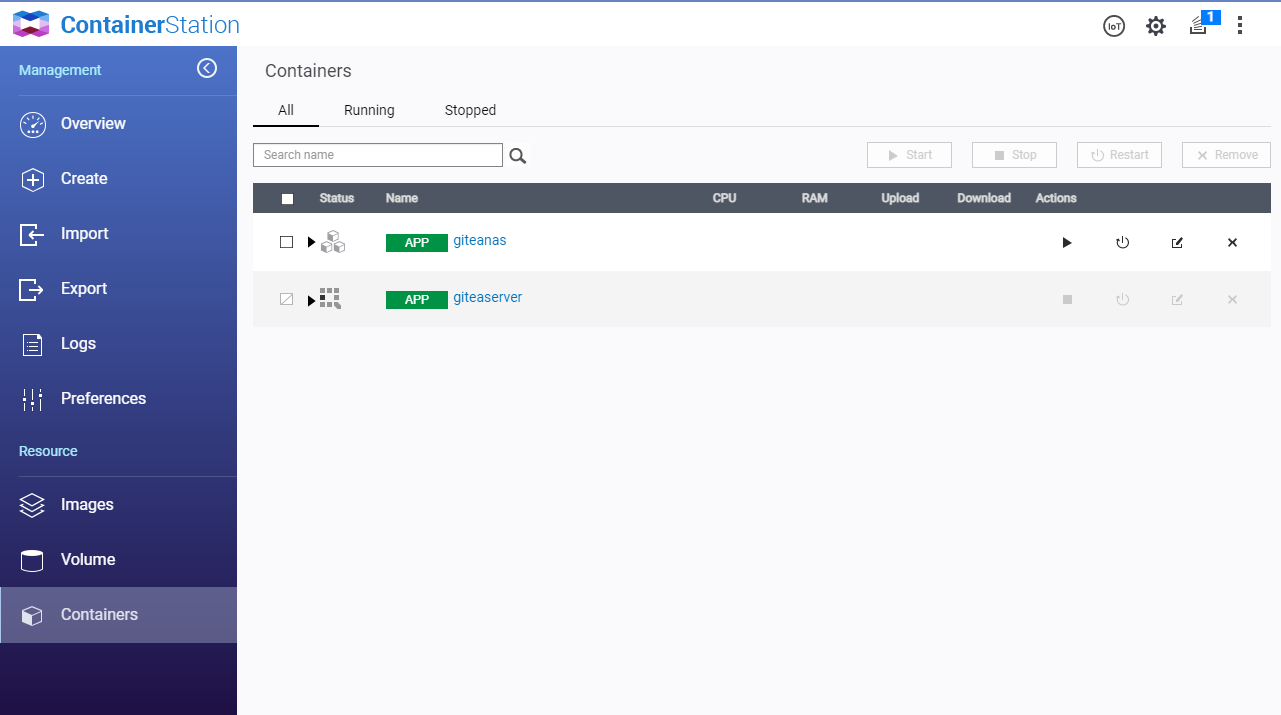
Navigate to "Containers" on the left
You will see something like this (you will only see giteaserver or which ever name you have chosen)
Wait until the symbol shows
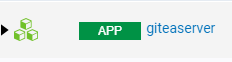
Press the button on the left of the 3 cubes to extend the application and see the running containers. Make sure that you see both containers and that they are both shown with a green cube on the left.
6. Setup Gitea in Browser
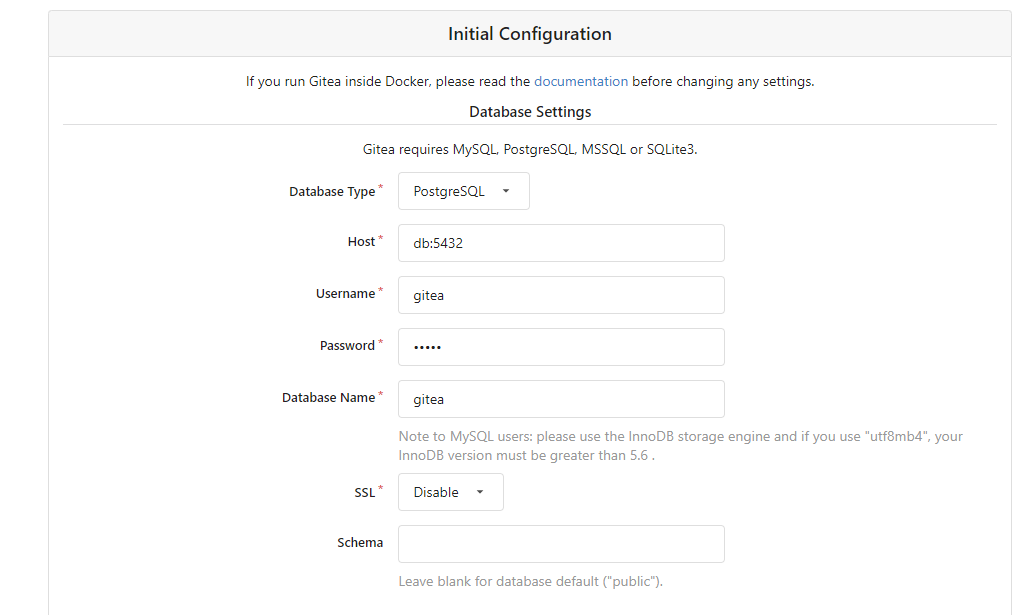
You now have a running gitea instance that can be accessed in your local network from your webbrowser from "http://ip-of-your_nas:3000". Navigate to Gitea in your browser and you will see an initial setup page.
Do not changed the prefilled options for the database. These are values that we have specified in the yaml file on step 5.
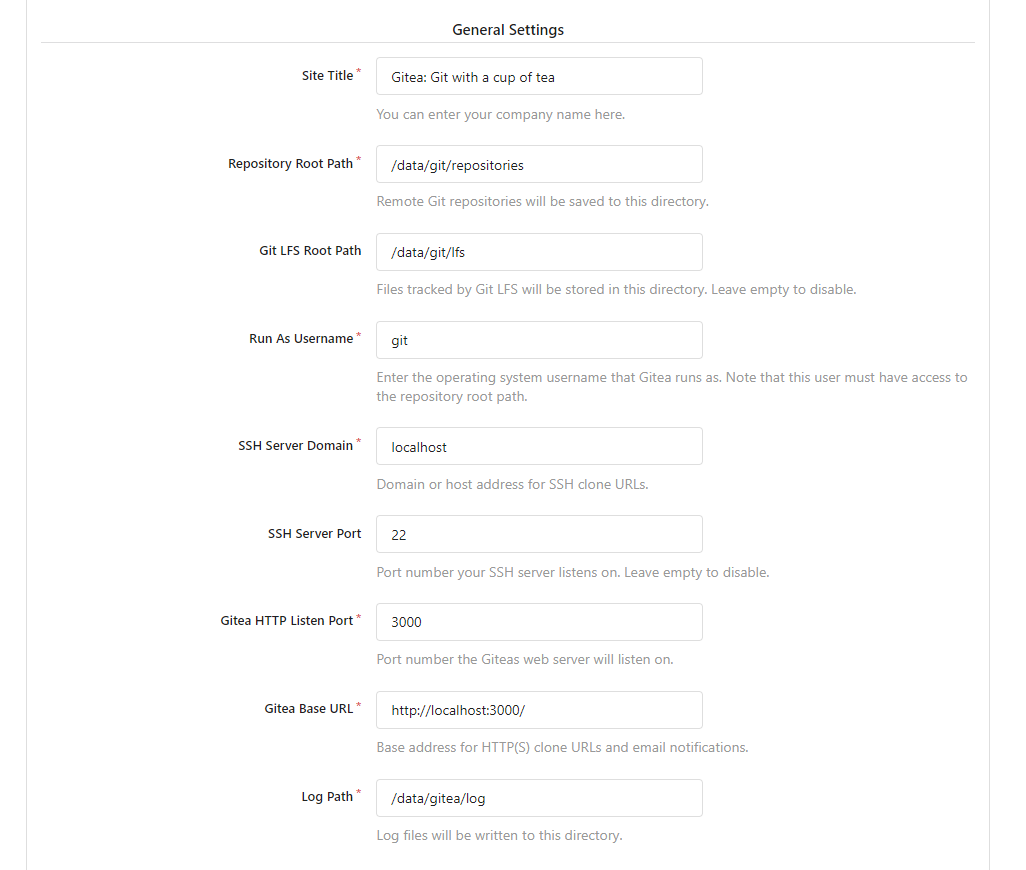
On the General Settings change the site title to your preferred title and the Gitea Base URL to "http://ip-of-your-nas:3000/"
You can disable "Federated Avatars" (this is only useful when the NAS has internet connection) and disable Self-Registration, if you want to be the only user that can add new users.
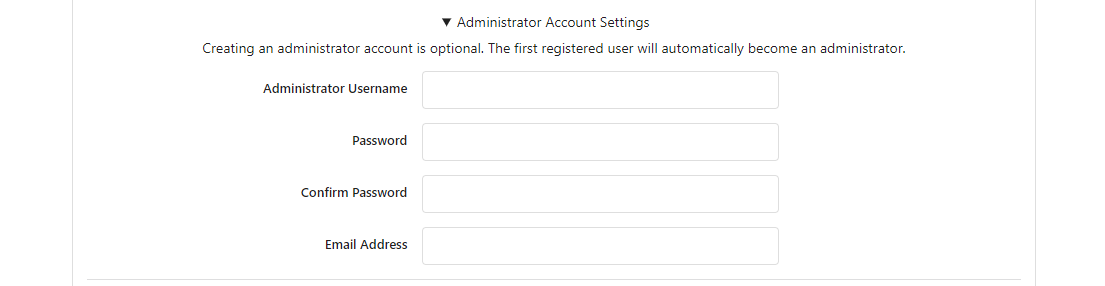
Open "Administrator Account Settings" and specify an admin account. Note that admin is reserved, but root is available. Finally, press the Install Gitea Button and wait until you are logged in.
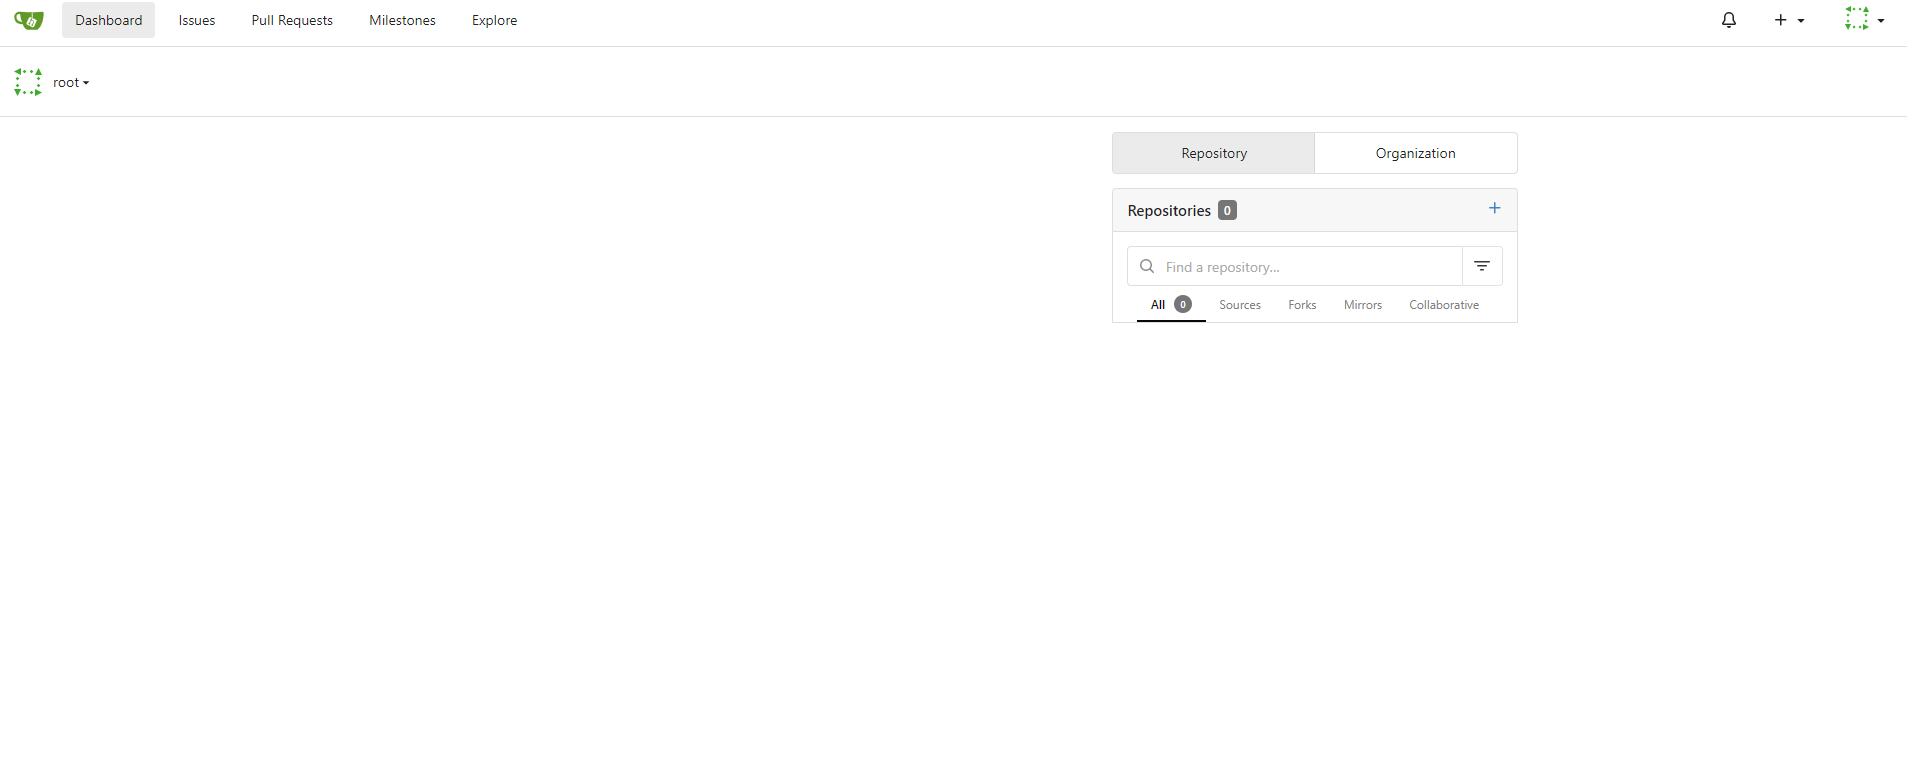
When you have arrived at this page, Gitea was installed successfully.
7. Create new user accounts
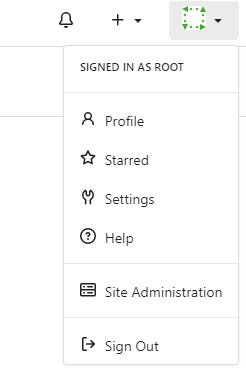
Press the button on the top right and go to "Site Administration"
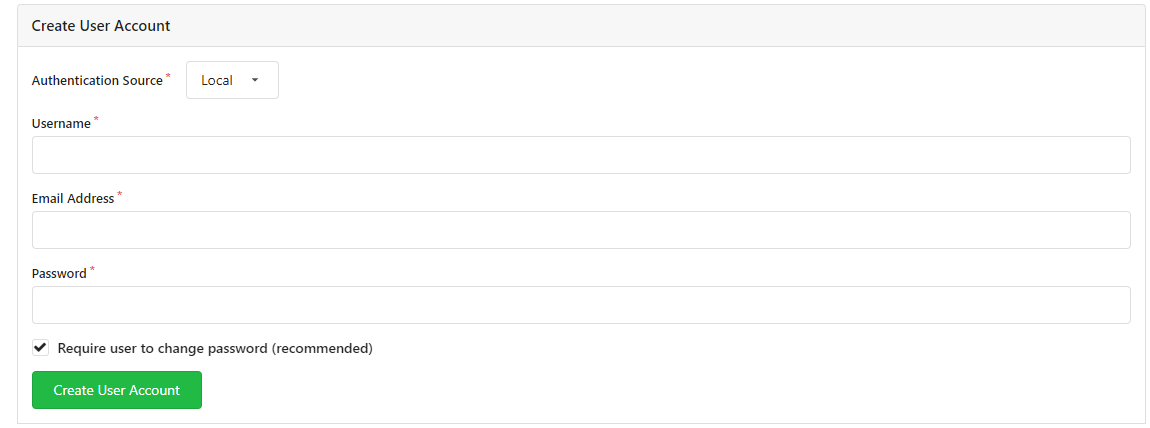
Navigate to the "User Accounts" tab. Press "Create User Account", provide input and press "Create User Account". Note that the new user has to login in the browser first to set a new user password. Otherwise pushing to a project is not possible for this user.
8. Create a Git repository
Press the "+" button on the top right and choose "New Repository"
Change the Repository settings
Choose a Repository Name
Change the Visibility by selecting "Make Repository Private" (if you do not change the visibility everyone that is in your network can see the project in the web browser, even without a user account).
Set a description and change the other options if you want to.
After you created the Repository you will see the overview of the project.
9. Join the Git Repository in Anchorpoint or any other Git-Client
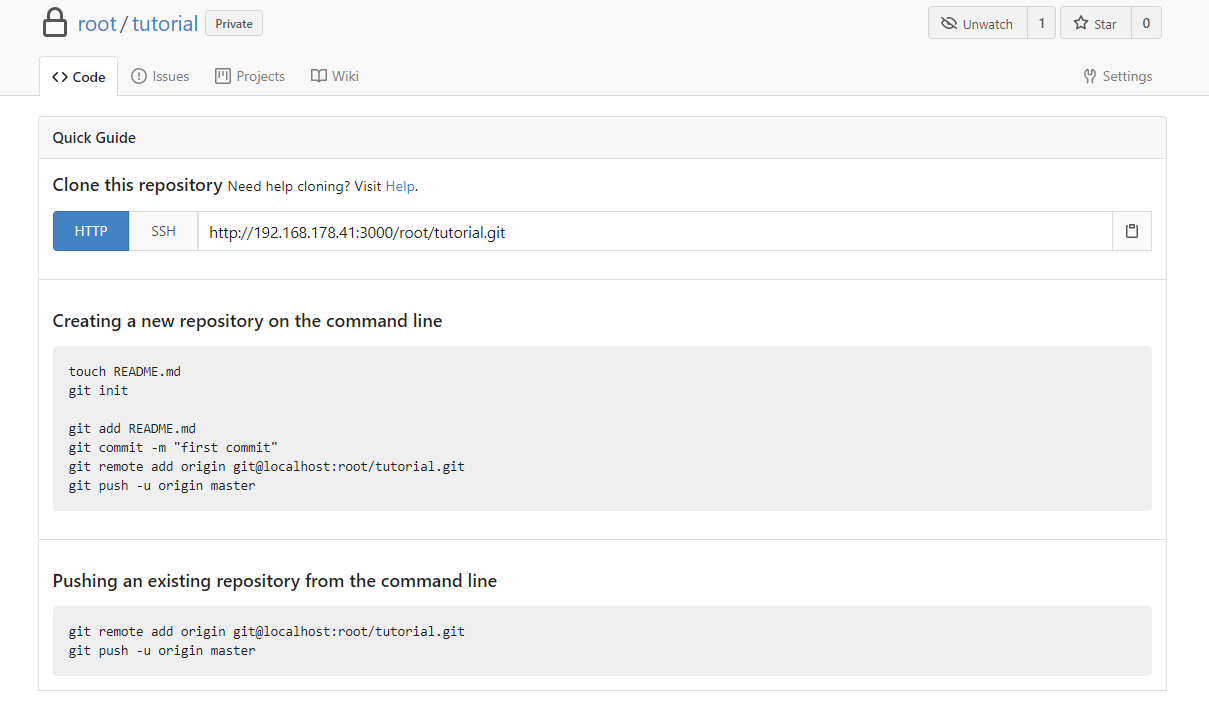
This video explains how to join a Git Repository in Anchorpoint. Copy the repository url from the website ("http://192.168.178.41:3000/root/tutorial.git" in the example) and use it in the "Join workspace Dialog" in Anchorpoint. Use your account credentials that we setup in Gitea early.
10. Add other users to a project
Go to project settings
Choose the Collaborators tab
search for the name of the user
press the add collaborator button
The result will look similar to this screen (note that the user needs Write permission to upload files from Anchorpoint or any other Git-Client)
How to update your Gitea server
In case you need to update to a newer version of Gitea. Just follow these steps below:
Backup your Gitea data and configuration first.
Open your deployment YAML file.
On line 9 (or wherever your image is defined), replace gitea/gitea:latest → gitea/gitea:1.24.6 (check Gitea GitHub releases for the latest version).
On your QNAP (or Docker host), stop the running Gitea container.
If needed, copy the YAML from the current install and update the image line.
Redeploy the container using the updated YAML.
Your Gitea instance will now run on the new version.