In this article, we'll explore how to effectively use Git version control with SolidWorks CAD by leveraging Git LFS (Large File Storage). We will also discuss the advantages and disadvantages of this approach and recommend useful tools.
George Neguceanu
15 Apr 2025
Updated on
09 Mar 2026
9
min read
Content
TL;DR
Version Control for CAD: Use Git and Anchorpoint as a lightweight, flexible alternative to SolidWorks PDM for smaller teams.
Git LFS Integration: Automatically handle large SolidWorks binary files (.sldprt, .sldasm) without complex manual configuration.
No More Conflicts: Use Anchorpoint’s instant file locking, capable of locking 1,000 files in under a second to prevent team members from overwriting each other's work.
Visual Workflow: Browse CAD files with custom thumbnails and treat every "Git commit" like a simple "checkpoint" for your project.
No Lock-in: Your production data stays in your own repository on platforms like GitHub or Azure DevOps.
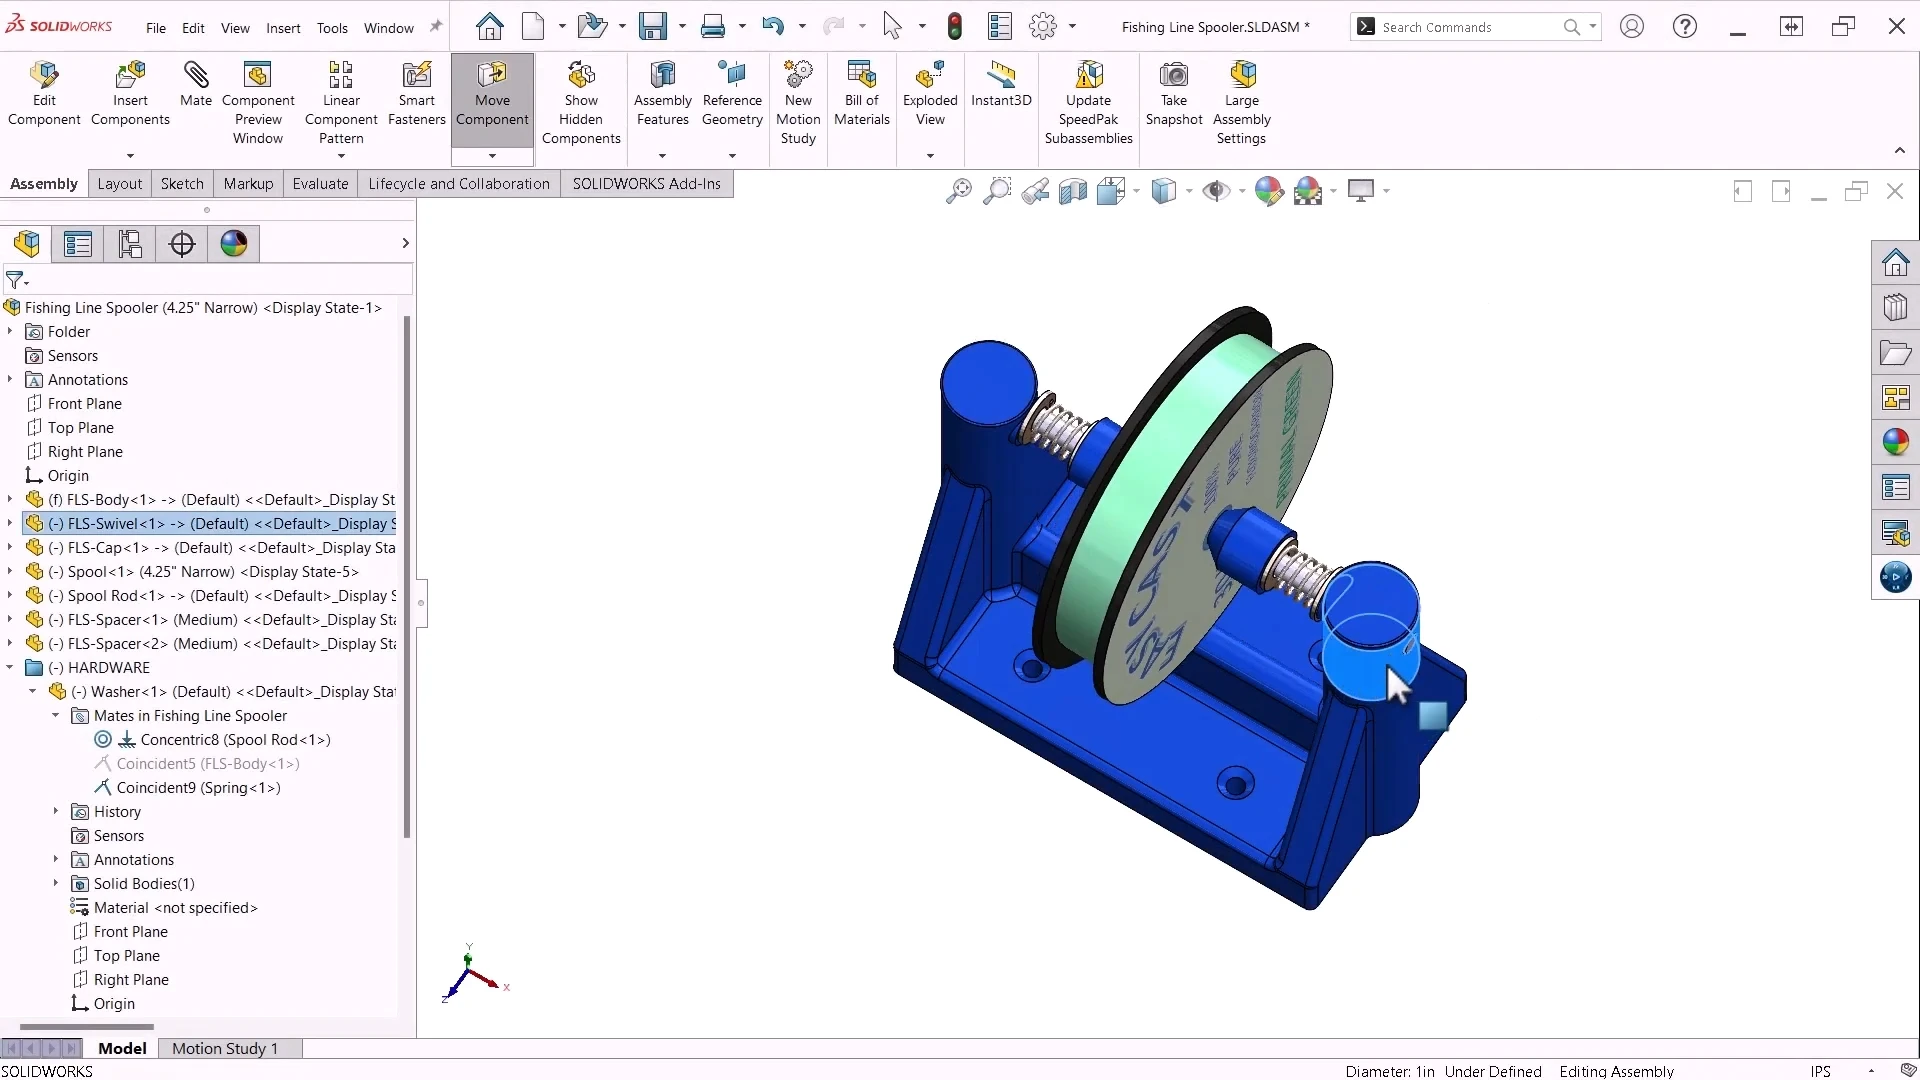
SolidWorks is a widely used 3D CAD software, popular in both educational and professional environments. With a robust design, simulation, and technical documentation capabilities, it is an ideal tool for a wide range of engineering and product development tasks. While platforms like Unreal Engine and Blender are sometimes used for design purposes, many professionals prefer purpose-built tools like SolidWorks for their specialized capabilities.
A design project in SolidWorks 3D CAD, Source:https://www.youtube.com/watch?v=E7Il-wmr01c
Understanding Version Control
Version control, also known as source control, is the practice of tracking and managing changes to files, most commonly source code. These systems enable developers and teams to collaborate more effectively by maintaining a history of changes and supporting parallel development efforts.
Sync solutions such as Dropbox or Google Drive are not ideal for version control because they lack file locking, a history view of the change list, and the ability to easily revert to a clearly defined state, features that are highly needed in CAD environments.
What is Git?
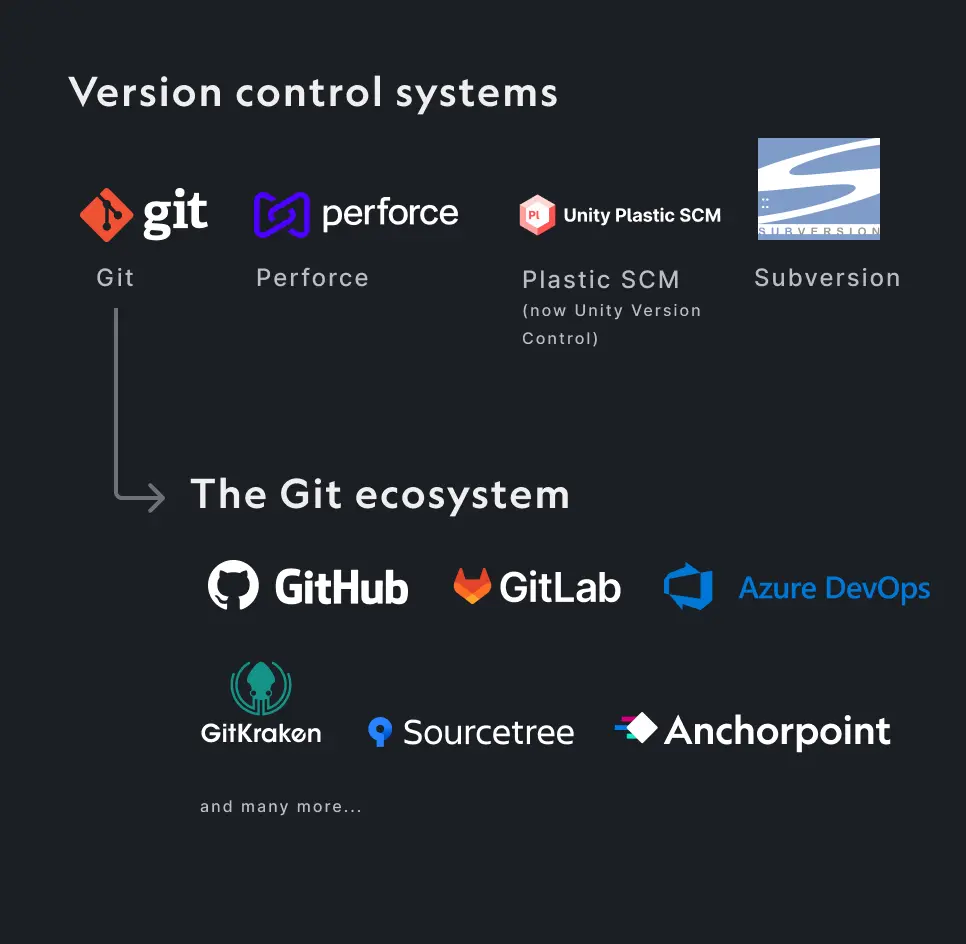
Git is a widely used version control system, similar to tools like Perforce, SVN, or Unity Version Control. Its open source nature and robust ecosystem, including platforms like GitHub, GitLab, and Azure DevOps, as well as desktop clients like SourceTree, Fork, and GitHub Desktop, make it a popular choice for many development teams. For engineers, Git can also improve workflow through distributed collaboration, allowing team members to work independently and merge changes later.
The Git ecosystem landscape in 2026
Git vs SolidWorks PDM
The choice between a SolidWorks with Git workflow and SolidWorks PDM depends on your project scope. While PDM is a robust enterprise solution, a SolidWorks Git setup with Anchorpoint offers a more affordable and flexible version control solution for smaller, agile teams. By using GitHub or similar Git compatible platforms as your central server, you benefit from a massive ecosystem while Anchorpoint provides the artist-friendly interface needed for CAD binary files.
Git
Git originally struggled with binary file management and file locking, both of which are important for CAD workflows. However, recent improvements, especially with Git LFS and Git clients like Anchorpoint, have made Git a viable solution.
✔ Distributed workflow: Supports distributed collaboration, allowing team members to work independently and merge changes later.
✔ Cost effective: Free and open source, making it accessible to individuals and small teams.
✔ Large ecosystem: Access to a wide variety of hosting clouds and Git clients, but also visualization tools like KeyShot or Blender to export your CAD data for visualization and presentation, which can be linked to the same version.
✖ Client dependency: Requires tools like Anchorpoint for simplified access to Git LFS and file locking, otherwise setup can be complex.
✖ No native merge for binary files: Git cannot merge binary CAD files, which can limit collaborative editing. At the same time, neither PDM, but with native file locking, conflicts can be prevented.
Anchorpoint's custom thumbnail feature allows you to replace the thumbnail even for source Solidworks files like .sldprt if Anchorpoint can't generate one, eliminating the need to add additional images for previews unless additional view angles are needed. See instructions at the end of the article.
SolidWorks PDM
SolidWorks PDM is a proprietary system designed specifically for CAD data management that integrates seamlessly into the SolidWorks environment.
✔ Native integration: Deep integration with SolidWorks supports features such as file locking, versioning, and structured data management.
✔ Metadata handling: Manages critical metadata, such as part numbers and bills of materials, essential for engineering documentation.
✖ Higher costs: Licensing and setup can be expensive, especially for smaller teams or individual users.
✖ Complex configuration: Requires specialized setup and training, which may not be ideal for casual users.
The choice between Git and SolidWorks PDM depends on your project scope, team size, and budget. Git offers flexibility and affordability for smaller teams, while SolidWorks PDM offers a robust, enterprise-level solution with deeper integration for larger organizations. If you're interested in trying Git with SolidWorks, read on to learn how to set up your project with Anchorpoint and Azure DevOps.
Git for 3D projects
Collaborate with your team on SolidWorks projects using familiar toolsets.
To use Solidworks 3D CAD with Git, we need two things:
1) A cloud provider such as GitHub or Azure DevOps
While GitHub is the most popular Git provider since it offers a Free and Pro plan, it has a file limit of 2GB (Free), while the Team plan allows files up to 4GB and the Enterprise plan up to 5GB. GitHub Git LFS offers users 10 GB of free storage and bandwidth. Any additional usage is charged at $0.07 per GB for storage and $0.0875 per GB for outbound data transfer.
A better alternative for large binary files is Azure DevOps which provides a more flexible LFS storage option at no extra cost. You can also set up your own Git server for complete control over your files.
2) A desktop application such as Anchorpoint, GitHub Desktop or Sourcetree
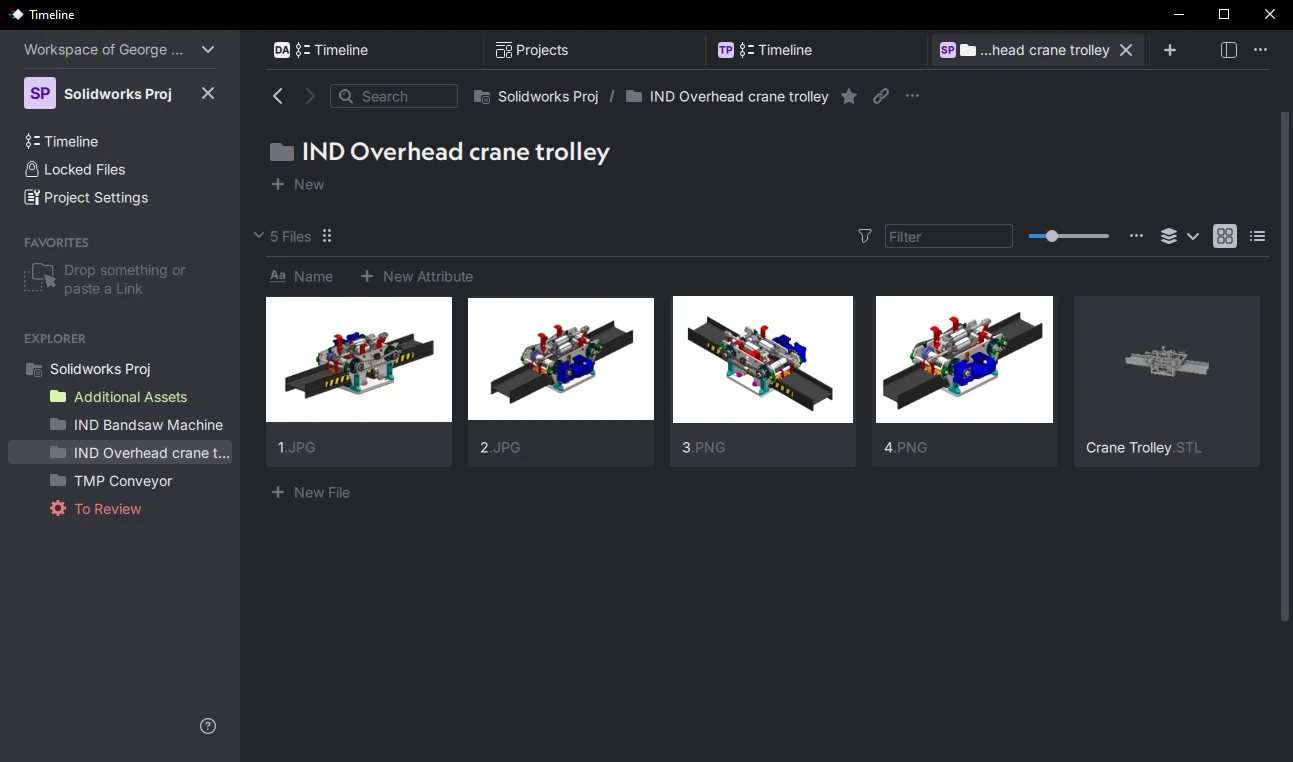
A SolidWorks 3D Cad project in Anchorpoint
In this tutorial we will use Anchorpoint because it is ideal for artists and engineers, and has all the configuration for 3D creation suites like Blender / CAD projects ready to go, and it can also generate thumbnails of the models based on the last camera position save you made, and even with texture if saved on the material preview page.
How to use Solidworks 3D CAD with Git, Anchorpoint and Azure DevOps
Getting Started with Azure DevOps and Anchorpoint Integration
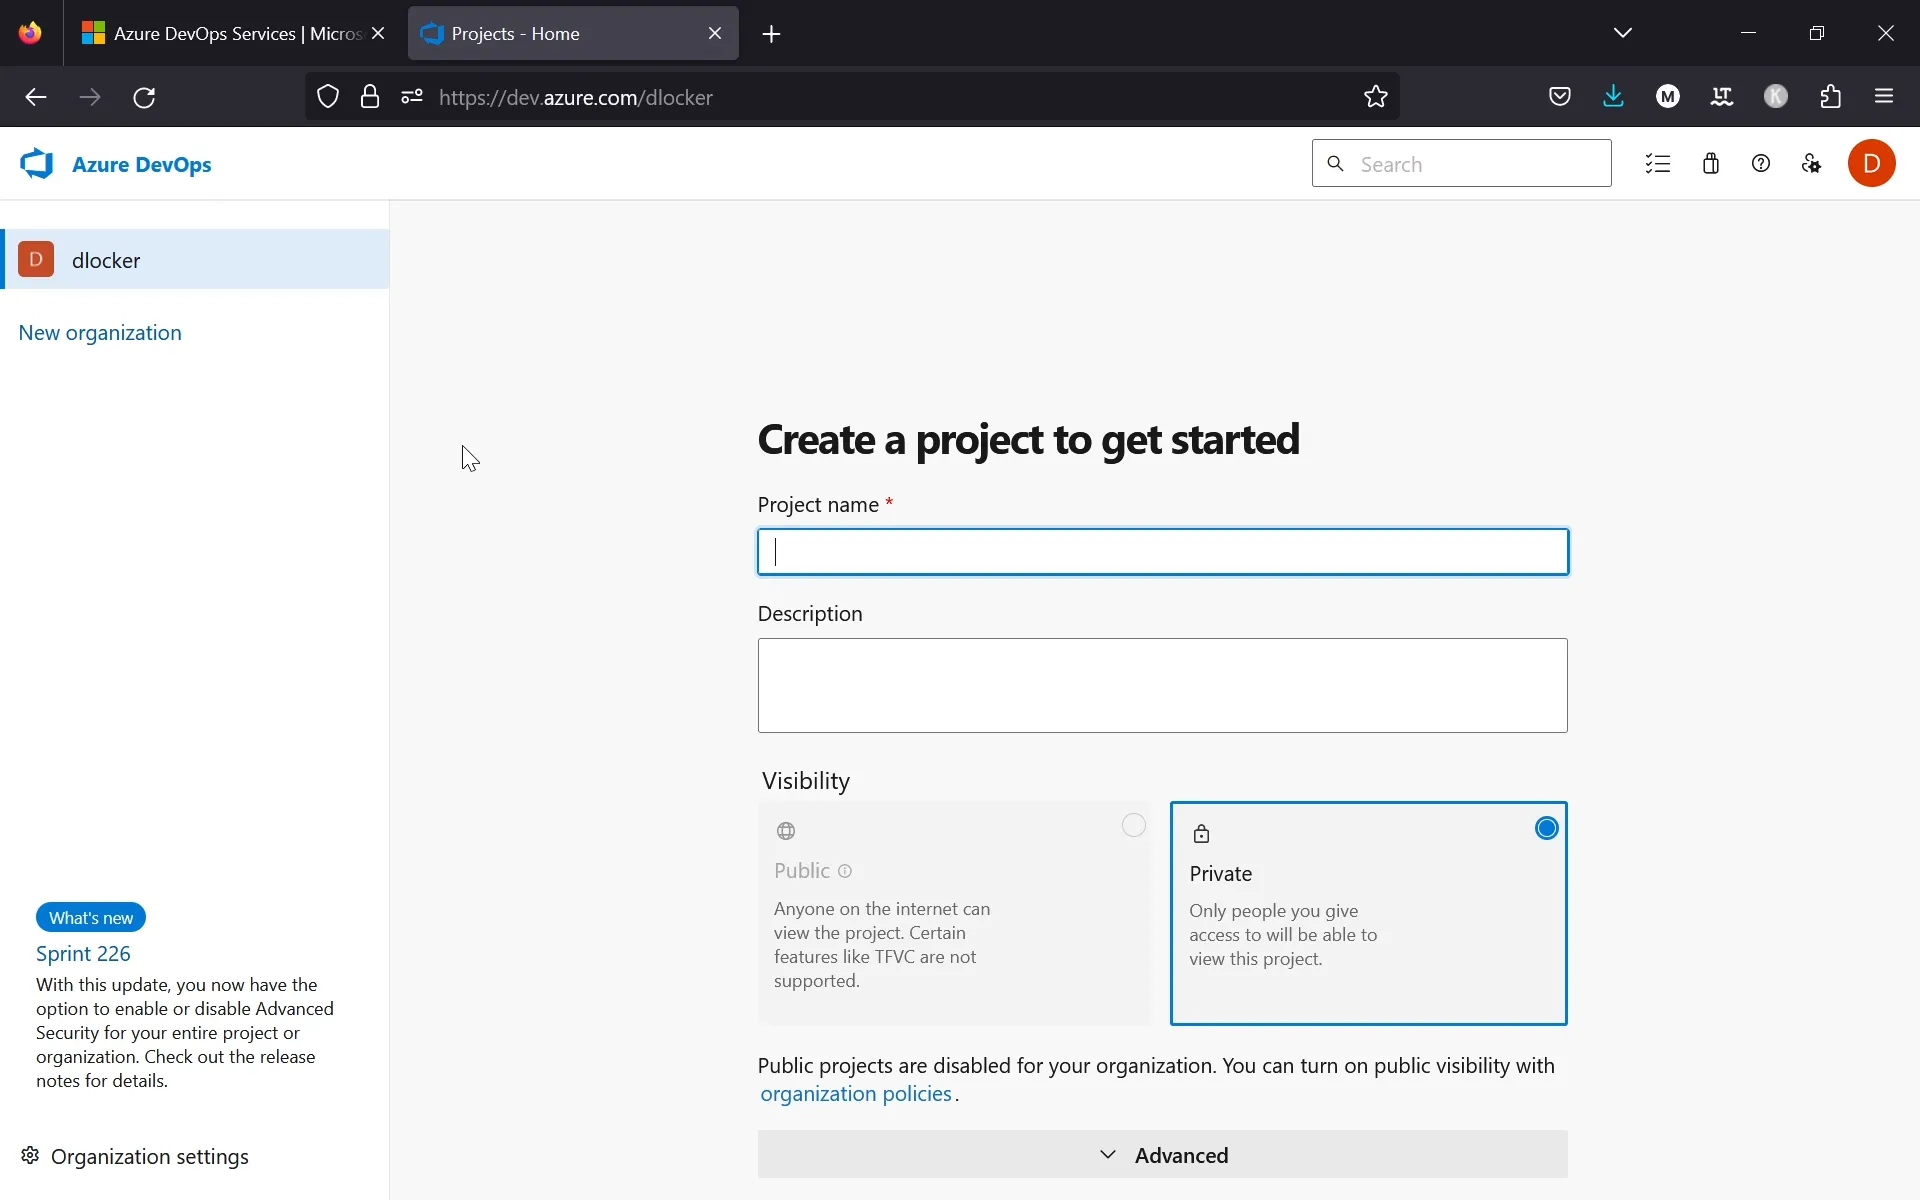
Begin by registering an account at dev.azure.com. Once your account is set up, you can proceed to create a new project within Azure DevOps. While the initial setup might feel a bit cumbersome, it's a one-time process, where future projects will be much quicker to configure.
Go to dev.azure.com and click on "Start free"
Create an account.
Once you've reached this point, you are nearly done setting up DevOps
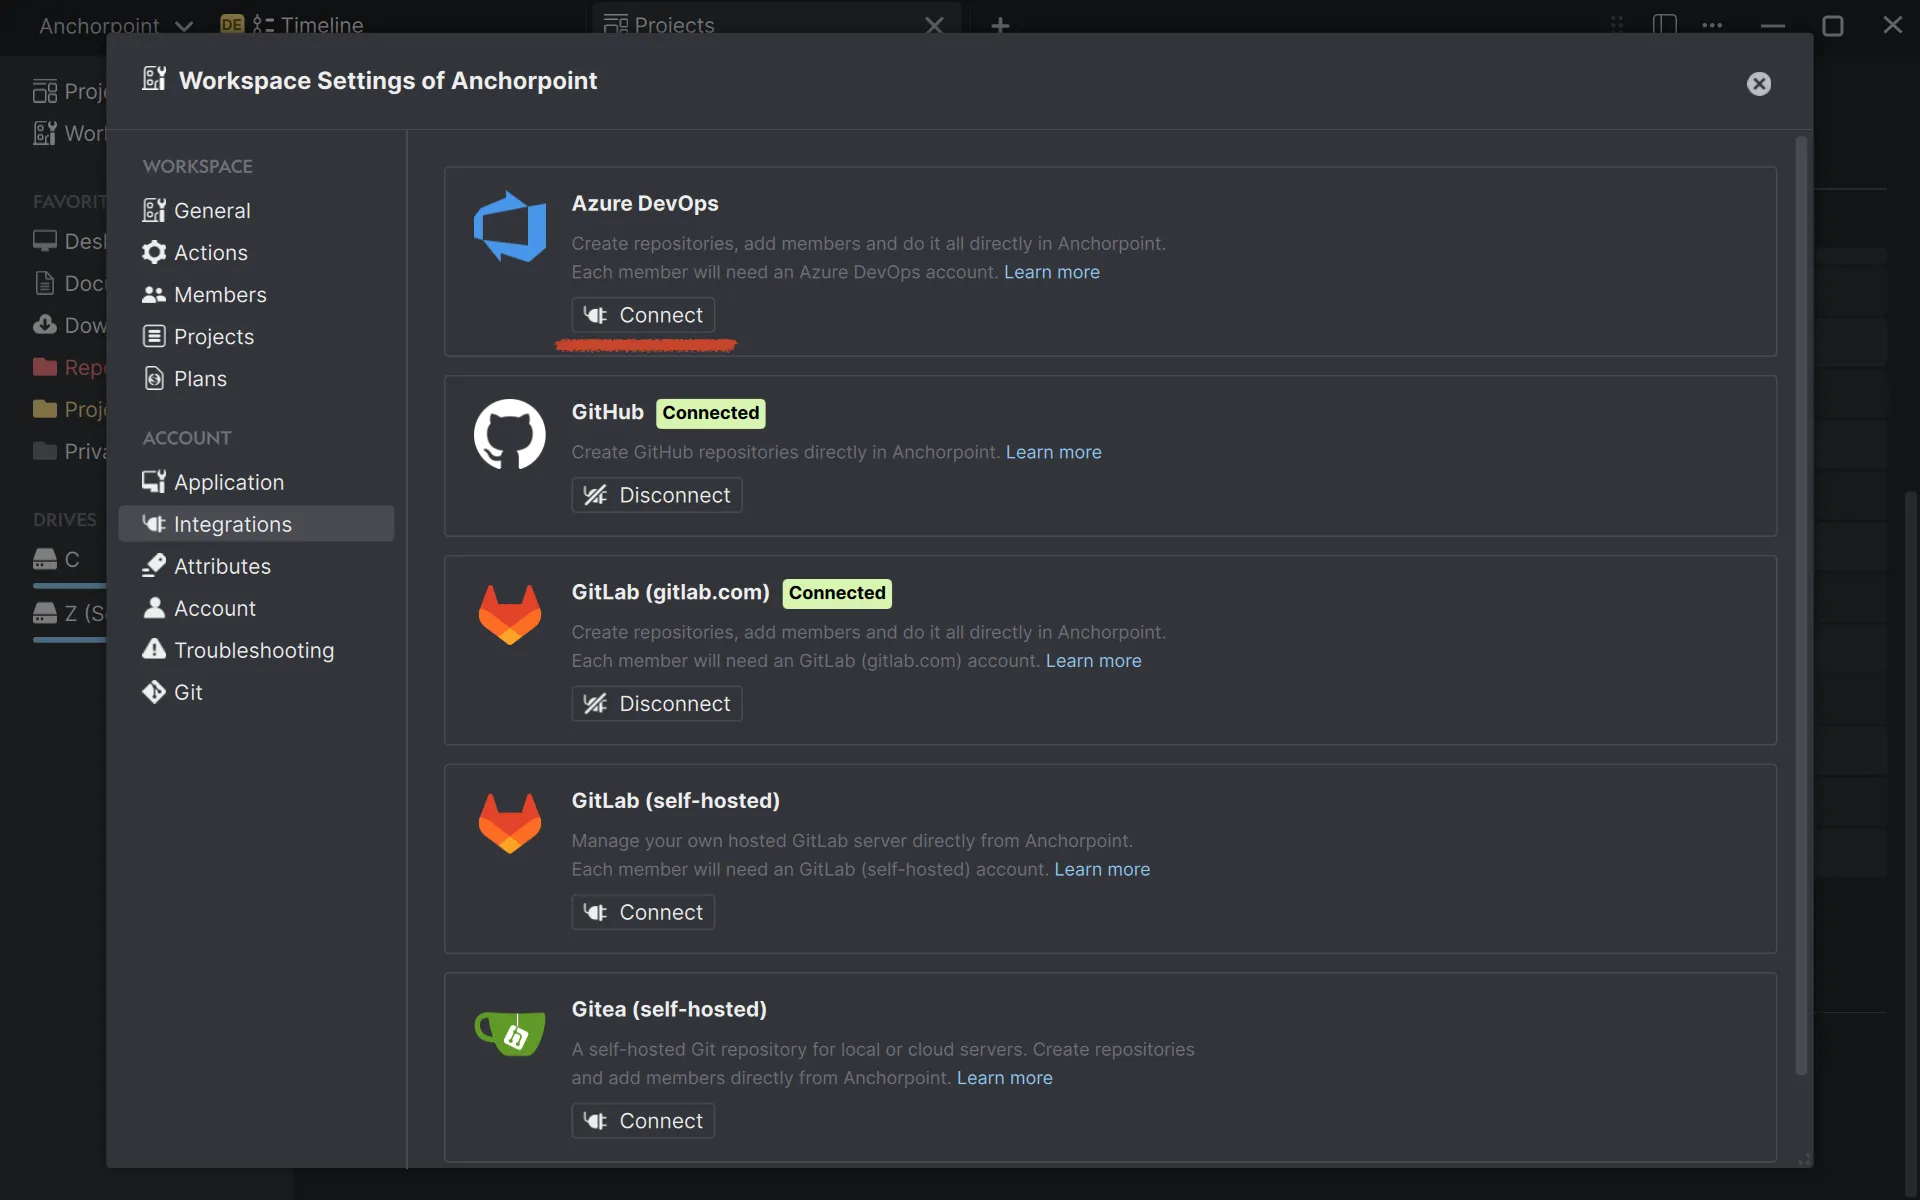
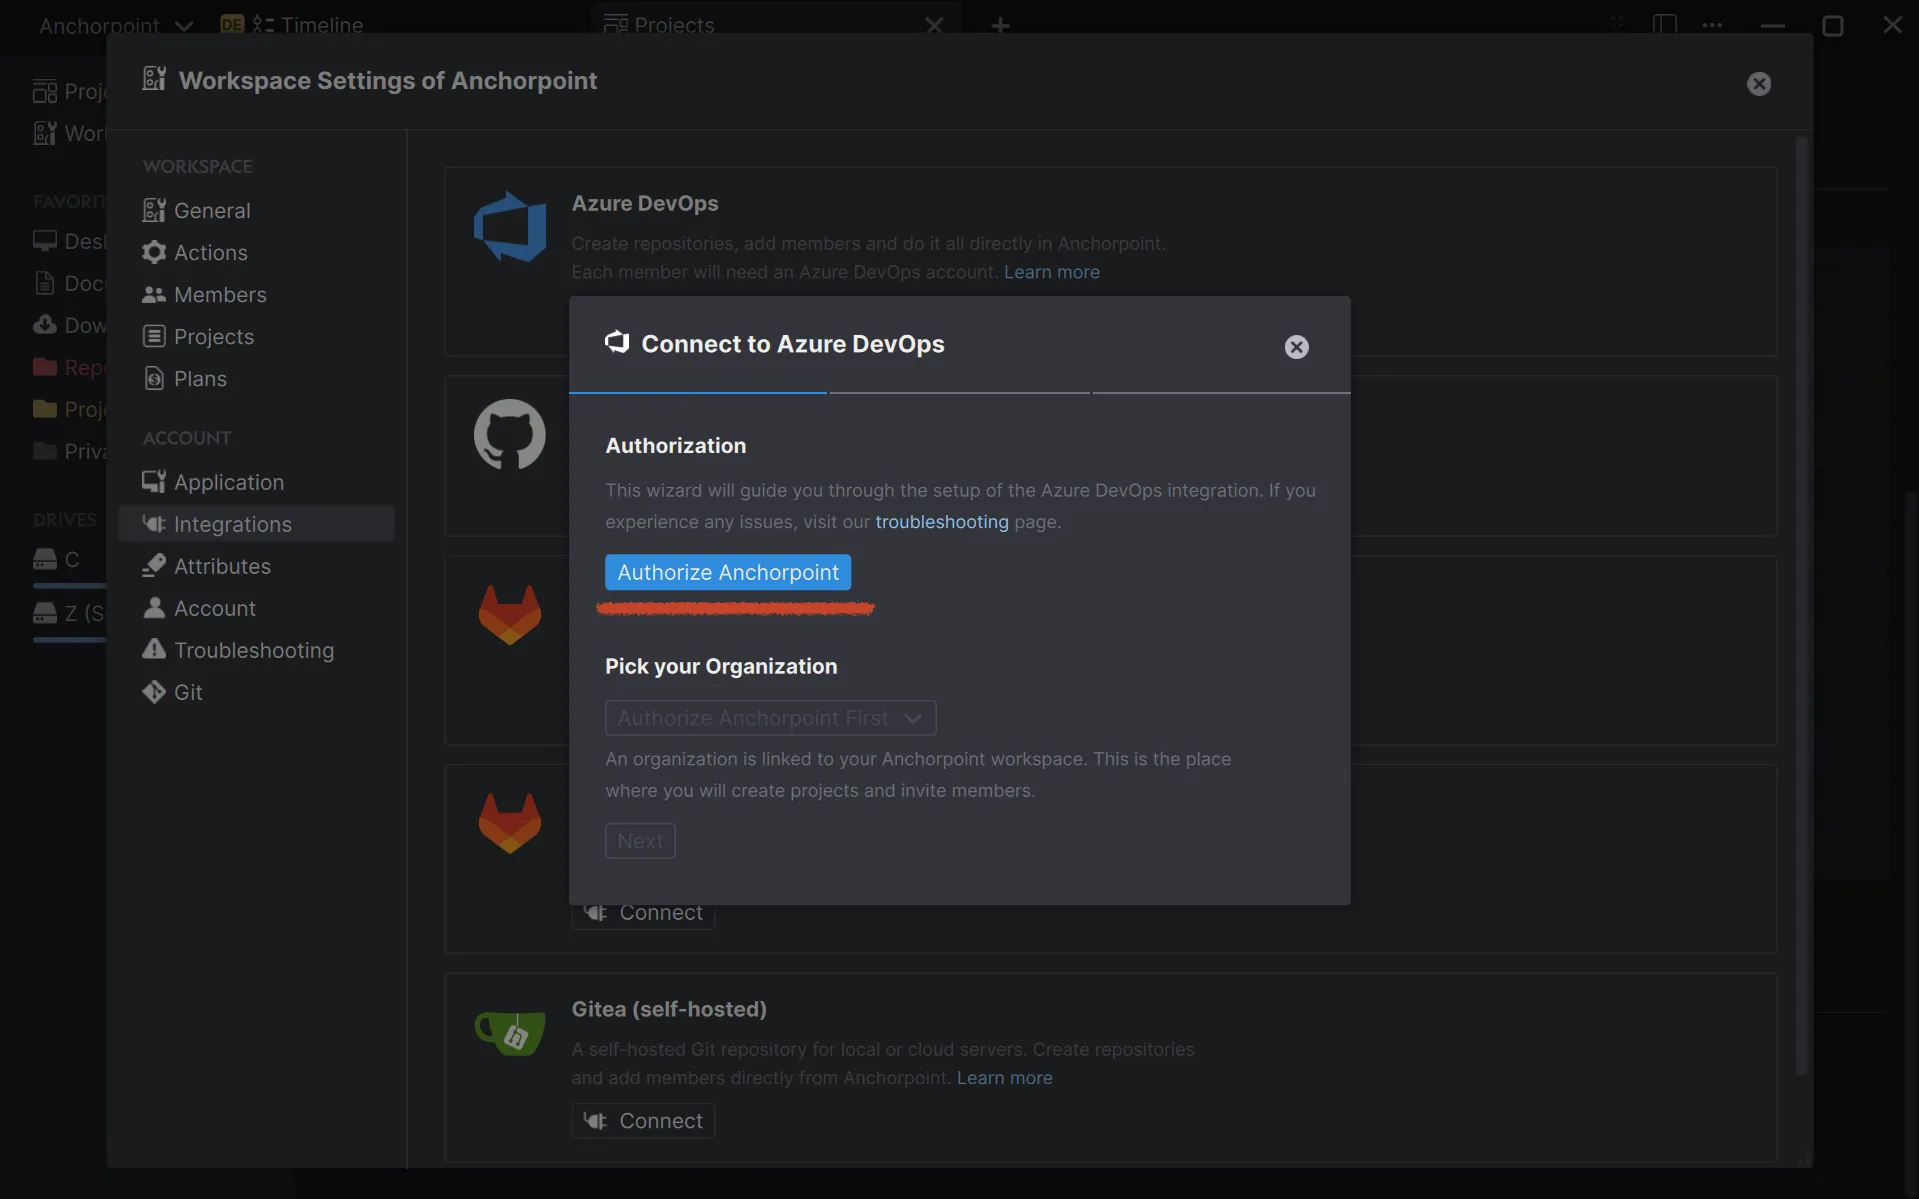
Connecting Azure DevOps to Anchorpoint
To link Azure DevOps with Anchorpoint, follow the setup instructions outlined below. If you plan to work offline, you can opt for the Shared Folder method when initiating a new project.
Connect Azure DevOps to Anchorpoint
Click on "Connect"
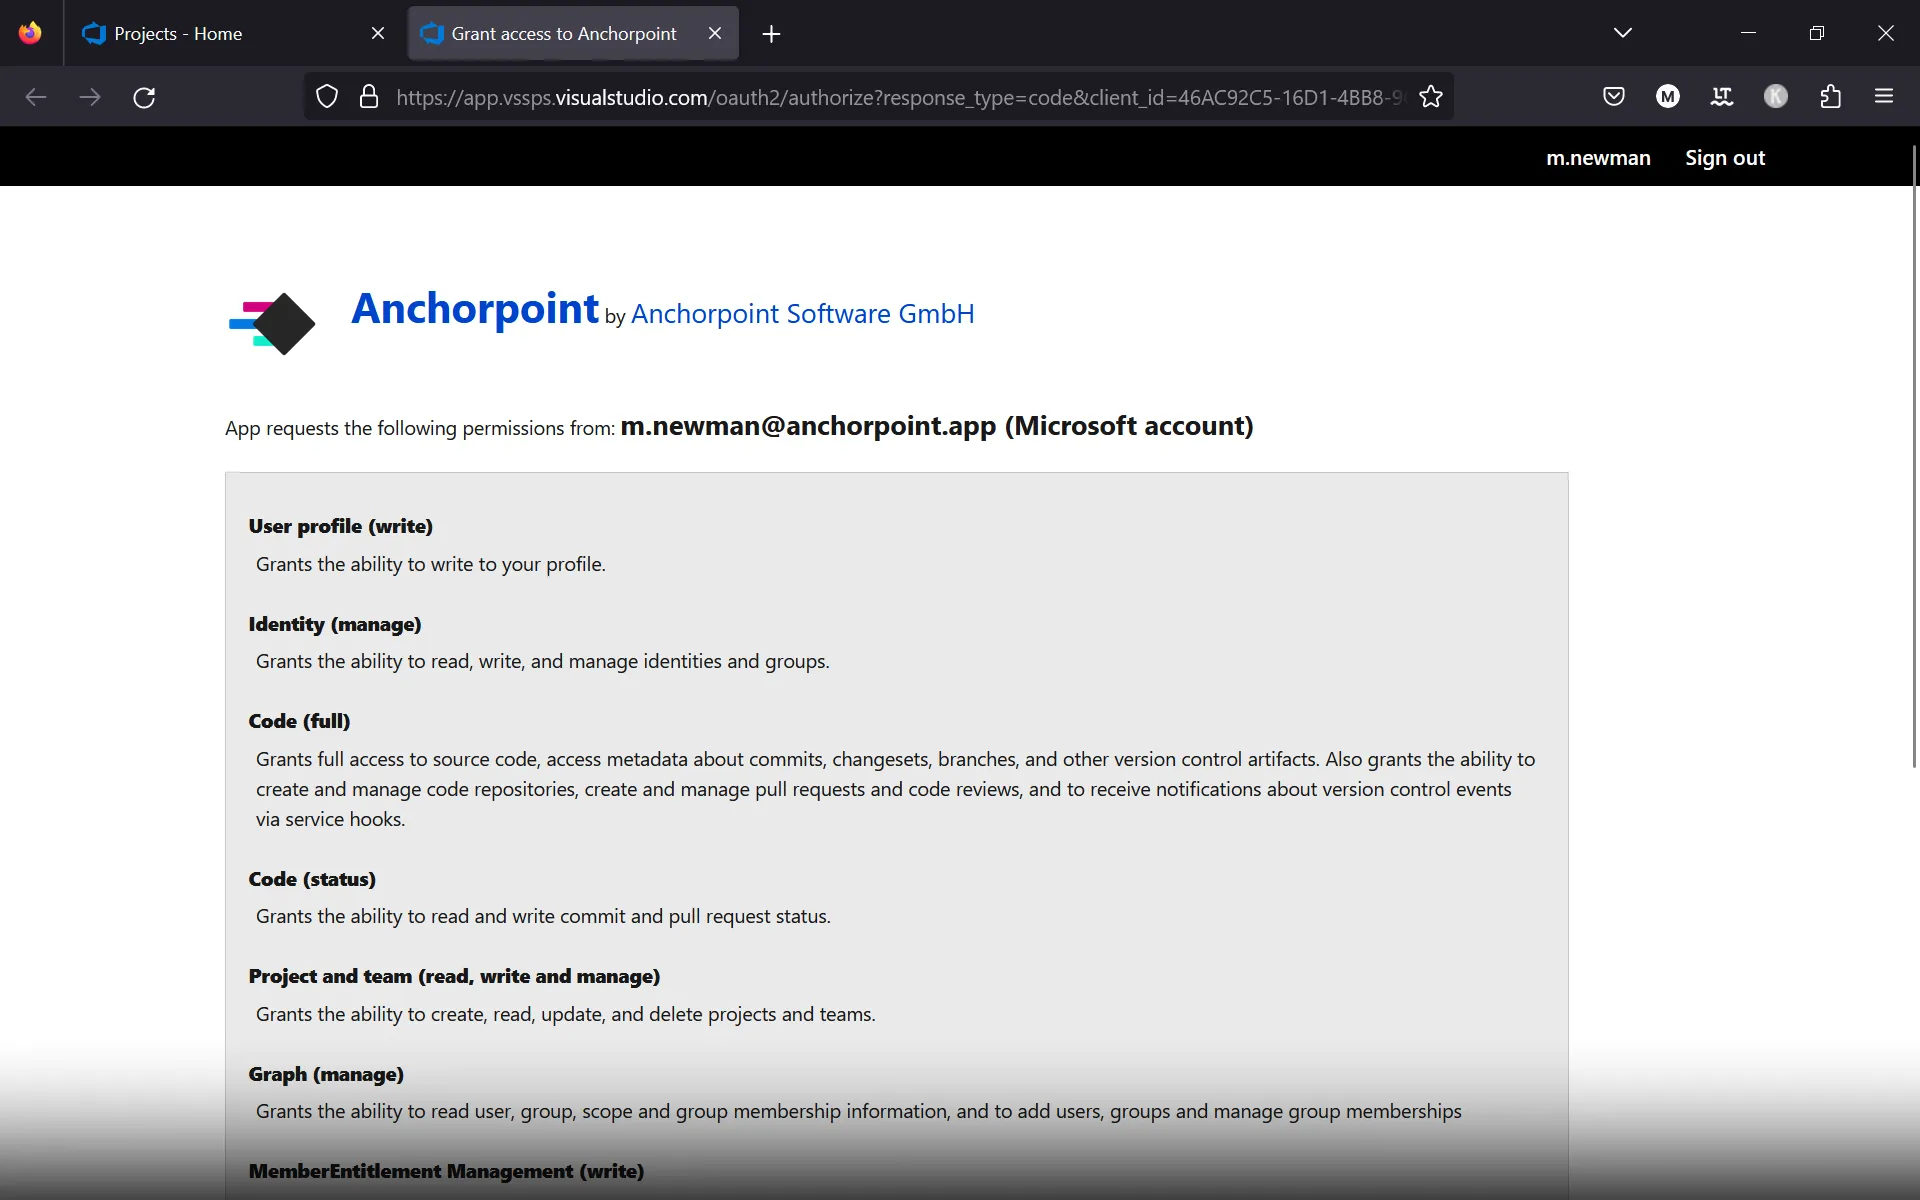
Click on "Authorize Anchorpoint"
A consent screen will appear, accept it
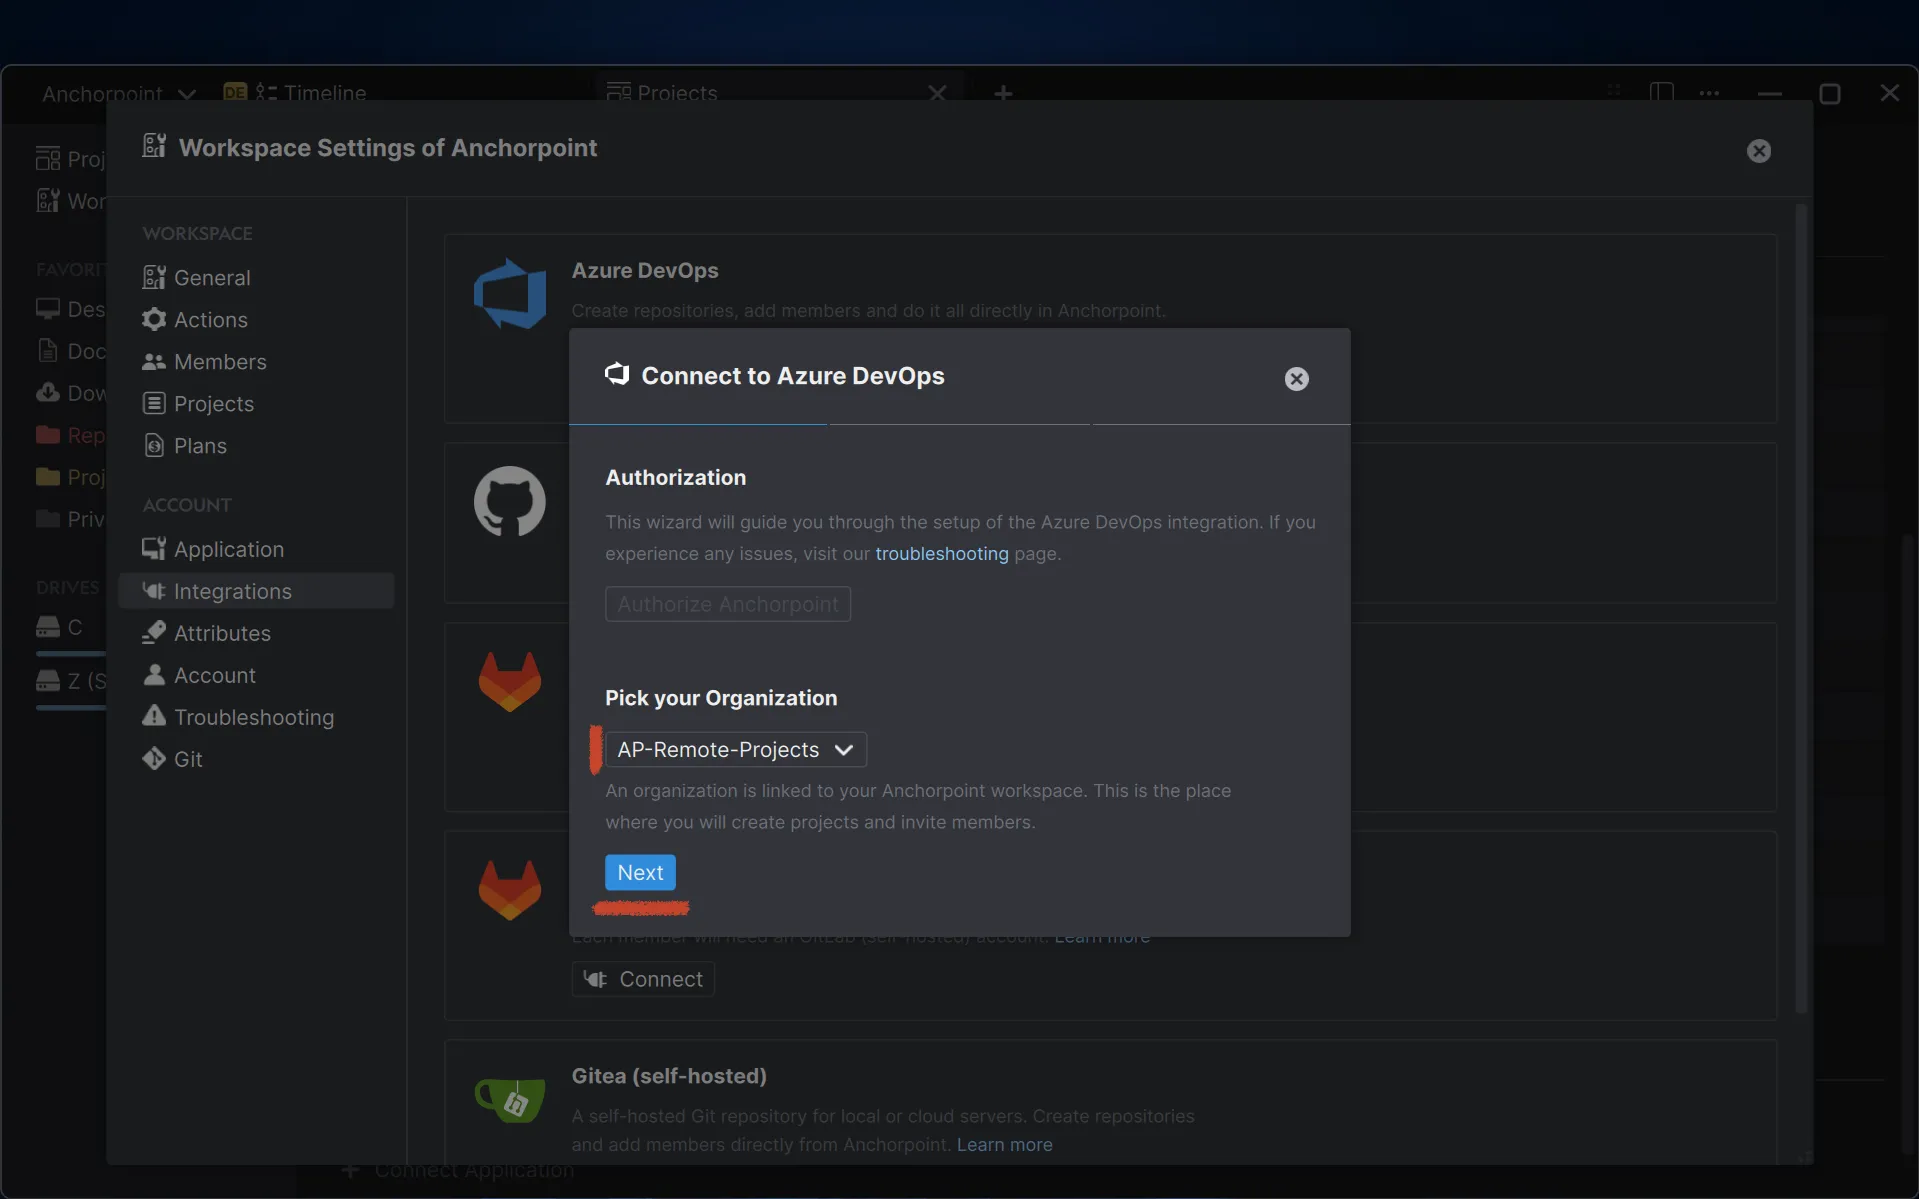
Select your organization where Anchorpoint will create repositories, then click "Next"
Follow the on-screen instructions. You'll need to enable "Third-party application access via OAuth" on Azure DevOps, then create a test repository.
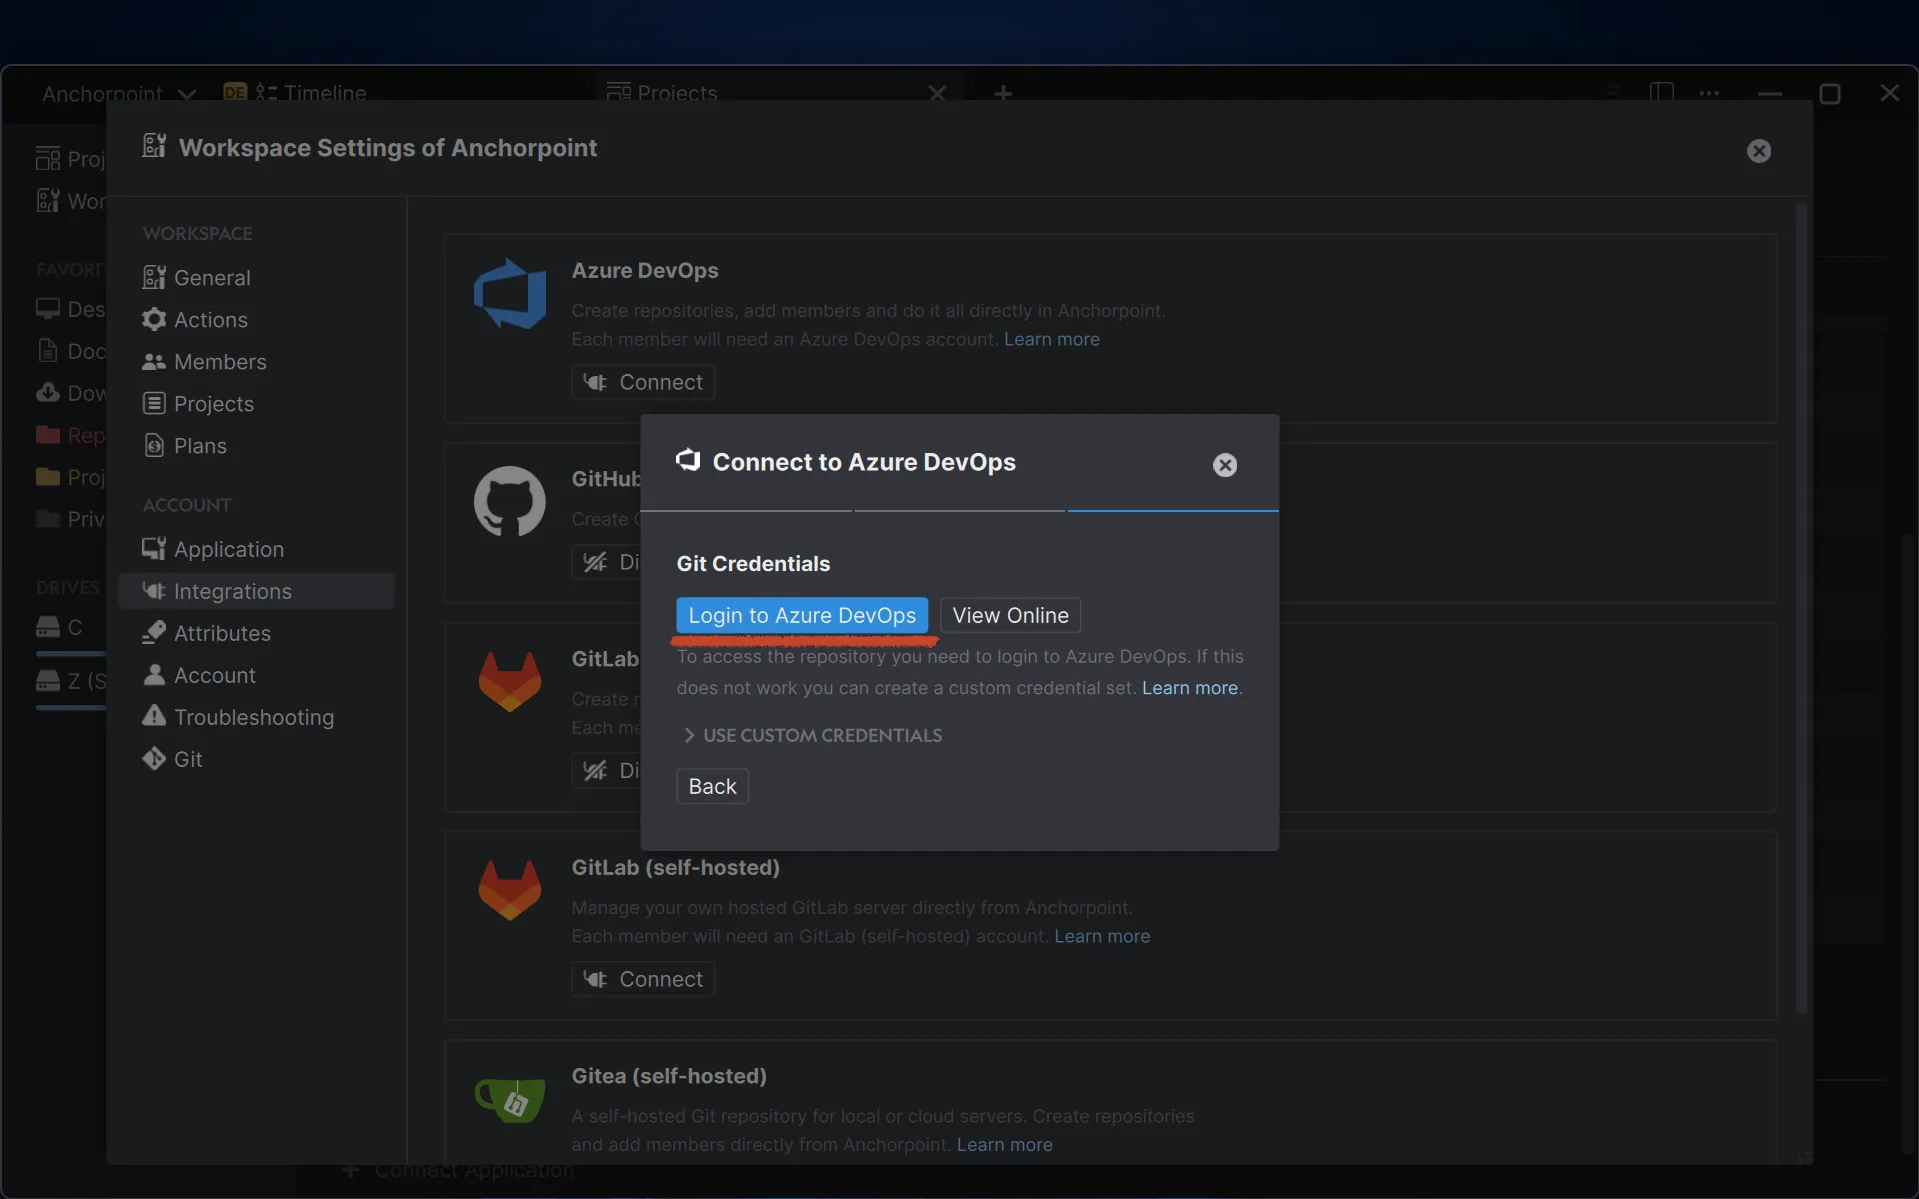
Set up your Git credentials by clicking "Login to Azure DevOps". A new window will open, where you can sign in to your account.
Troubleshooting Setup Issues
During the Azure DevOps setup, you might face some common issues like login difficulties. These can usually be resolved by selecting the Use custom credentials option and following the provided steps.
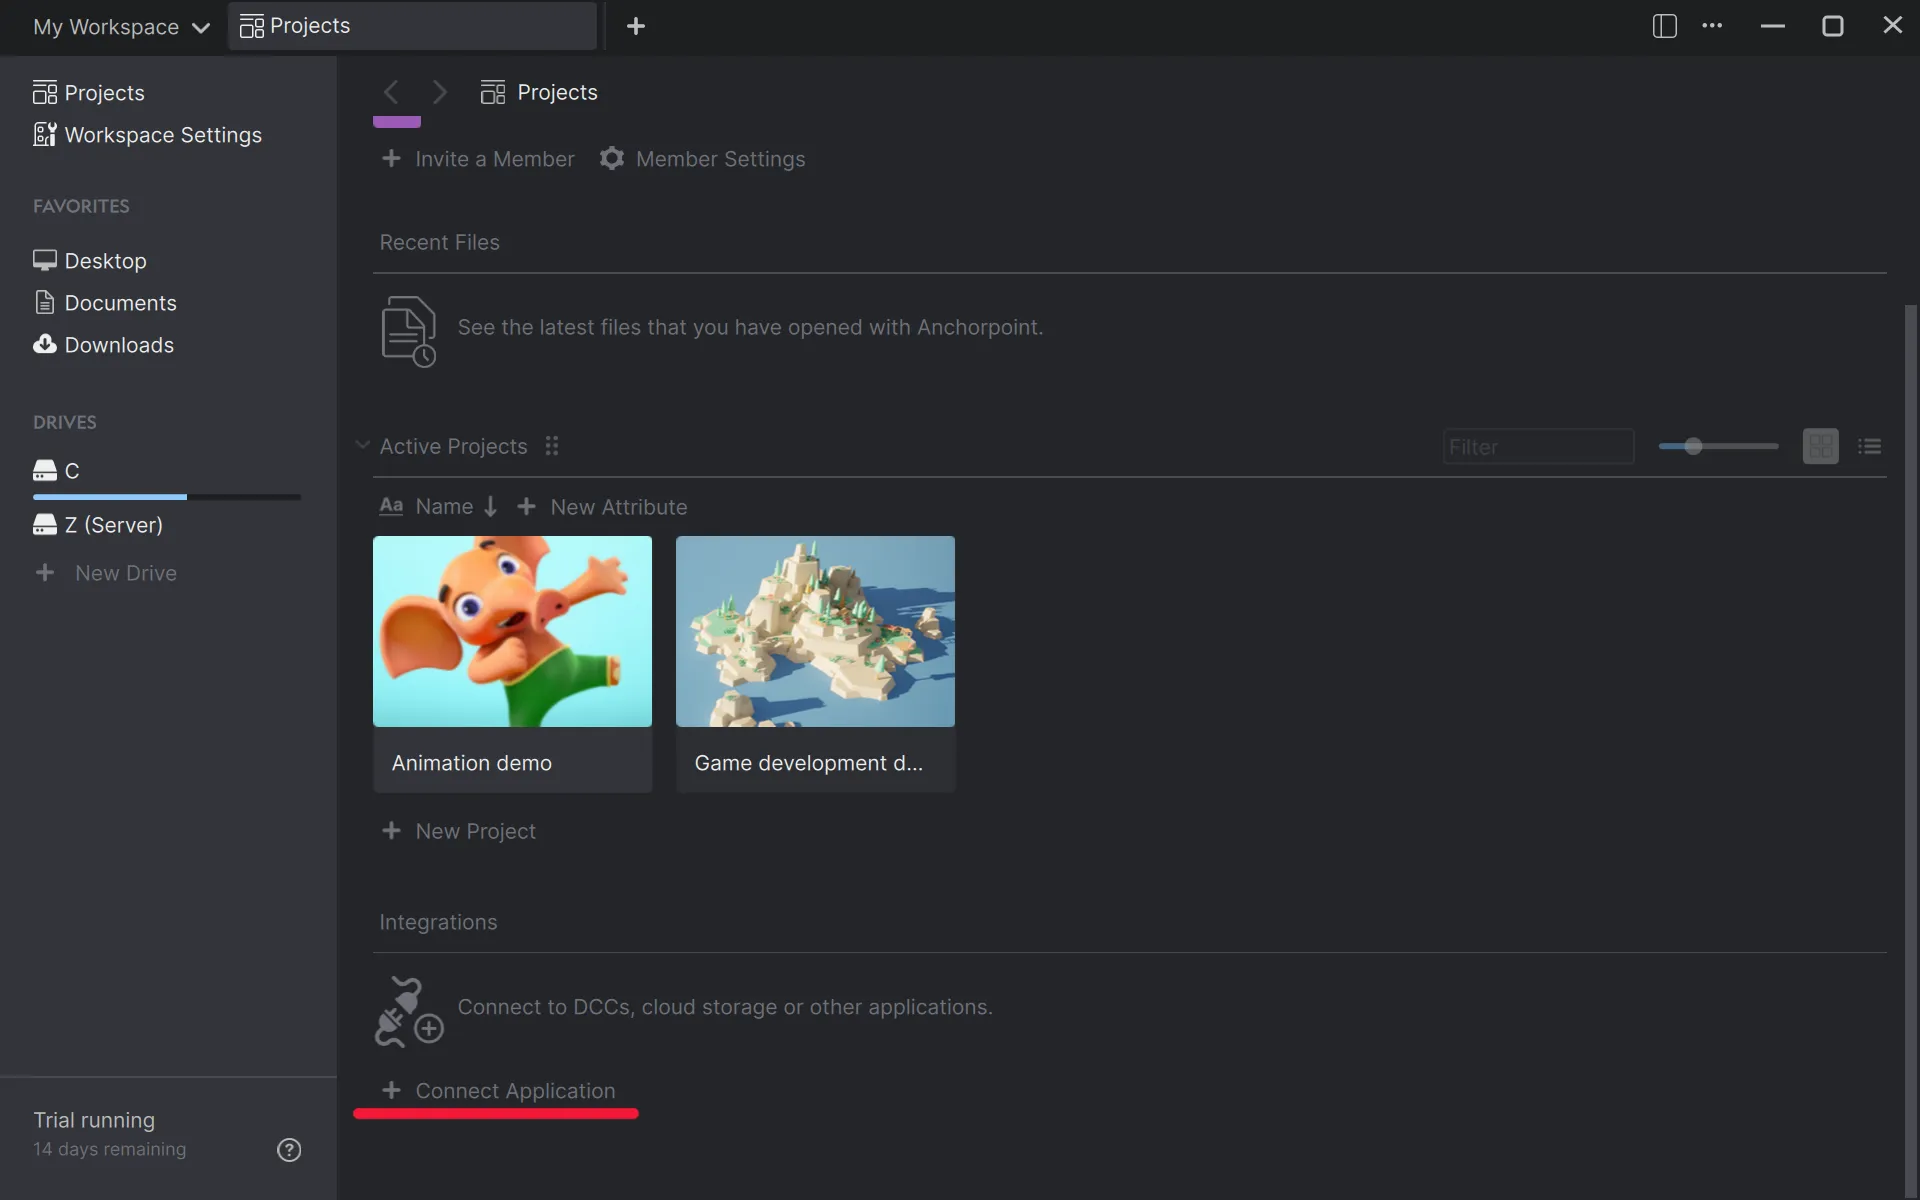
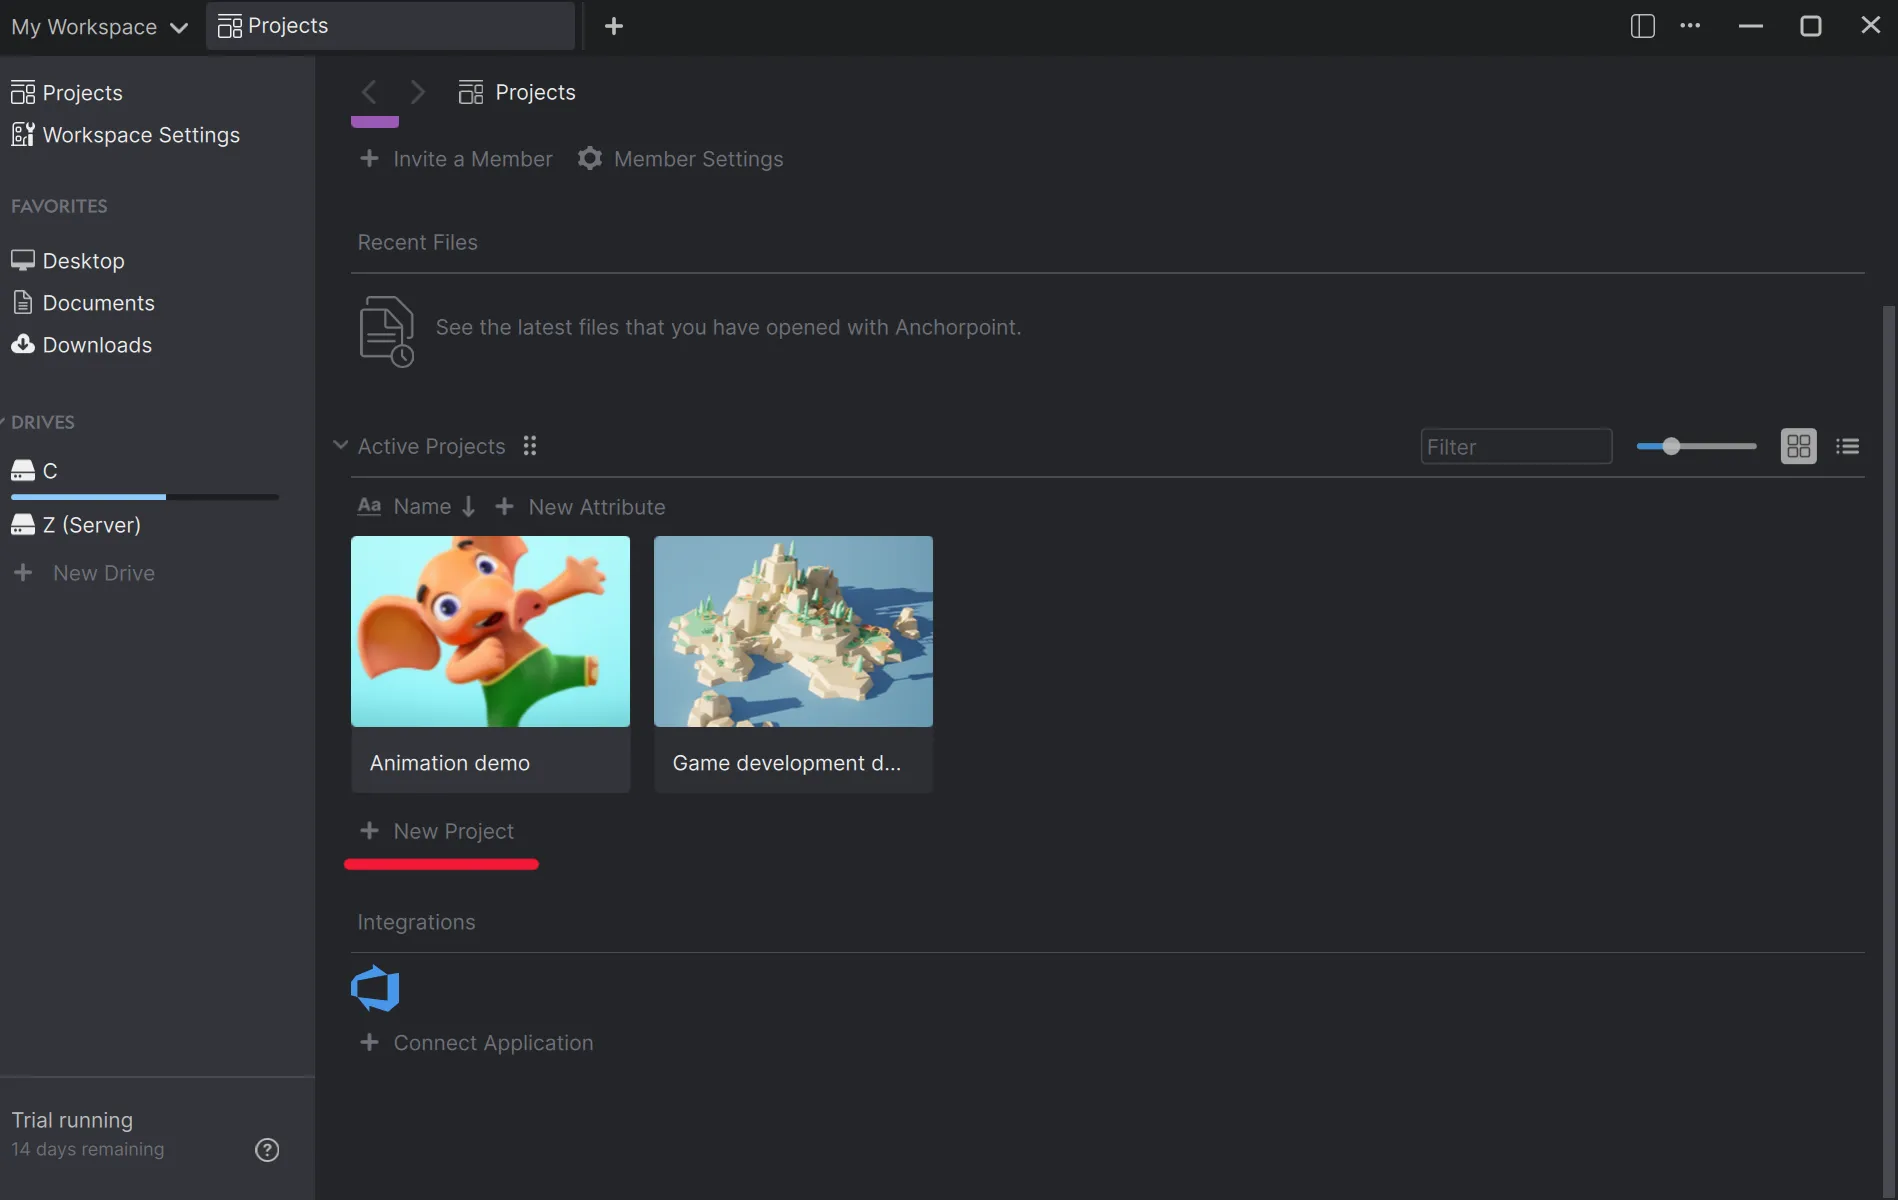
Creating a Project in Anchorpoint
Open Anchorpoint and create a new project. Choose the local project folder on your hard drive. Once set up, Anchorpoint will automatically begin syncing with Azure DevOps.
Click the "New Project" button
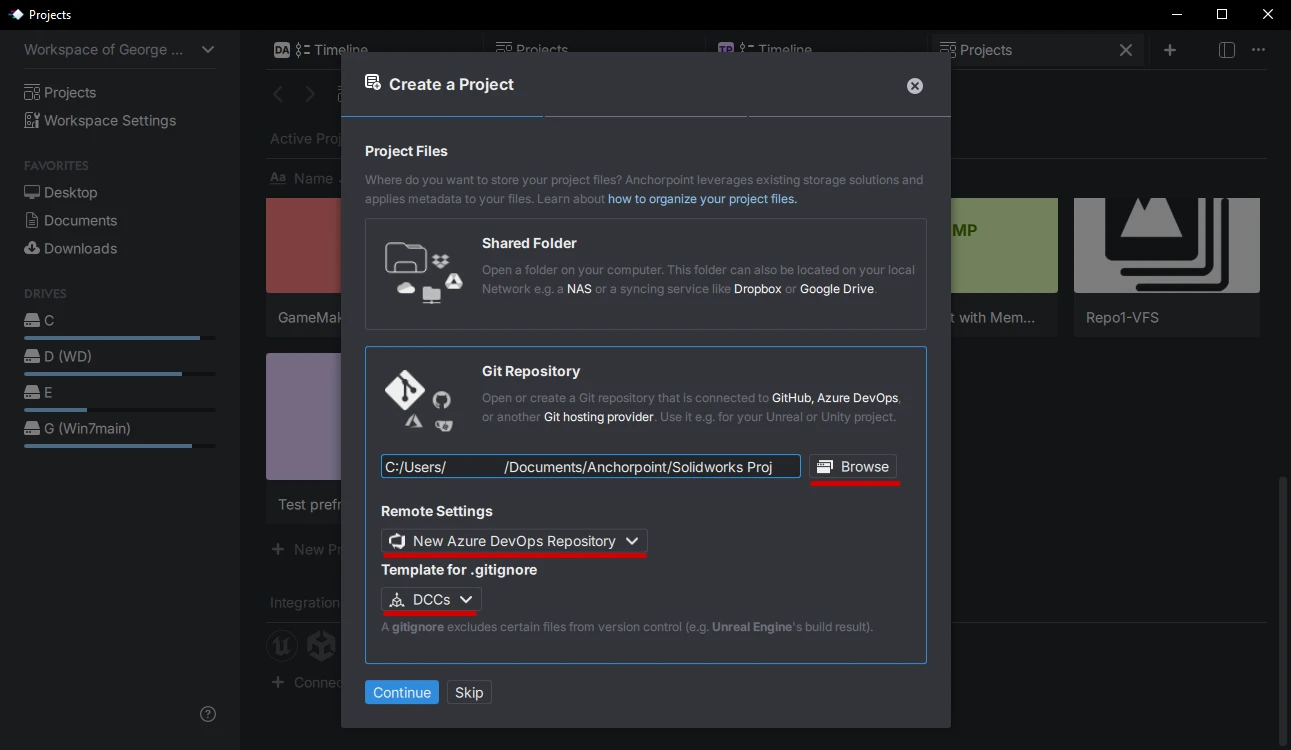
Navigate to the folder containing your CAD project files, ensuring the ".gitignore template" and "Remote Settings" are configured properly. Then, click "Continue".
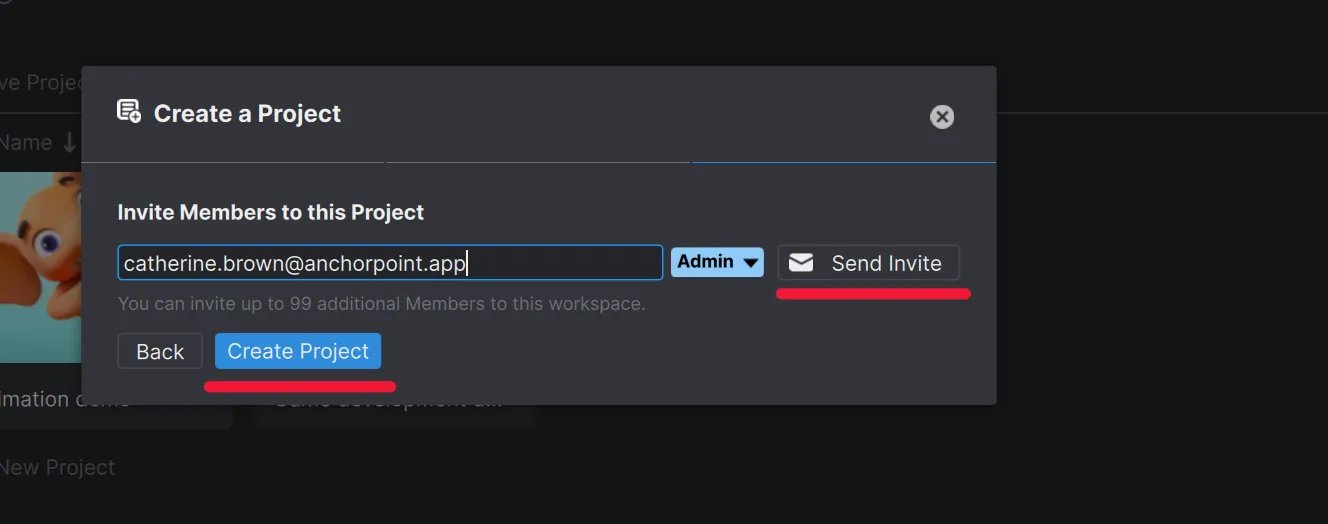
Lastly, invite team members you want to collaborate with, or leave it blank if you're working solo. Each member must have an Azure DevOps account.
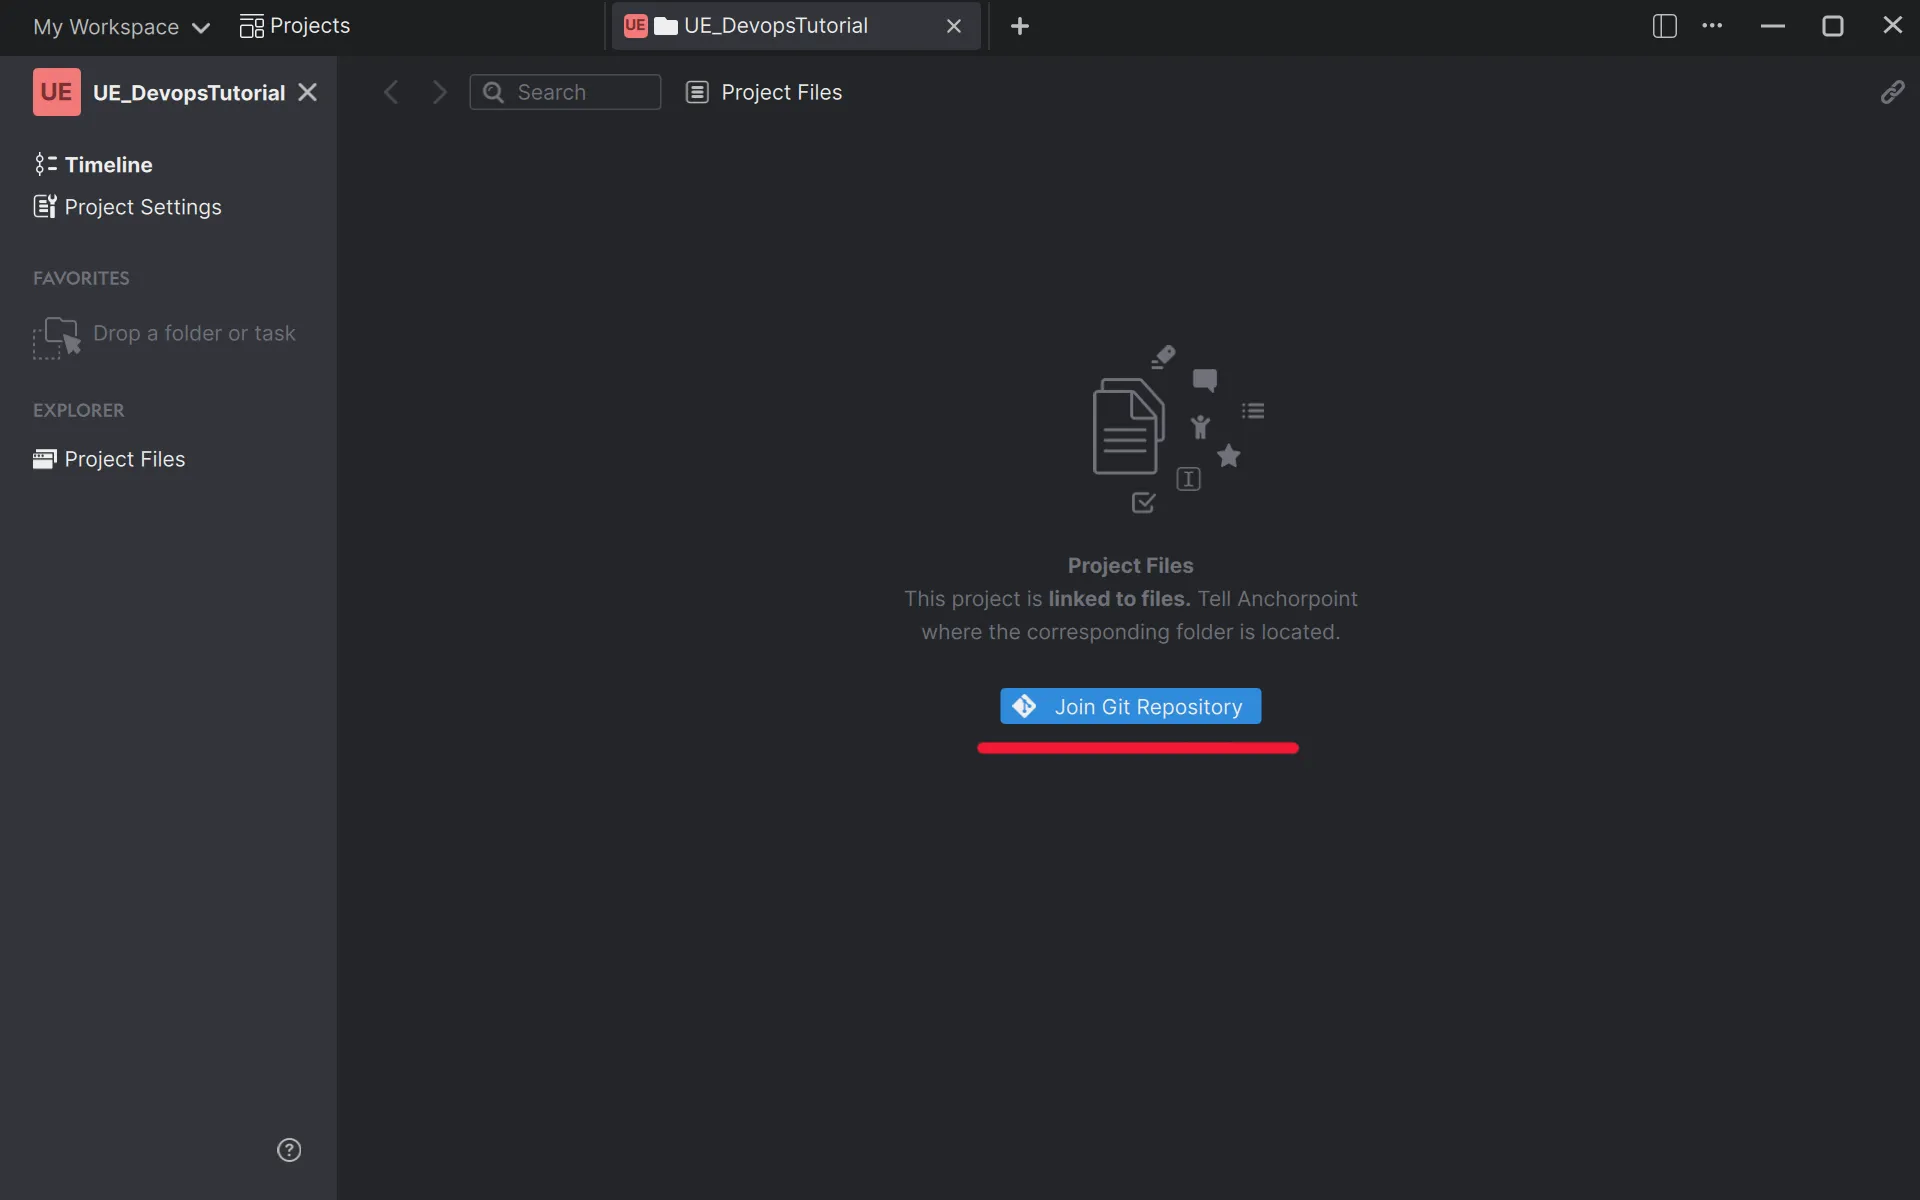
Uploading your Solidworks 3D Cad project to Azure DevOps
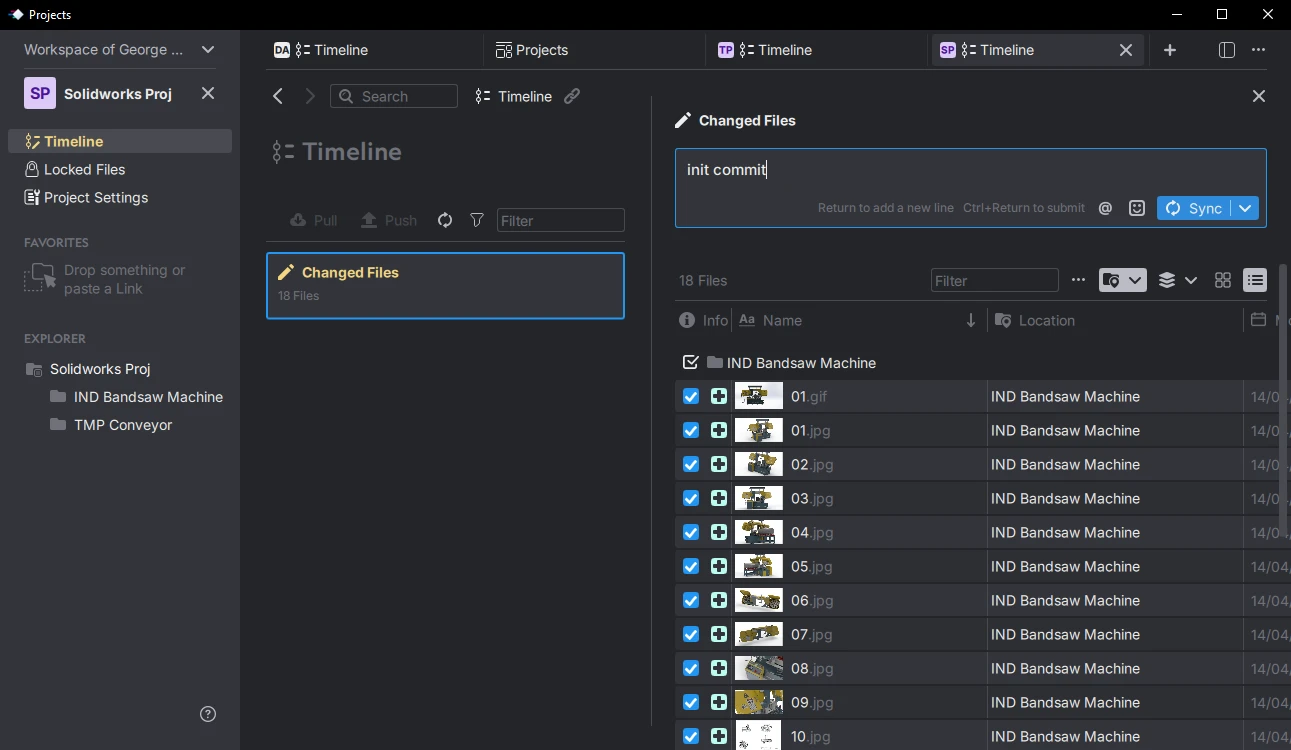
Uploading your SolidWorks project is straightforward. When Anchorpoint detects uncommitted changes in your CAD folder, it will prompt you to enter a message, think of this as a checkpoint description. Once you click 'Sync', Anchorpoint pushes your files to Azure DevOps using Git LFS, ensuring your large 3D assemblies are handled efficiently without slowing down your repository.
Your history will initially be empty. Click Timeline, then Changed files to see a list of your project files. Anchorpoint recognizes art and 3d files, displaying the correct name and thumbnail. Add a meaningful message and click "Sync".
Managing Project Files with .gitignore
The .gitignore file helps exclude unnecessary files such as build outputs, temporary CAD files, or the DerivedDataCache. In this workflow, a tailored .gitignore file named DCCs is used, optimized specifically for managing digital art assets.
Team Collaboration Setup
All team members must have active accounts for both Azure DevOps and Anchorpoint. Once you invite them to the project, they'll receive a notification. They'll need to select an empty folder on their system, which Anchorpoint will use to download the project from Azure DevOps.
Once team members are invited to the Anchorpoint project, they can download all project files from Azure DevOps. The first time they do this, they'll also need to connect Anchorpoint to DevOps by entering their DevOps credentials.
Version Control Workflow
This type of version control system simplifies the process: instead of saving multiple incremental files, you can work continuously and push updates directly to the cloud. Although it may take some time to adjust, this method enhances efficiency, keeps your file structure clean, and streamlines collaboration.
Your daily workflow becomes:
Work in SolidWorks
Sync changes
Continue working
Sync updates
Repeat
With each sync, Anchorpoint checks for updates from other team members, downloads them, and then uploads your latest changes.
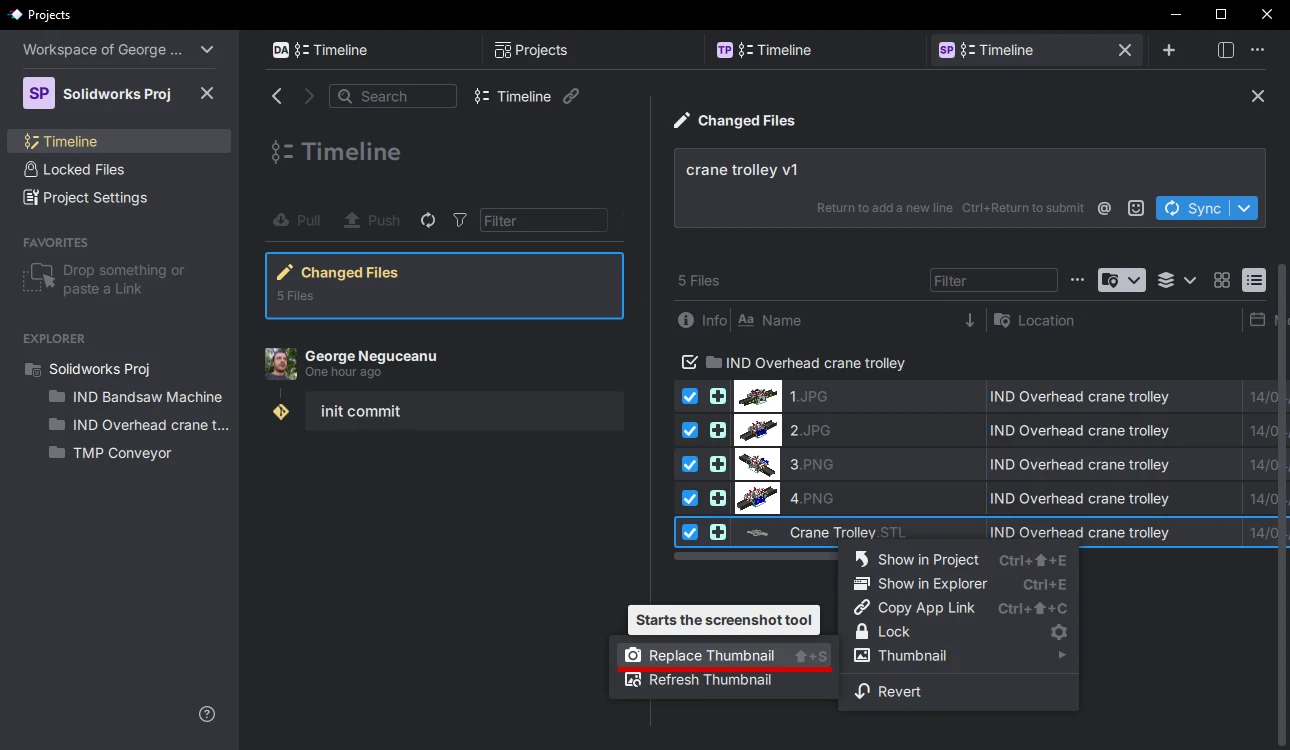
Custom Thumbnails
One of the many extra features of Anchorpoint is Custom Thumbnails, which allows you to right click on an art file and replace its thumbnail. To do this, first sync/commit your new or changed files, open the desired image or tool/engine viewport, switch to Anchorpoint, right-click the desired art file, and click Replace Thumbnails. Drag over the desired view and the thumbnail will be replaced. If you failed the first time, right-click on the file again, and select refresh the thumbnails, and start the thumbnail replacement again. Sync files when you are done.
Replacing a thumbnail for .STL 3D file in Anchorpoint.
FAQ
Can I use a SolidWorks GitHub workflow for my project?
Yes. Anchorpoint is fully compatible with the Git ecosystem. You can connect your local SolidWorks files to a GitHub repository, using Anchorpoint as the visual interface to push and pull your changes.
How does the file locking system prevent lost work?
Because SolidWorks files are binary and cannot be "merged" like code, file locking is critical. Anchorpoint’s system allows you to lock a file instantly, notifying the rest of the team that you are working on it so they don't create conflicting versions.
Where are my SolidWorks files actually stored?
Following a "no lock-in" approach, Anchorpoint does not host your files; they are stored in your chosen Git repository, such as GitHub or a self-hosted server. This ensures you always have full control over your production data.