
Git with KiCad - Version control for PCB design workflows
Learn why KiCad’s open-source text files are the perfect complement to Git and how to use version control as the ultimate safety net for your hardware layouts.
July 1, 2026
9
min read

Although SVN is one of the granddaddies of version control systems, Git is now faster and more flexible, and it works well with modern development workflows. However, if you've been using SVN for years, switching can feel like trying to unlearn how to ride a bike while riding it. Don’t worry. We've got you covered.
Before we discuss the how, let’s talk about the why.
For this type of migration we will use Git SVN Clone and SVN Command line tools.
Go to the working copy folder of the SVN project you want to import. Right-click and open Git Bash there. Then, run the following command:
svn log -q | awk -F '|' '/^r/ {gsub(/ /, "", $2); sub(" $", "", $2); print $2" = "$2" <"$2">"}' | sort -u > svnusers.txtA file named svnusers.txt will be generated in this folder with the names of the users in this project.
If needed, make modifications to it with a text editor. The format is as follows:
User_svn_name = Git_user_name <Git_user_email or Git_user_name>
Some Git apps consider the email address for revisions, so instead of an email address, you can use the username again. Example:
George_SVN = George <George>
Create an empty folder somewhere and copy the svnusers.txt file from the previous step into it. Then, right-click and select Open Git Bash.
Before running the main command, note that SVN repos can be all over the place. Some have the traditional /trunk, /branches, and /tags layout. Others do not. You’ll want to know what you’re working with.
A standard command for a remote SVN repository can be:
git svn clone "https://your-svn-url.com/repo" \
--no-metadata \
--stdlayout \
--authors-file=svnusers.txt \
-r8:HEAD \
"your-git-repo"
In this case, we have the project's standard SVN structure, for which we use the –stdlayout argument. The –authors-file is in the folder in which we open GitBash. In this example, --no-metadata ensures that Git does not create additional SVN-specific metadata branches in your Git repository, and -rXXX:HEAD ensures that we get the project revisions from 8 and up. (Remove this line if you want the entire history.)
If your SVN structure is custom, you will have to specify the location of each subdirectory. In some cases, use -T "path" instead of –trunk="path" if the former does not work. On one of my local migrations, I had to use
-T "file://C:/Repositories/SVN_your_reponame/trunk/projectfolder"to retrieve the files because I had an extra folder in the trunk and not the root project directly. You can find out more about advanced commands at git-scm.com/docs/git-svn.
git svn clone "https://your-svn-url.com/repo" \
--no-metadata \
--trunk=trunk \
--branches=branches \
--tags=tags \
--authors-file=svnusers.txt \
-r8:HEAD \
"your-git-repo2"
If you want to clone from a local repository, the first step is to find the location of your repository. For example, if your repository is located at file://C:/Repositories/your_SVN_reponame, remove the colon (:) from the C:/, leaving file:///C/Repositories/your_SVN_reponame.
git svn clone "file:///C/Repositories/your_SVN_reponame" \
--no-metadata \
--stdlayout \
--authors-file=svnusers.txt \
-r8:HEAD \
"your-git-repo3"
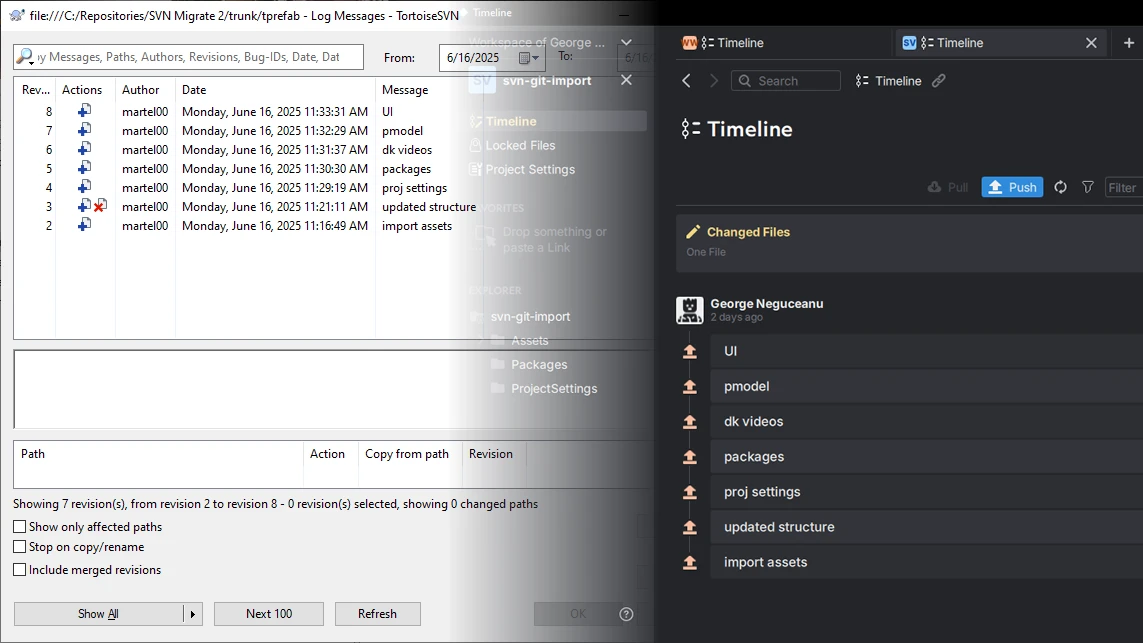
Once the import is complete, open Git Bash in the root directory of the imported directory and use the Git log command to view the imported revisions.
git log --oneline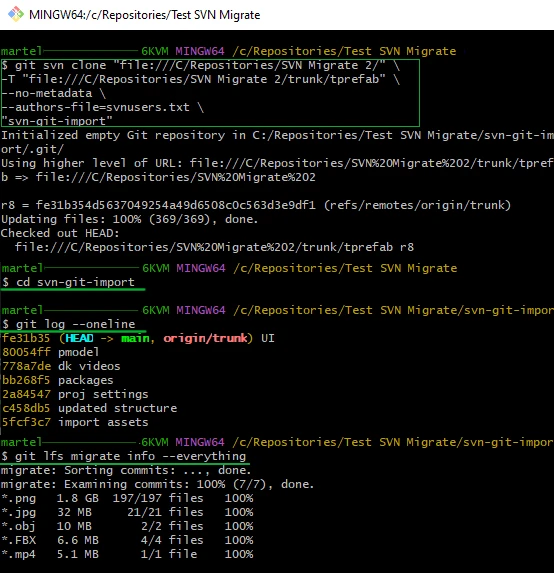
You can convert tags in your project with the following command while in your project folder root if you have certain tags.
for t in $(git for-each-ref --format='%(refname:short)' refs/remotes/tags); do git tag ${t/tags\//} $t && git branch -D -r $t; done
You can also move any references under "refs/remotes" and convert them to local branches using the following command:
for b in $(git for-each-ref --format='%(refname:short)' refs/remotes); do git branch $b refs/remotes/$b && git branch -D -r $b; done;
for p in $(git for-each-ref --format='%(refname:short)' | grep @); do git branch -D $p; done;
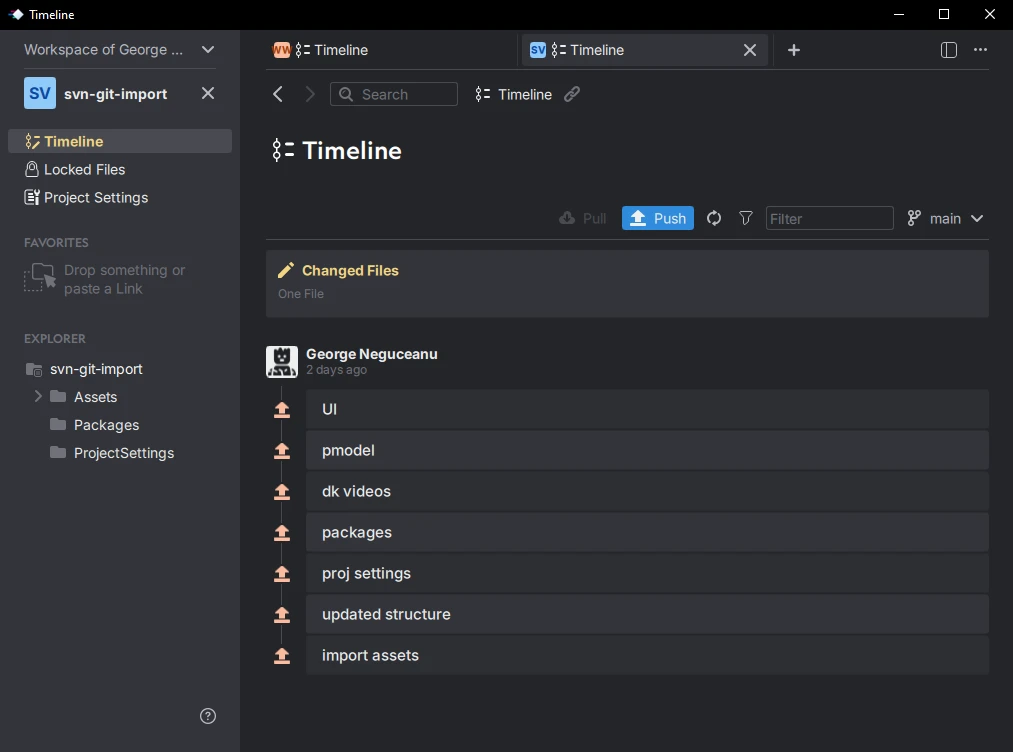
Before pushing to a remote server, you must decide whether to use a Git application, such as Anchorpoint or GitHub Desktop, to manage your project and perform pushes and pulls. These apps handle Git LFS automatically and provide a .gitignore file based on your project, so you don't have to create one yourself.
To continue using Git Bash commands, open a new Git Bash window in your Git project folder. Then, install Git LFS to properly handle large binary files.
1) If you are using SVN ignore properties, you can convert them to a .gitignore file using Git Bash in your Git project directory. If you don't have one, create one as described here and skip to the commit command.
git svn show-ignore --id=origin/trunk > .gitignore
git add .gitignore
Take a look at the newly created .gitignore file. Make any necessary modifications, then add it to the commit.
git commit -m 'svn-ignore to .gitignore.'2) The next step is to install Git LFS and import the files.
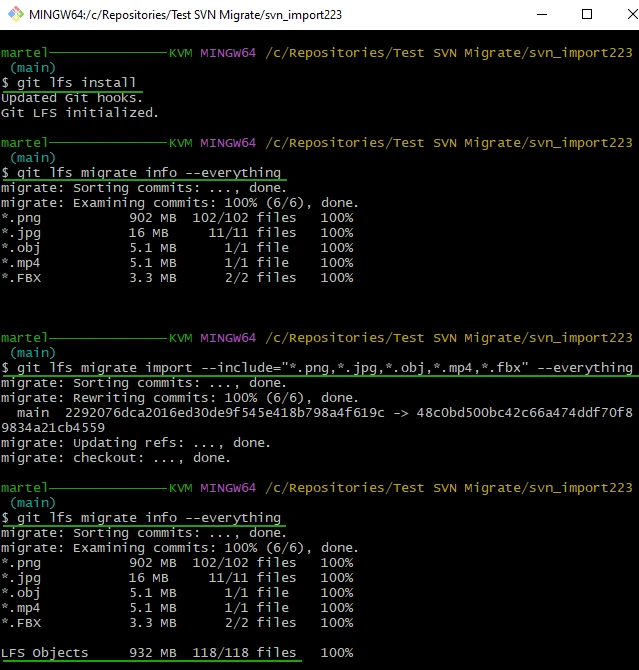
git lfs installUse the following command to see which binary files should be added to the Git LFS track:
git lfs migrate info --everythingA list of the binary files and their count will be generated. Even if the files are less than 100 MB, it is recommended that you import them as Git LFS.

As you can see in the image, this repository contains 102 .png files and other binary files. Since I know I will add more of these types of binaries in the future, I will import them all to Git LFS.
git lfs migrate import --include="*.png,*.jpg,*.obj,*.mp4,*.fbx" --everythingThis will migrate these types of files in your project to Git LFS and create a .gitattributes file for future commits to take these types into consideration.
3) Finally, push to a remote repository, such as GitHub.
git remote add origin https://github.com/your-org/your-repo.git
git push -u origin --all
git push --tags