Learn how to migrate your Perforce project to Git with Git P4 Clone.
George Neguceanu
11 Jun 2025
Updated on
11 Jun 2025
4
min read
Content
So, you've decided to migrate from Perforce to Git. Maybe you seek the flexibility of Git branches, are tired of Perforce's licensing model, or want better integration with modern tools like GitHub and GitLab. Whatever your reason, welcome to the world of distributed version control!
Before you hit "git p4 clone" and call it a day, let's walk through what this migration actually involves and how to install Git LFS.
Migrating from Perforce to Git and Anchorpoint app
Why move from Perforce to Git?
Perforce (Helix Core) is ideal for large binary files and enterprise teams, particularly those in AAA game development or visual effects. However, Git has become more popular for game development over the last five years thanks to:
Download and Instal Python from python.org/downloads (select at start “add python.exe to PATH” when installing)
Find the git-p4 file in the C:\Program Files\Git\mingw64\libexec\git-core directory or the directory where you installed Git. Then, open the file with a text editor such as Notepad++ and on first line replace:
#!/usr/bin/python2
with
#!/usr/bin/env python
This is done so that Git P4 Clone will work properly with Python 3.
3. Clone your P4 project with Git P4 Clone
a) Right-click on the desktop or in a custom, empty folder that you created. Select "Open Git Bash Here" and type:
p4 login
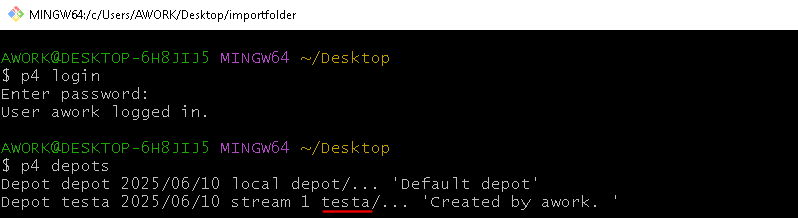
and type your Helix Core password. Then let's find out our depots with:
p4 depots
p4 depots list
If the command doesn't work for you, take a look at the Perforce Client depot structure.
List of p4 depots in the Perforce client
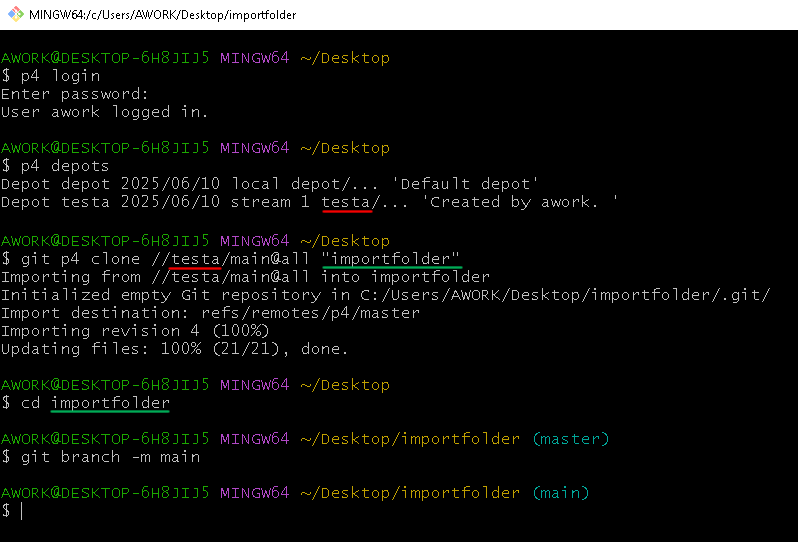
b) Based on the P4 depot results above or the Perforce client core depot structure, we will use depot testa and the main stream/branch depot in our example.
git p4 clone //test/main@all "name_of_the_folder"
# main is stream (branch) from p4

# @all grabs all history or if you have a huge history, use @1-X, Import only changes 1 through X, e.g. 5.

# "name_of_the_folder" the directory to be clone into
If you encounter any errors, make sure the name and structure of the depot are correct. This is usually verified using the p4 depots command.
c) Finally, rename your branch if is needed with the commands:
cd name_of_the_folder
git branch -m main
The Git bash commands for this migration
4. Clone only a folder
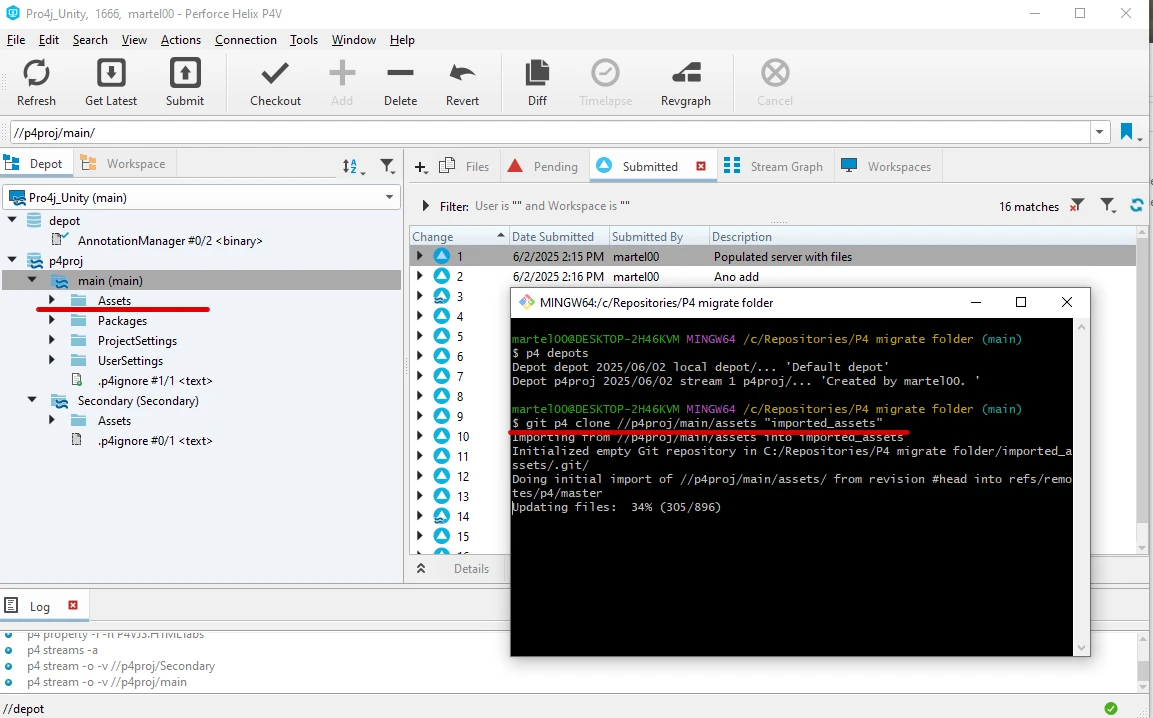
In certain situations, you may only want to clone a folder from the depos. Add the folder name at the end after checking the depots with the p4 depots command.
Migrating a specific folder from Perforce to Git
git p4 clone //p4proj/main/assets@all "imported_assets"# where "imported_assets" is the name of the folder where the files will be clone to.
5. Push to remote
Before pushing to remote, you can clean up the project by converting .p4ignore to .gitignore, removing temporary folders, and renaming the main branch.
Next, decide if you will use a Git app, such as Anchorpoint or GitHub Desktop, to manage your project and push/pull to your remote servers. These apps handle Git LFS out of the box and provide a .gitignore based on your project instead of making you do this work yourself.
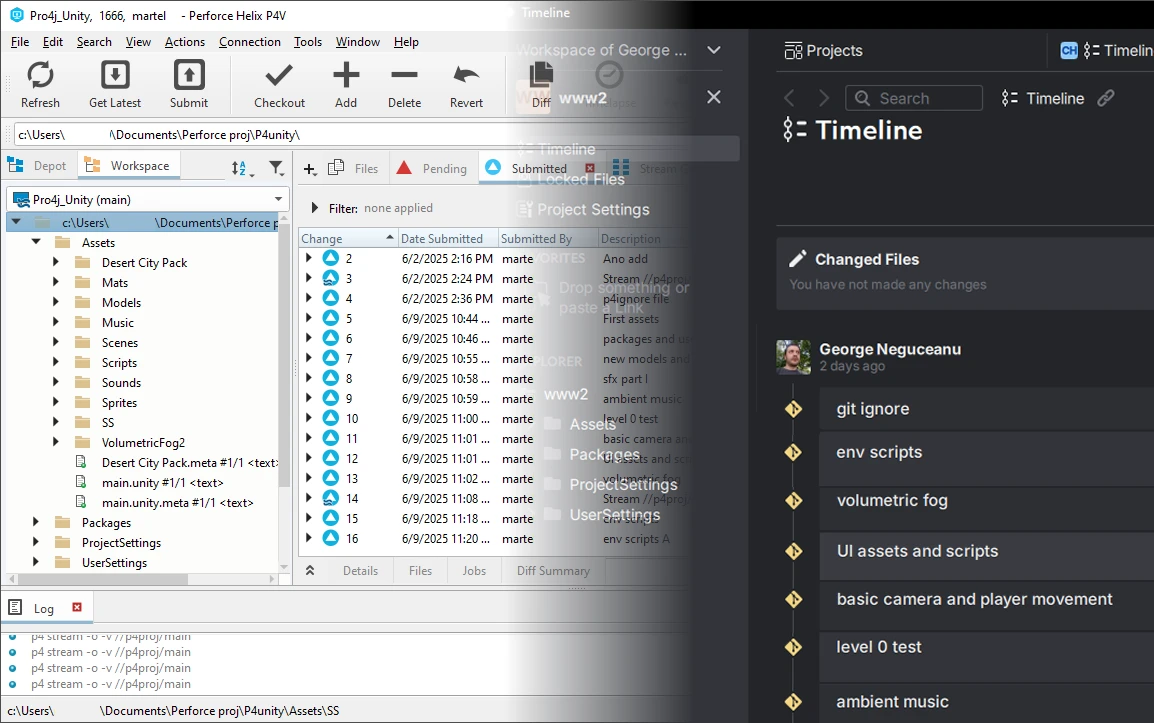
Our example project migrated to Git with history shown in Anchorpoint
To continue using Git Bash commands, open a new Git Bash window in your project folder and install Git LFS to properly handle large binary files.
1) First convert your .p4ignore file to a .gitignore file. Although they are similar, some flags won't work in a .gitignore file. Learn more about the .gitignore template here.
Once you are satisfied with the file, commit it.
git commit -m 'added .gitignore'
2) Next, we need to install Git LFS to manage our large binary files. To do so, we must first scan our project using the following commands:
git lfs install
Then to scan the project with:
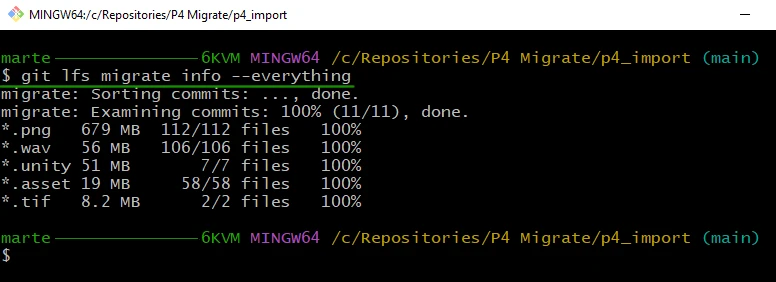
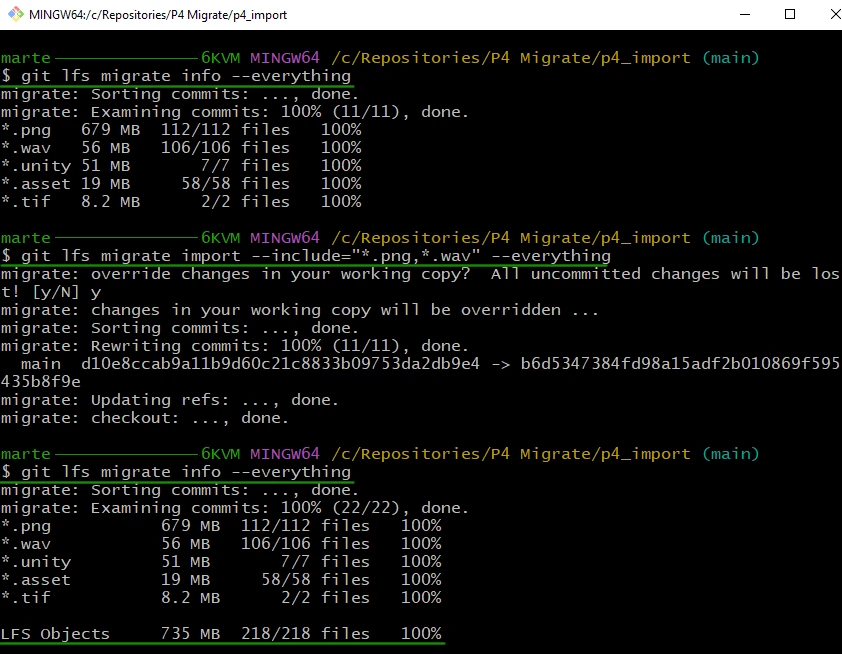
git lfs migrate info --everything
Git LFS Migrate info
As you can see in the image, we have a lot of PNG and WAV binary files. Since these will be the main files, I will import them as Git LFS objects.
Decide how much of the project's history you want to import. Do you want to import all of the project's history from the past four years?
Choose the right cloud provider. We recommend Azure DevOps for large projects and GitHub for smaller ones. If you have your own servers, we recommend Gitea.
If you rely heavily on file locking, use Git apps like Anchorpoint, Fork or SourceTree which handle this feature by default.
Read the official documentation for advanced migration options and updates between the P4 and Git repos at git-scm.com/docs/git-p4 .