Version Control with Git & Azure DevOps for Unreal 5 (UE5)
Set up a Git server on Azure DevOps for UE5. Configure repositories, LFS, and permissions so that teams can reliably push large assets and collaborate.
Matthäus Niedoba
14 Jun 2024
Updated on
06 Feb 2026
8
min read
Content
TL;DR
Using version control with Windows Azure is a smart choice for game development because Azure DevOps offers unlimited Git Large File Storage (LFS) for large binary assets. Anchorpoint streamlines this process for teams by offering a 100% Git-compatible interface that automates repository setup and file locking. This allows artists to concentrate on their work rather than the command line.
Introduction
If you want to collaborate on a game project, resolving version control (or source control) is one of the first things you need to consider. If you are familiar with Git, you may have heard of GitHub. This allows you to store your game project on a server, so that everybody has access to it. GitHub is great for software development, but for games, there are better solutions out there.
For many game studios, finding a robust git client for Windows Azure DevOps is a priority to ensure technical and non-technical team members can collaborate effectively. While developers often prefer the command line, artists require a visual, fail-safe environment. Anchorpoint acts as a specialized solution that connects directly to Azure, handling the heavy lifting of Git LFS and repository configuration so your team can start creating immediately.
Microsoft Azure DevOps is a Git server and a viable alternative to GitHub, GitLab, and Bitbucket. It provides unlimited storage for Git LFS, which is a blessing for game development with Unity, Godot and Unreal. The free plan allows up to 5 users, which is great to get started. Everything above 5 users comes at a reasonable price of $6 per user per month. This is keeping in mind that it does not bill you for storage, which you will need for textures, movies, audio and 3D files.
Azure DevOps is part of the huge Microsoft Azure ecosystem, which is a direct competitor to AWS from Amazon. It seems a bit overwhelming to get started and this tutorial will help you with that.
Prerequisites
In this tutorial, we will use
Azure DevOps (a free account is fully fine)
Anchorpoint, as our Git desktop application
An Unreal Engine project as an example
Anchorpoint is a 100% Git-compatible version control solution used by over 200 studios worldwide to bridge the gap between technical DevOps and artist workflows, eliminating the complexity of managing large game assets on Azure DevOps.
Setting up your Unreal Engine project
Since Unreal Engine 5, changes on a level can be stored in multiple small files using One File Per Actor. This has multiple benefits:
The level is not completely locked for others. Multiple team members can work on the same level at the same time
Your commits to version control are lighter, because you don't need to re-upload the whole level
You have a better history, because each committed version will display you all the actors that have changed.
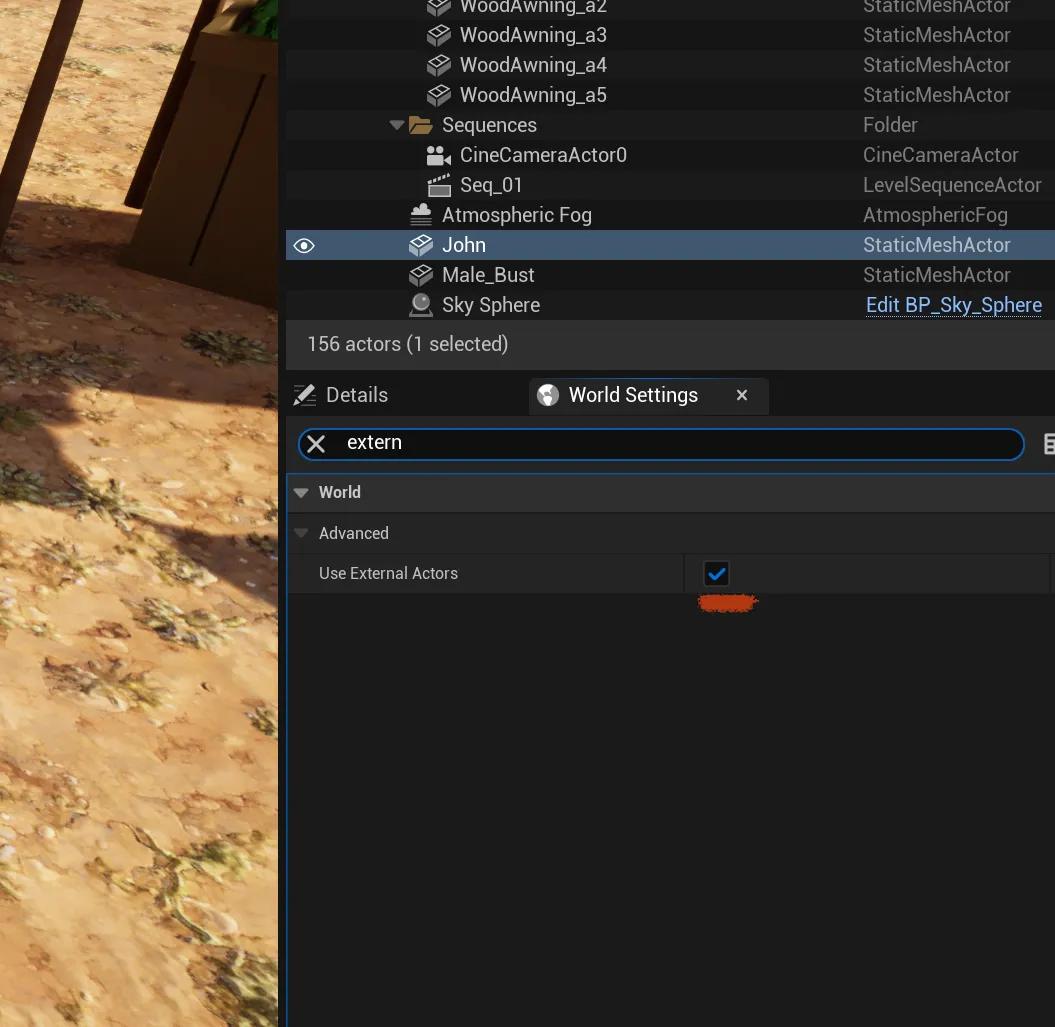
If you are using World Partition, the One File Per Actor feature is enabled by default. It not, you have to enabled it here.
Enable "Use External Actors" in the World Settings of your level.
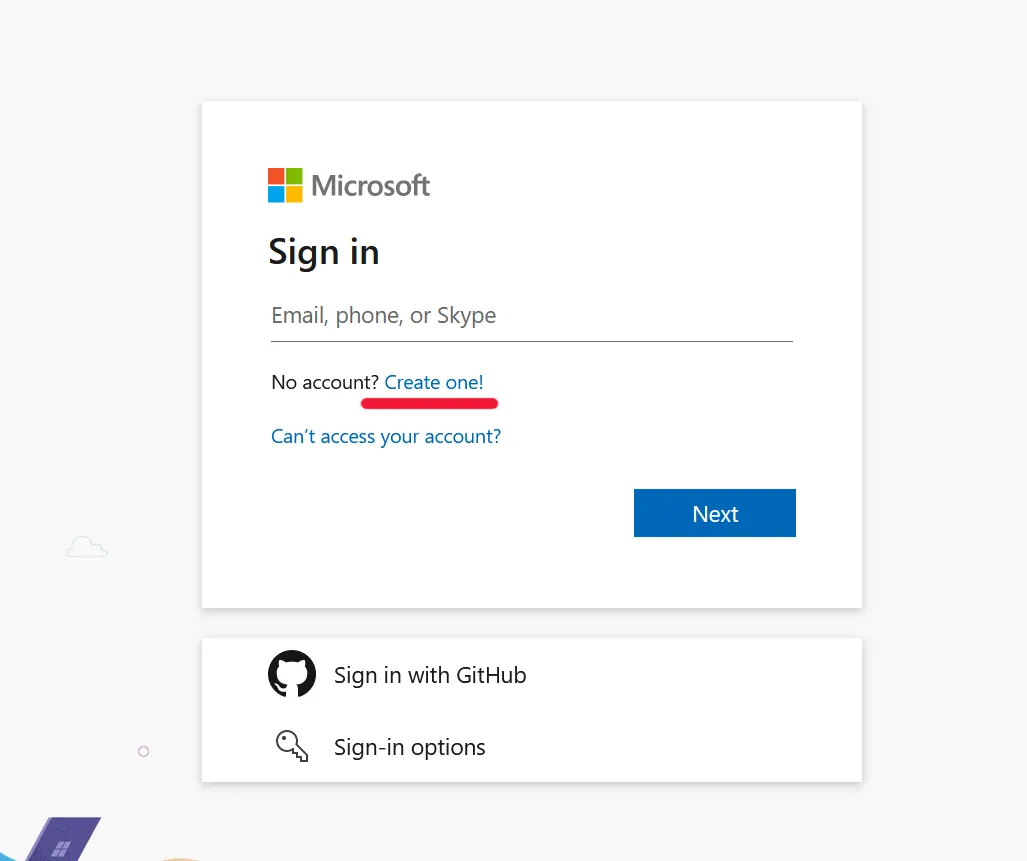
Now you have to walk through the typical account creation process. When you are done with that, you will be able to create a new project in DevOps. The process is a bit nasty, but you only need to do it once.
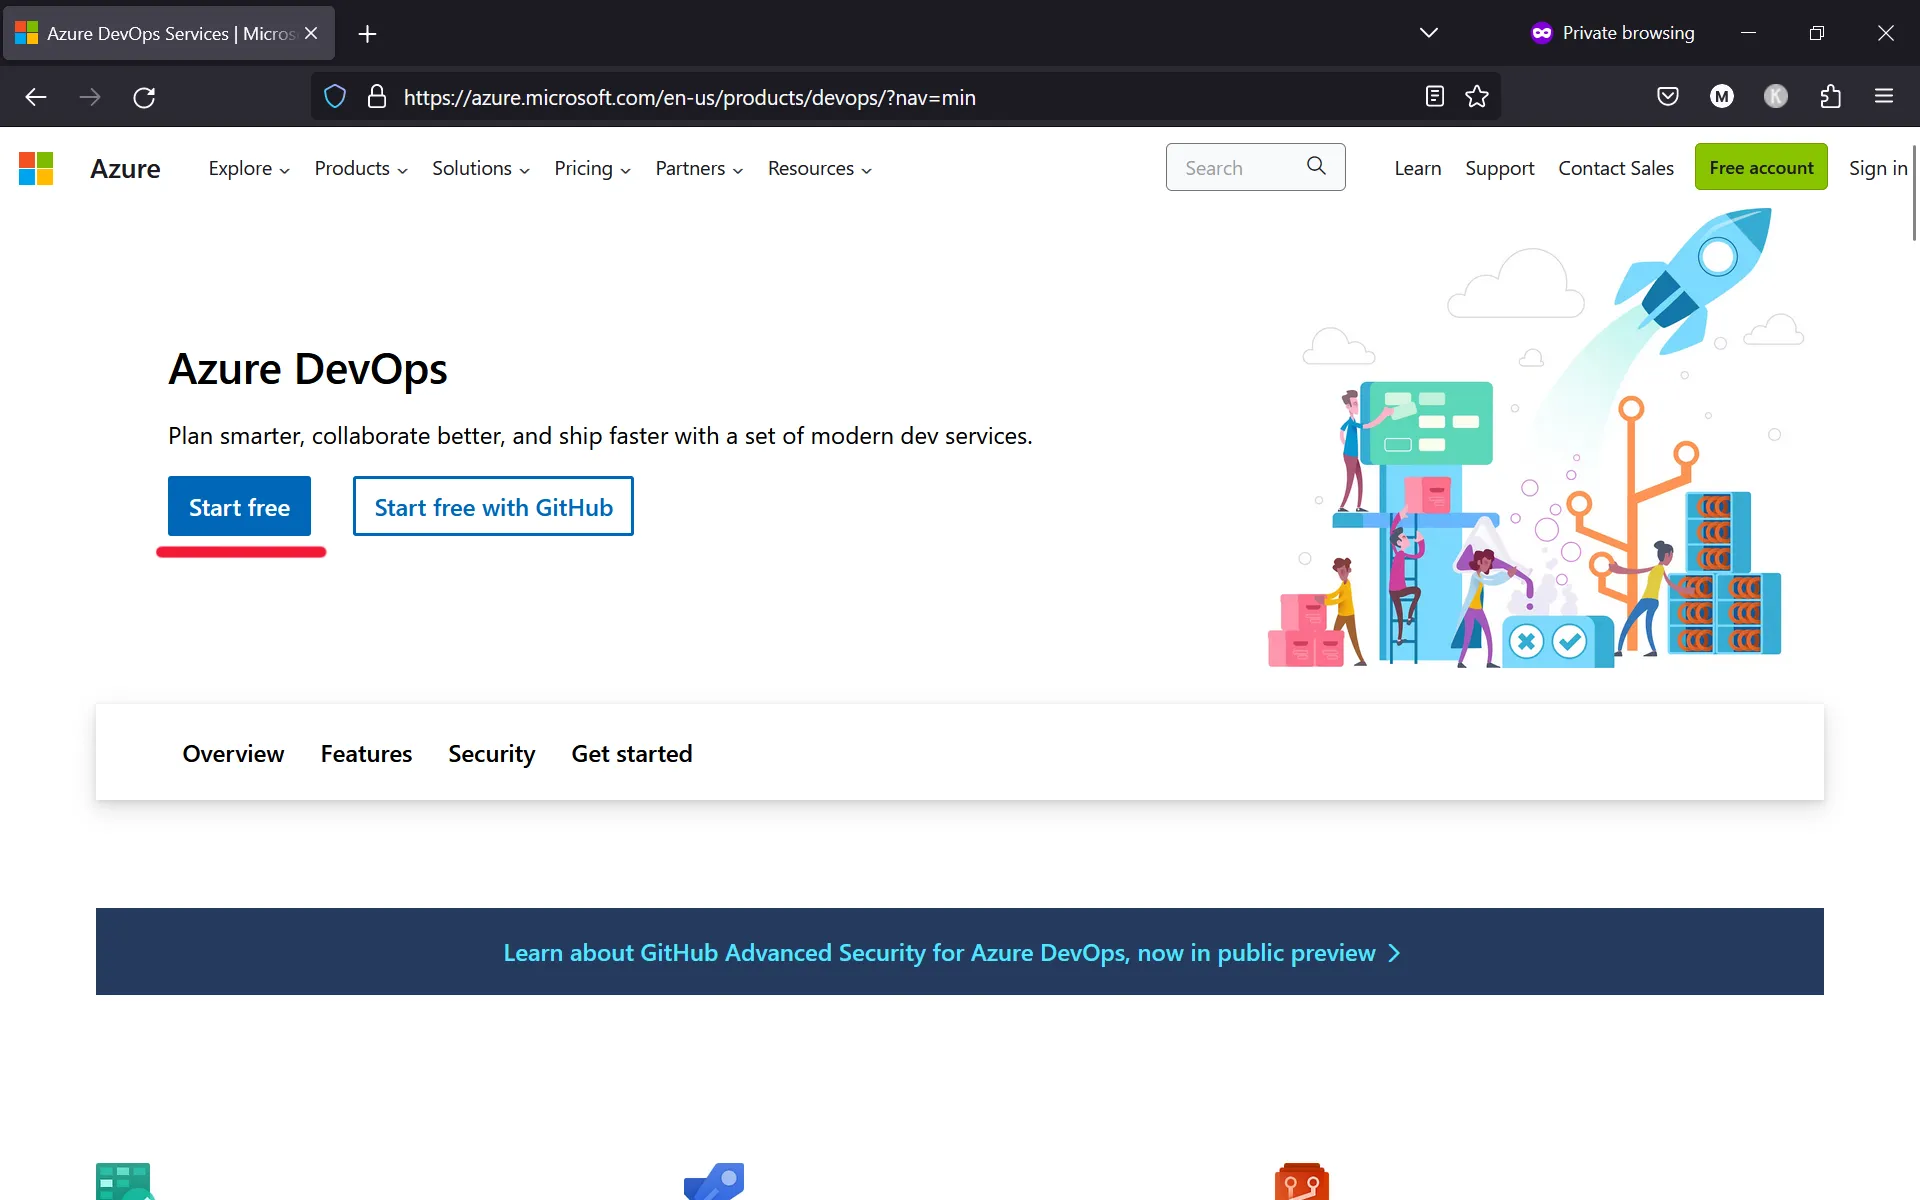
Go to dev.azure.com and click on "Start free"
Start the account creation process
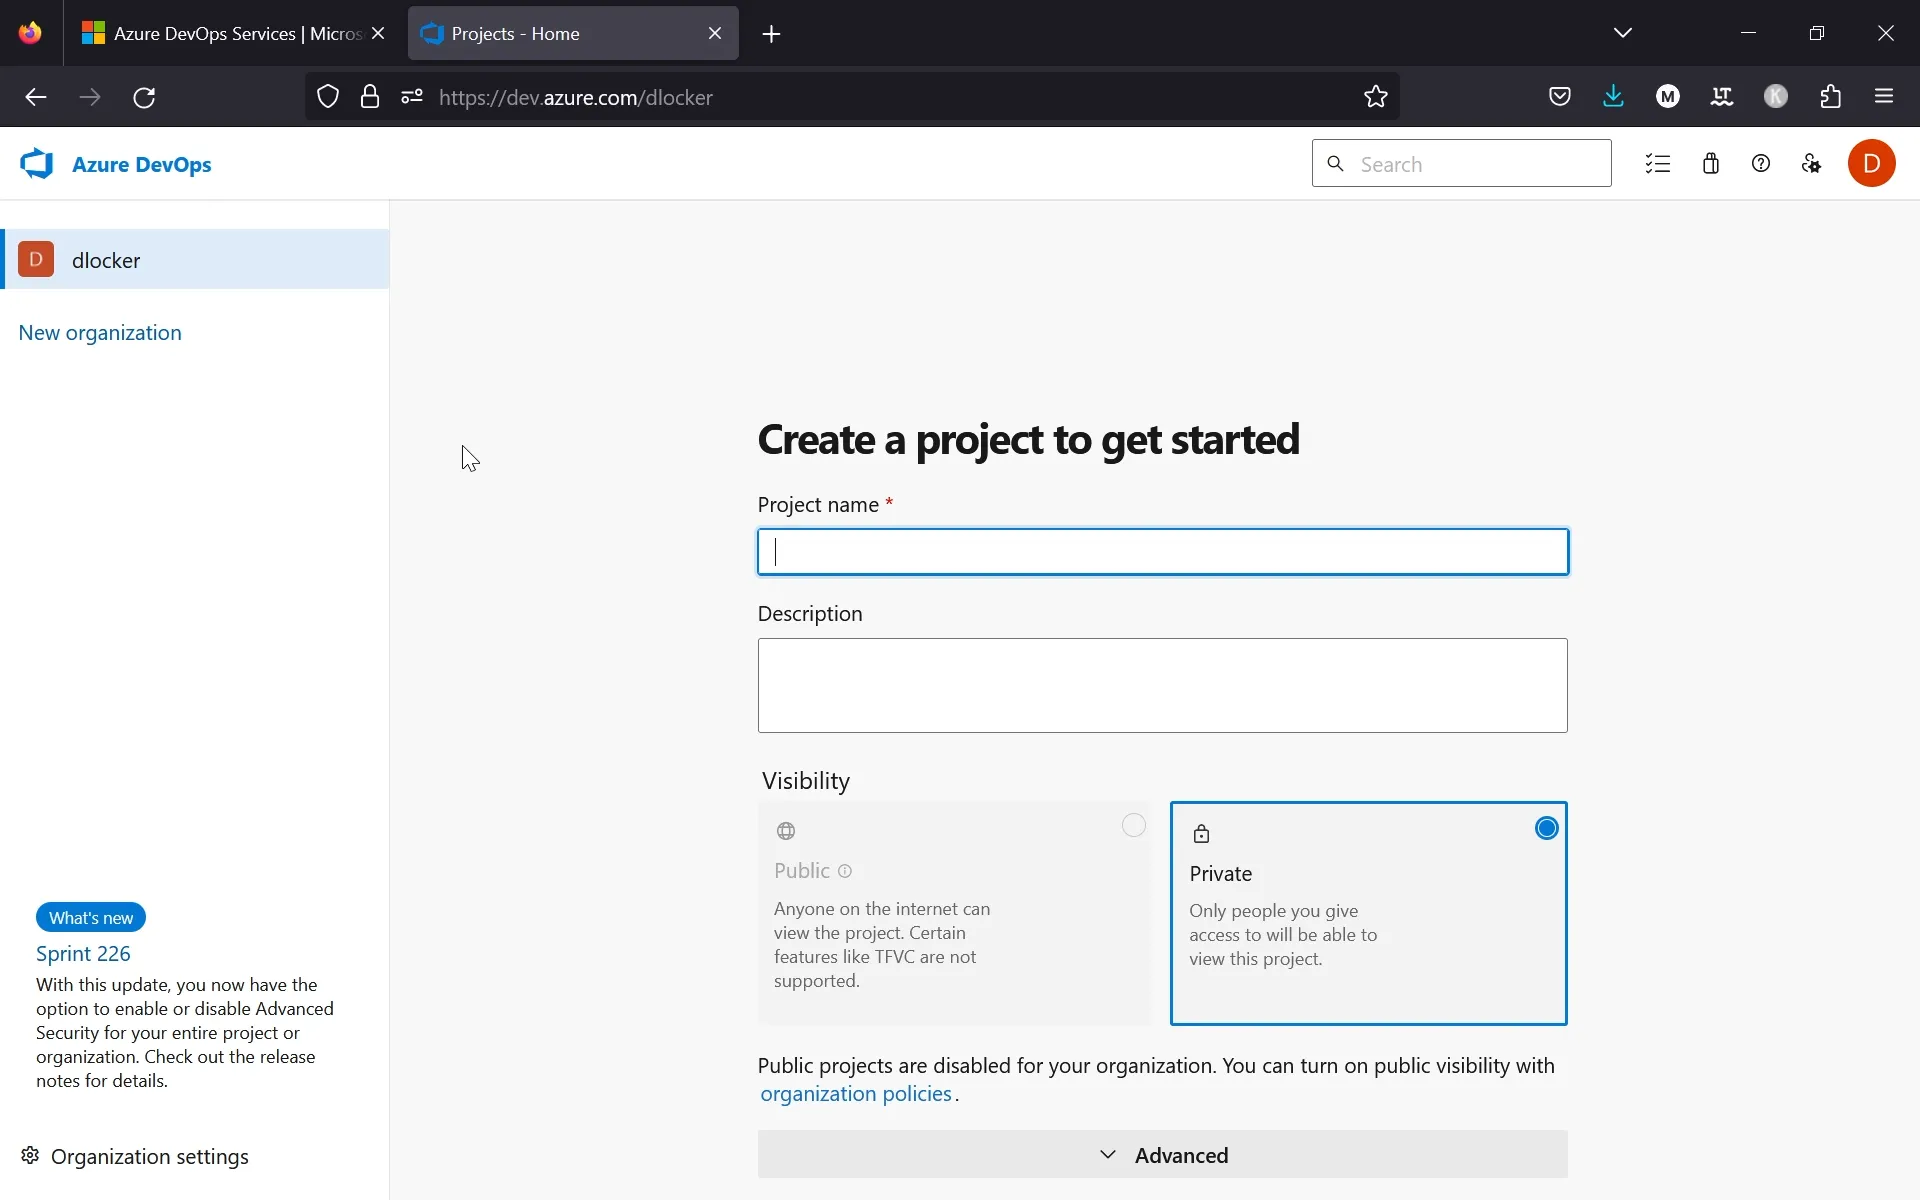
This is where you should end. If you are here, you are almost done in DevOps
Git for game development
Anchorpoint is a one-button version control solution optimized for game engines and art assets.
In the next step, you'll need a Git client. This is a desktop application that will push and pull files from your computer to the server. In this tutorial, we will use Anchorpoint, because it is suited for artists and has all the configuration for Unreal or Unity projects ready to go. If you don’t want to use Anchorpoint, there are alternatives like GitHub Desktop or SourceTree.
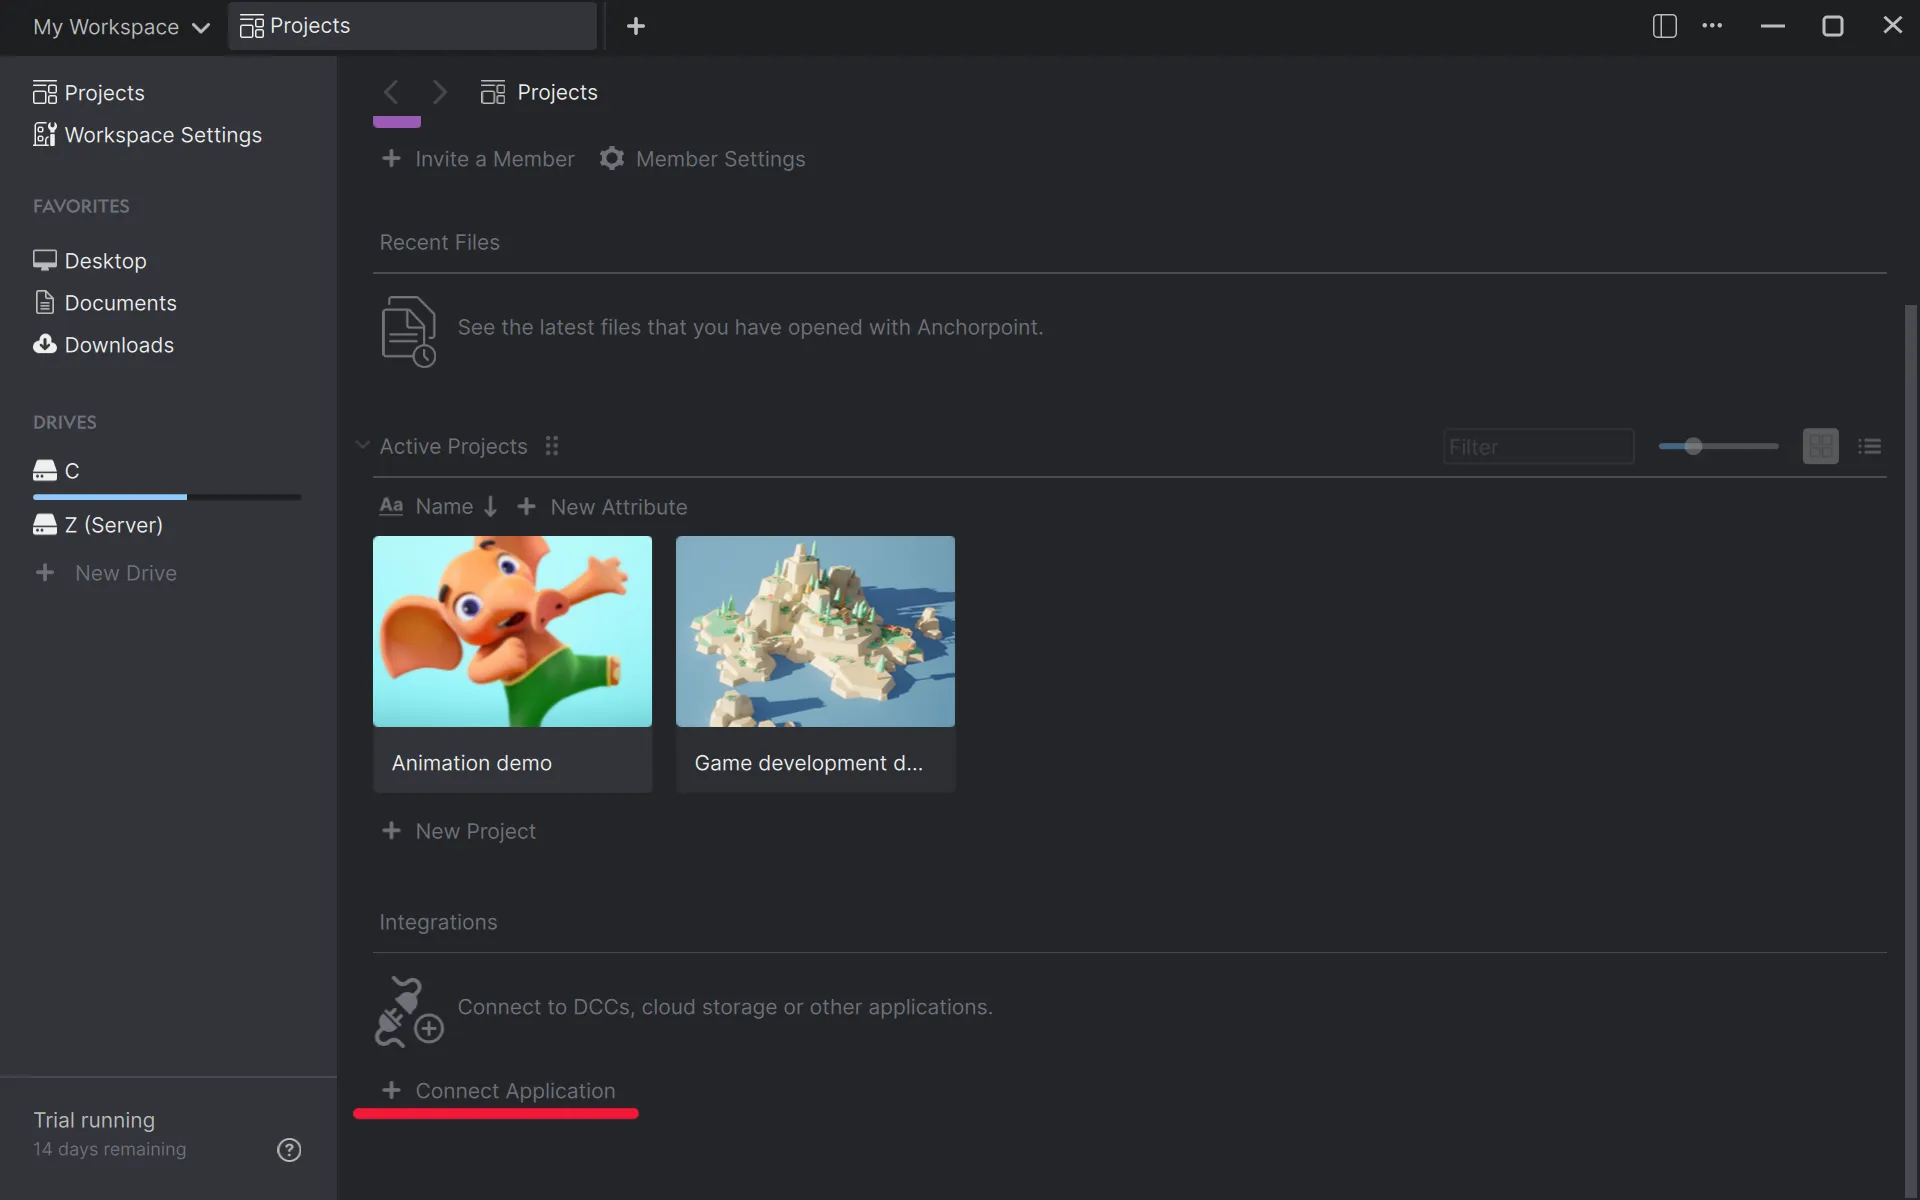
Connect Azure DevOps to Anchorpoint
Click on "Connect"
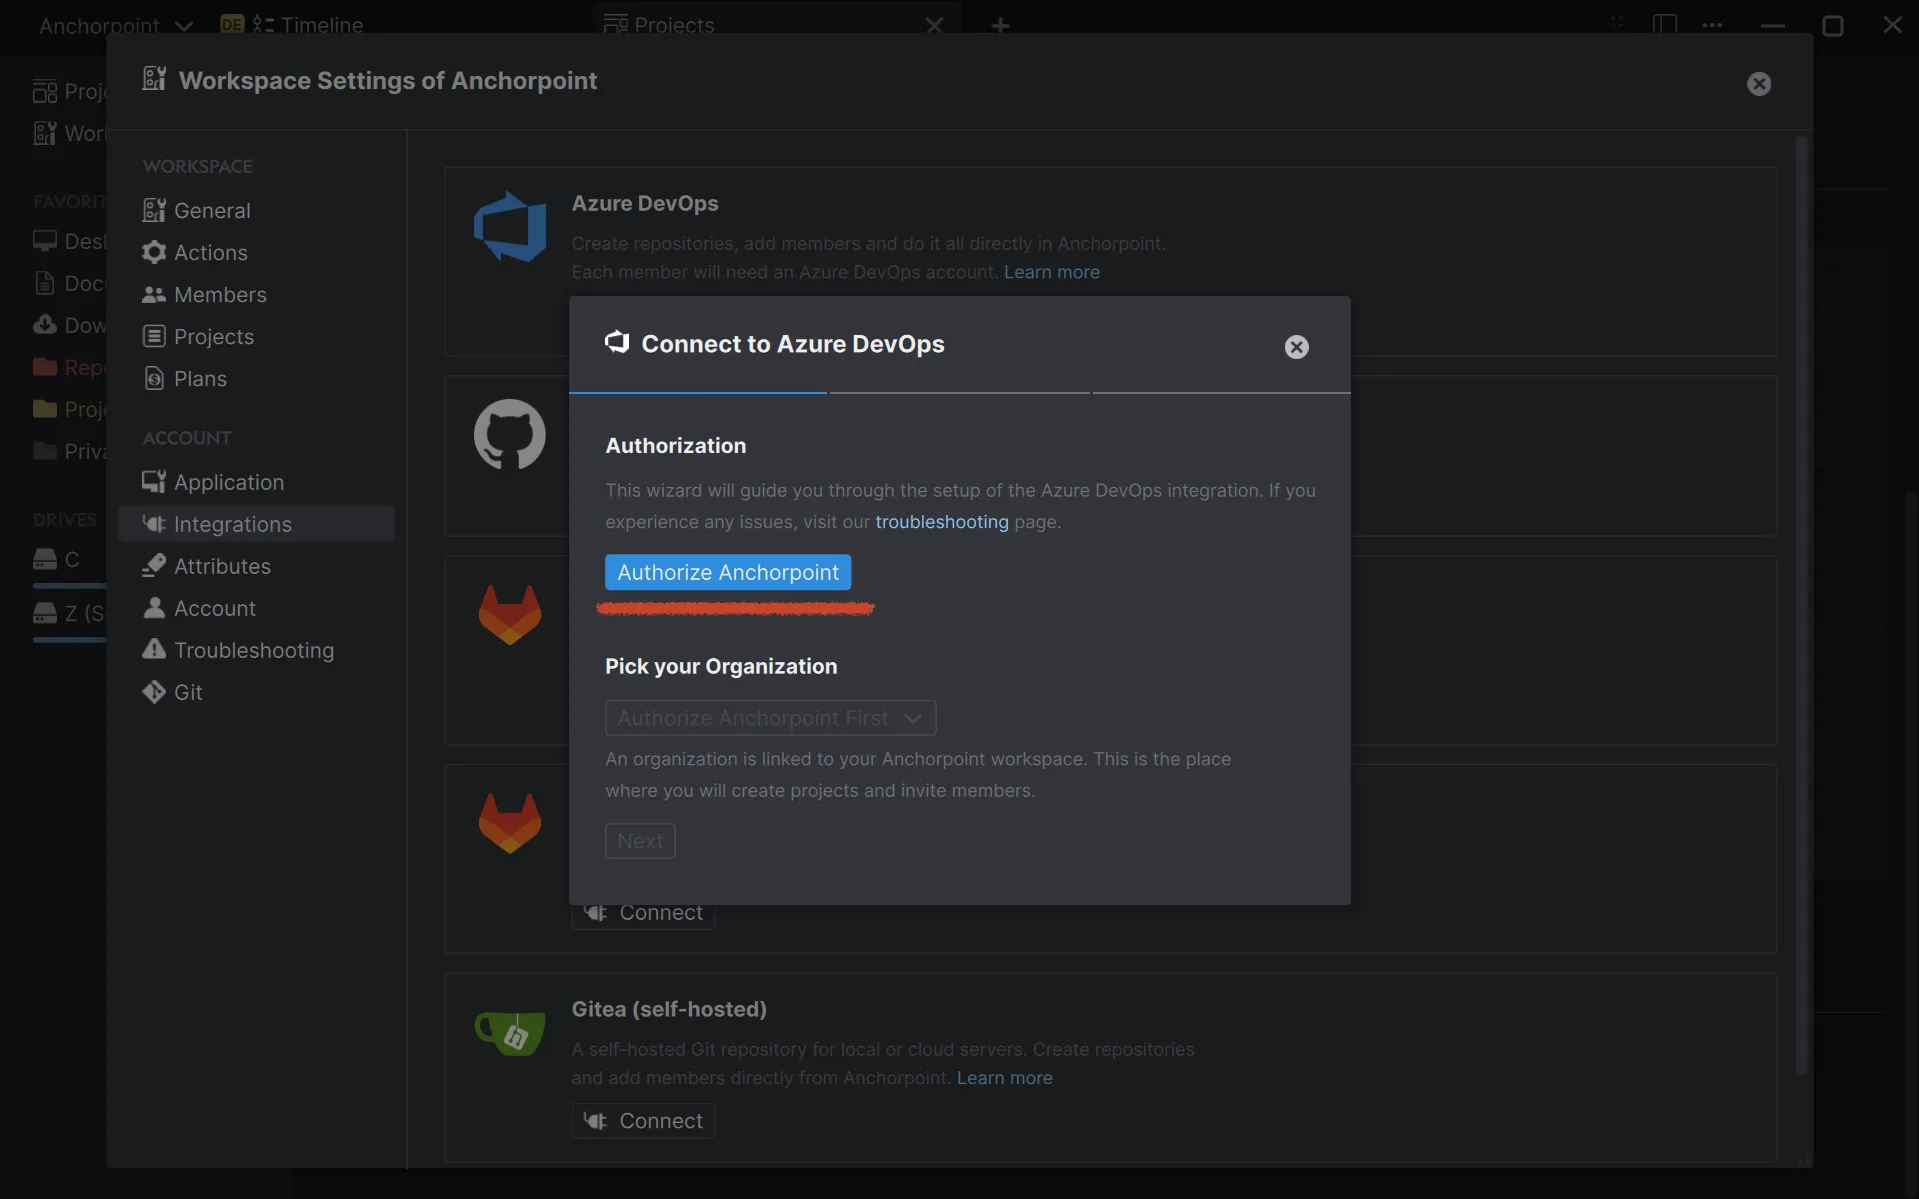
Click on "Authorize Anchorpoint"
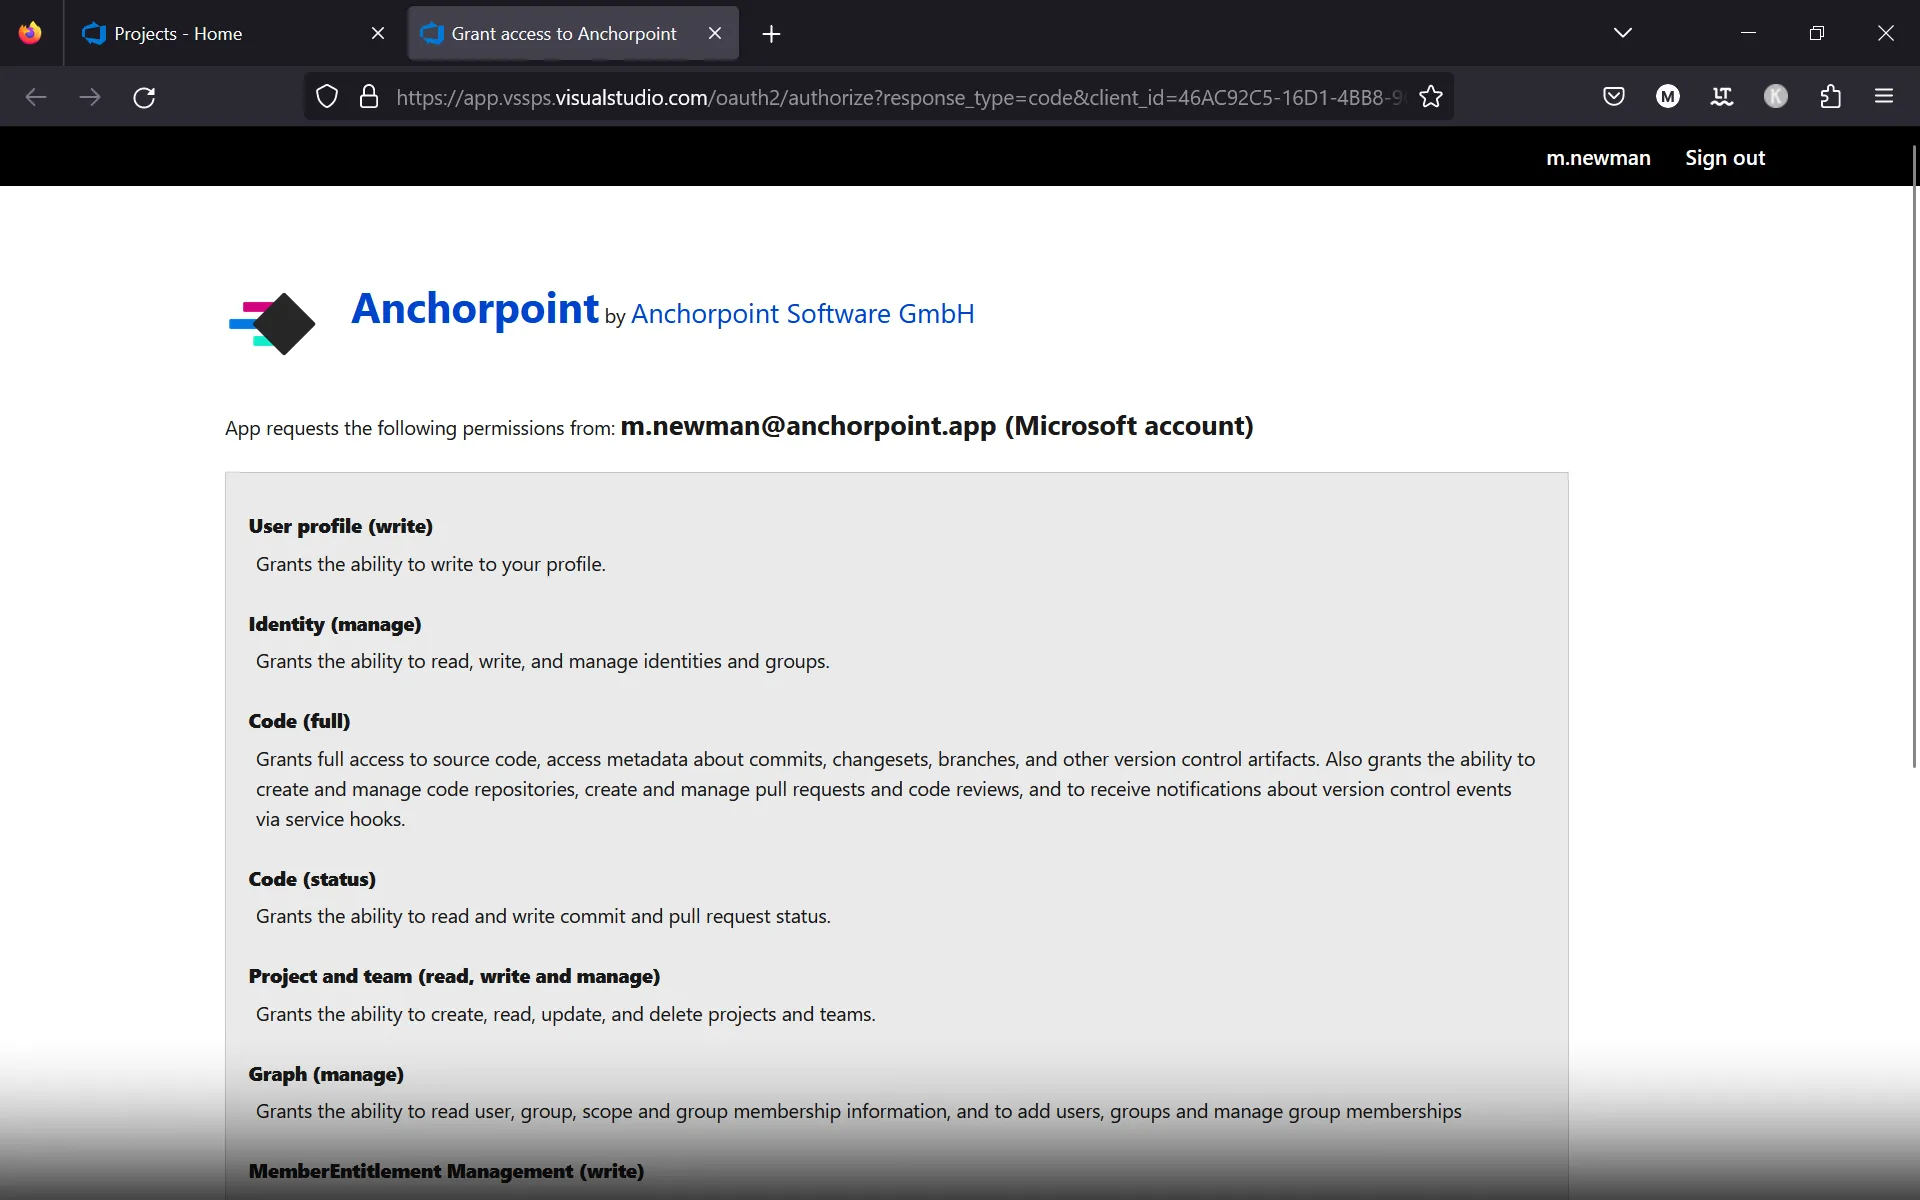
You will get a consent screen which you have to accept
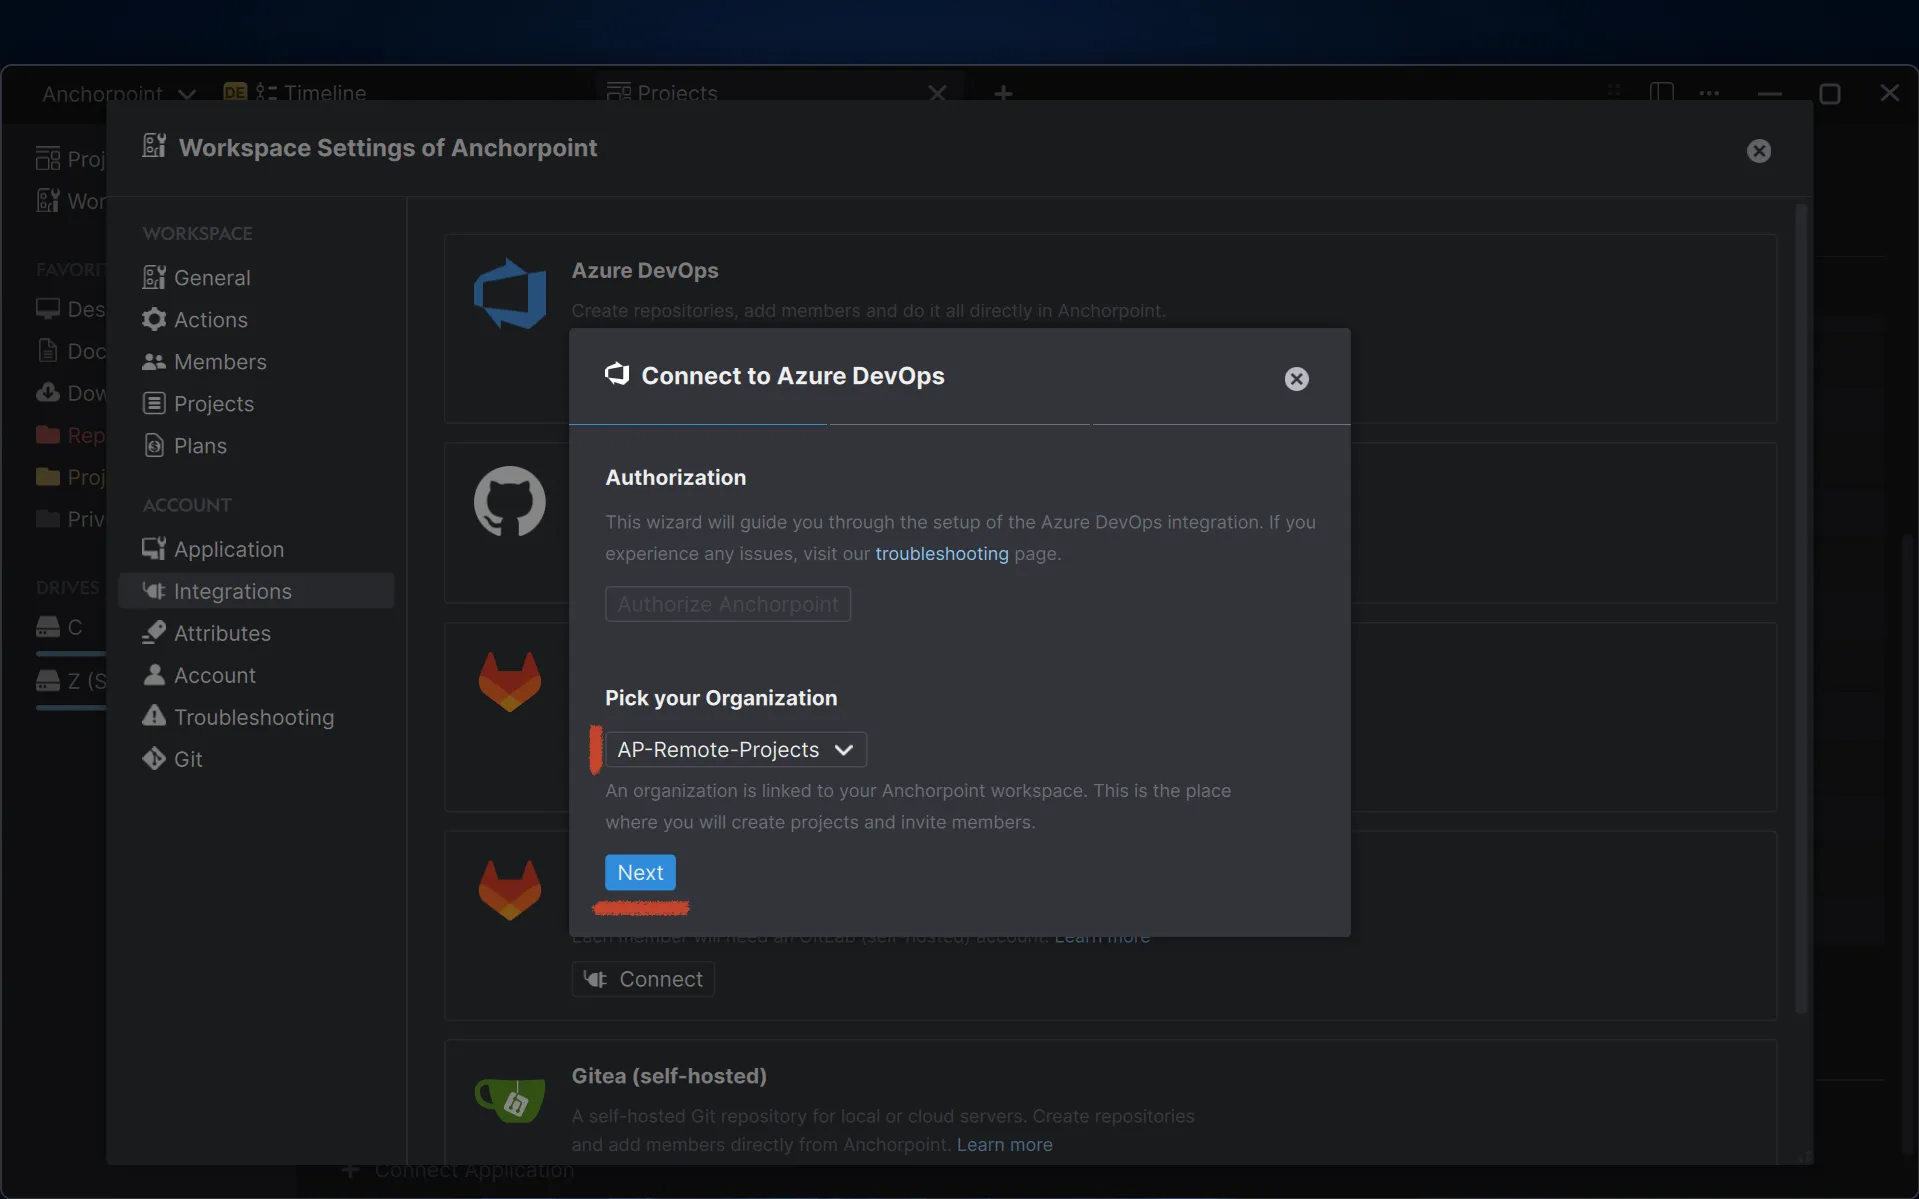
Pick your organization, where Anchorpoint should create the repositories and click on "Next"
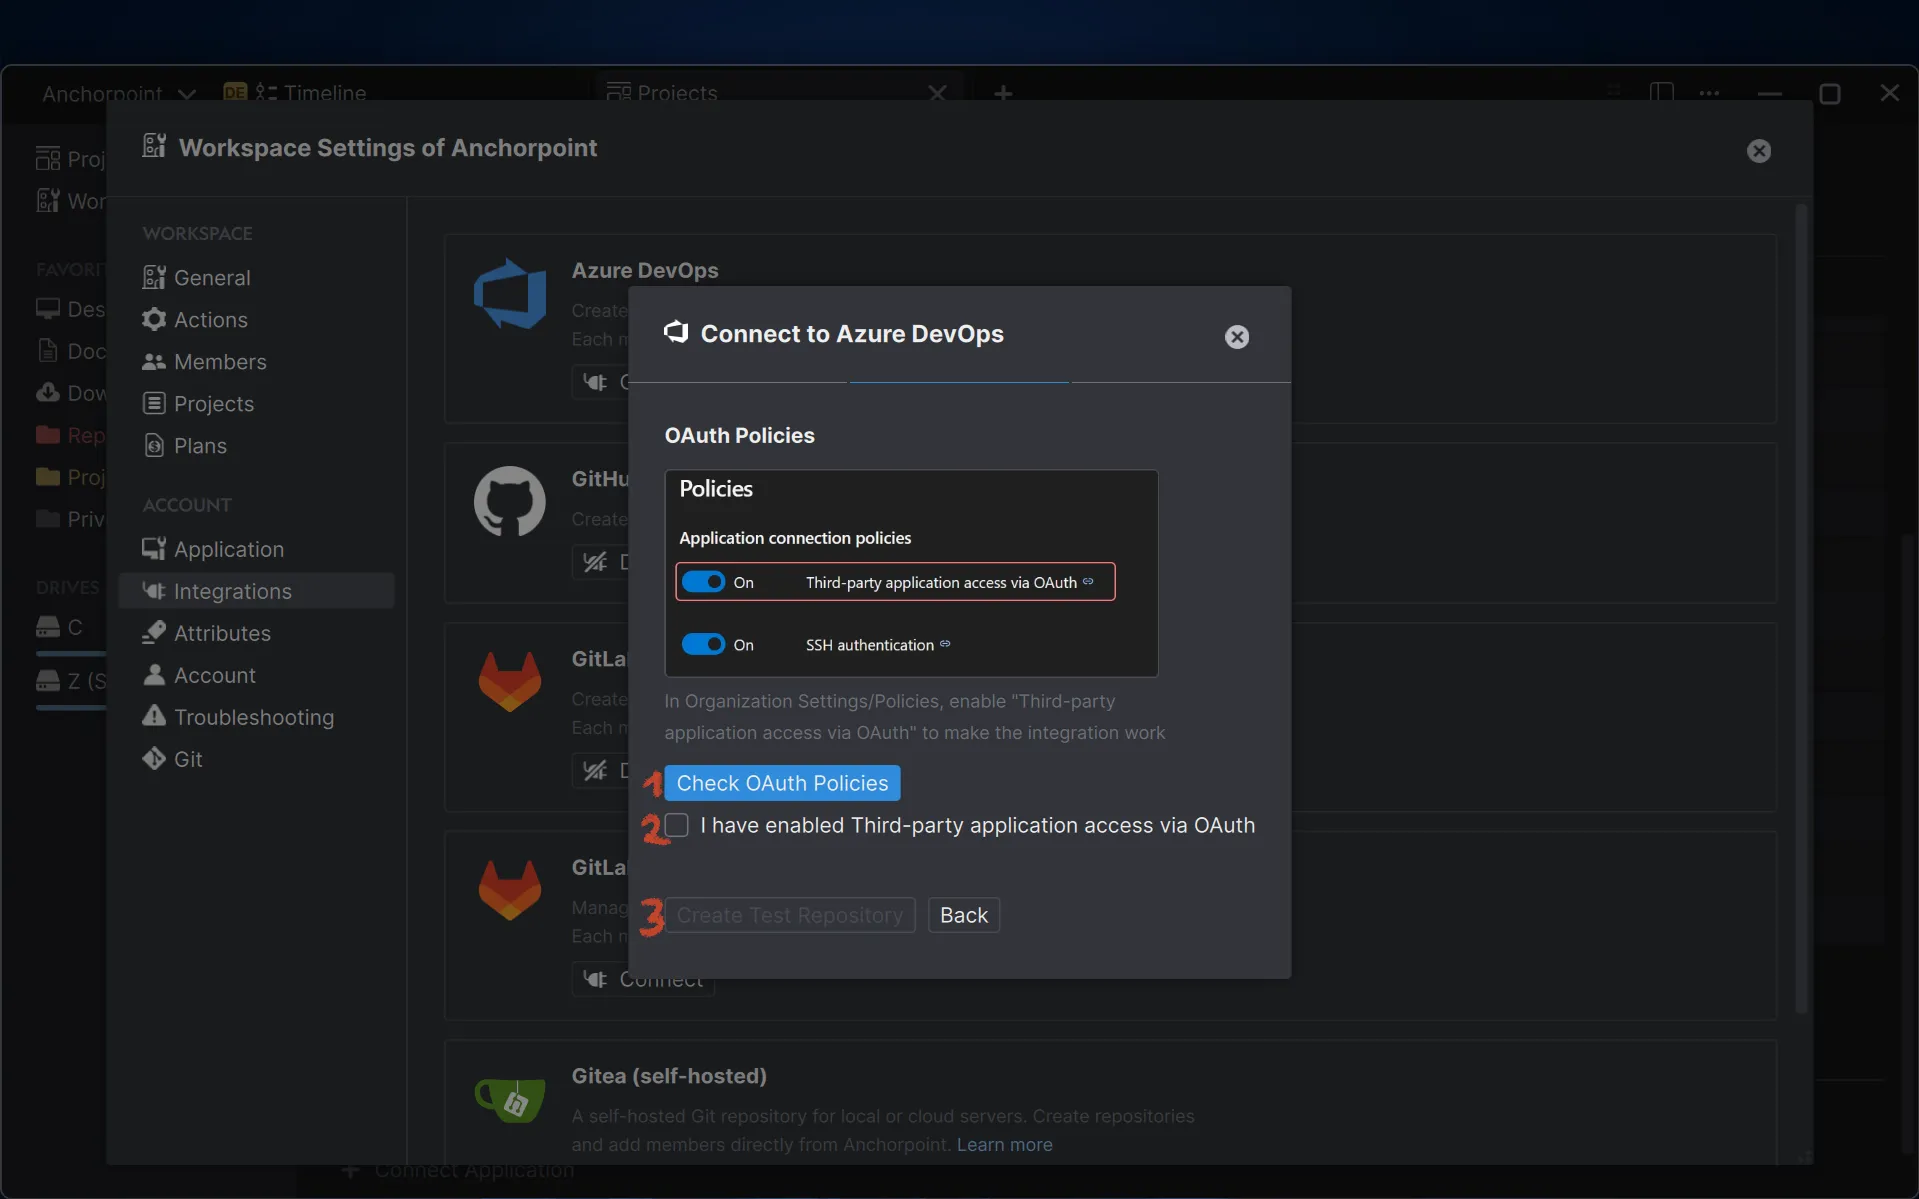
Follow the steps on the screen. You have to enable "Third-party application access via OAuth" on Azure DevOps. Then create the test repository.
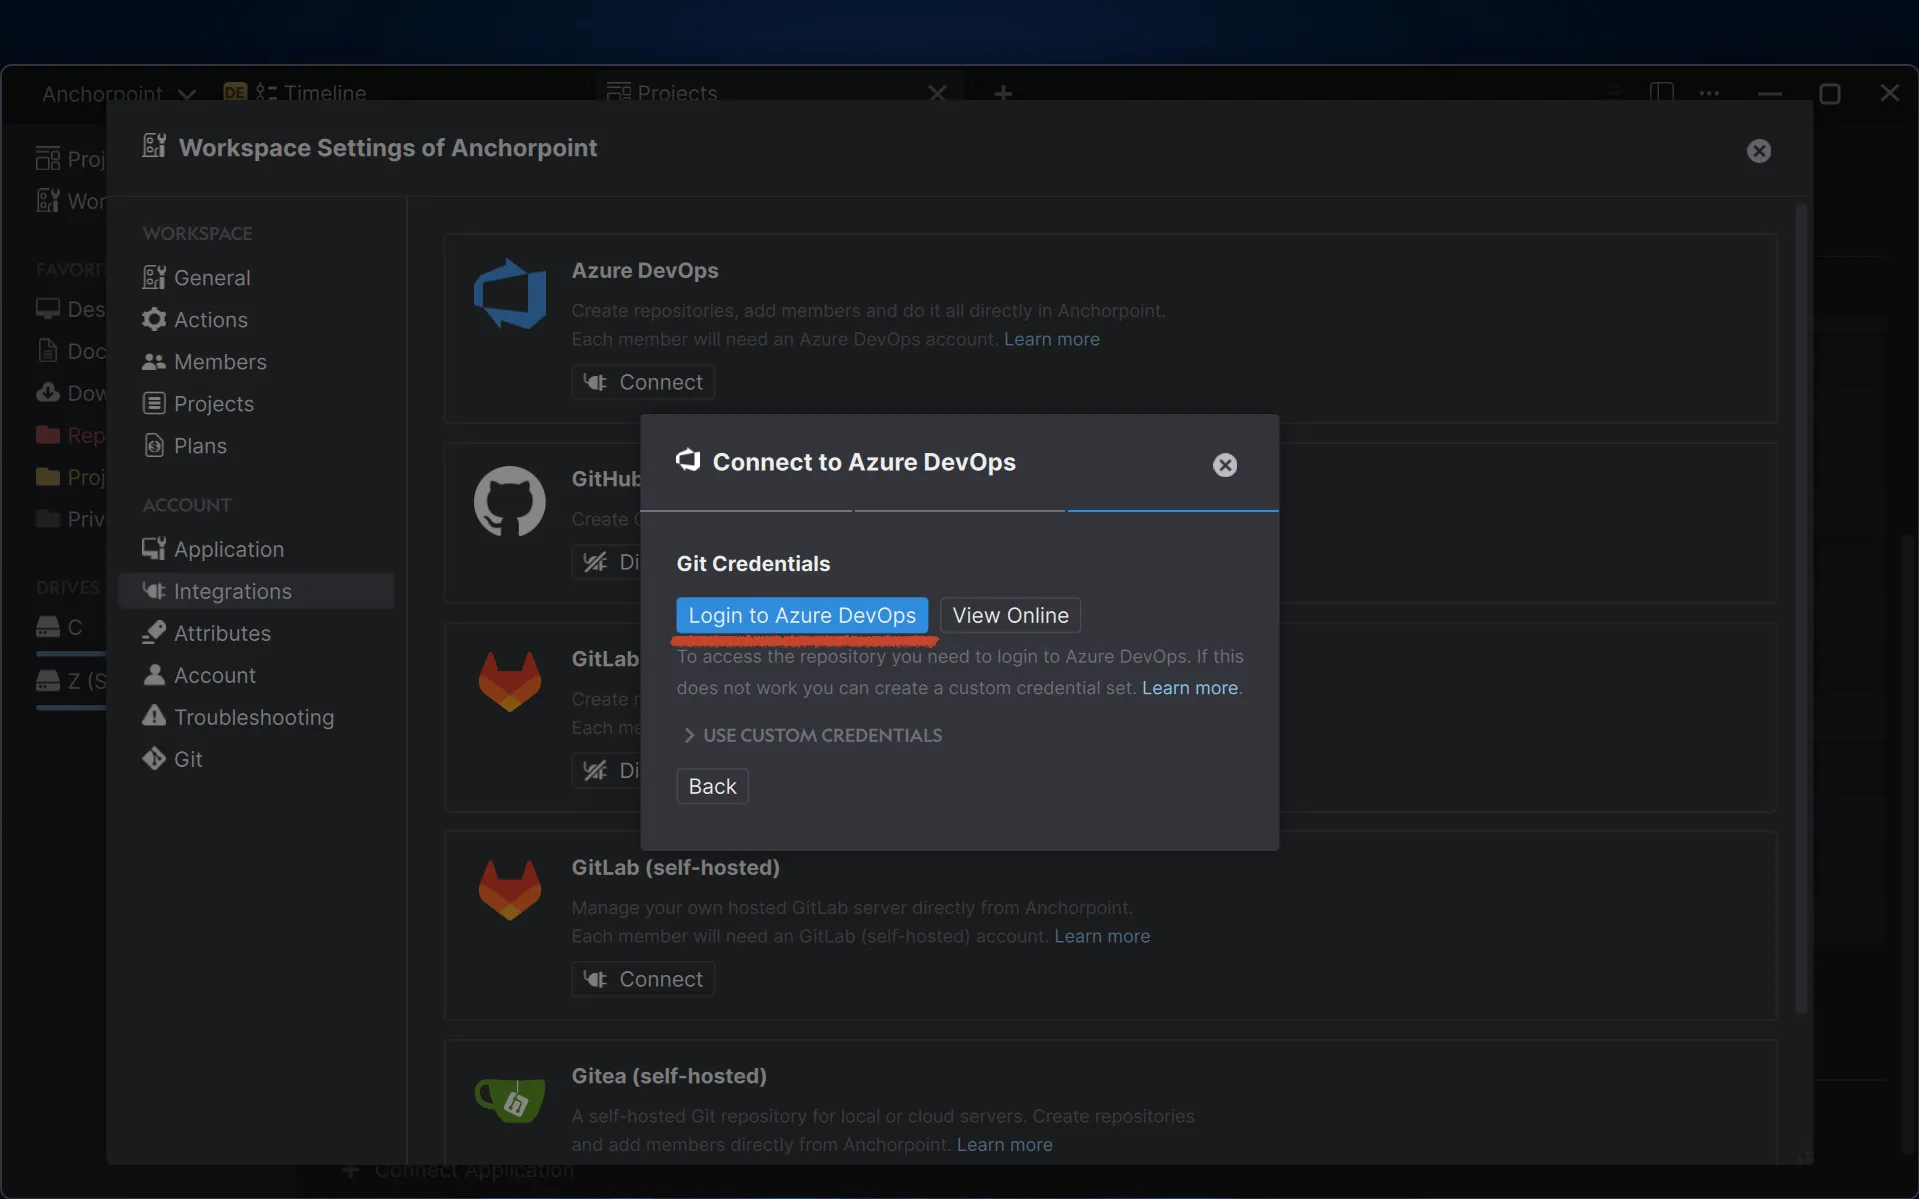
Now it's time to set up the Git credentials. Click on "Login to Azure DevOps" and a separate window will open up, where you have to login to your account.
What happens if something goes wrong
Setting up Azure DevOps can be a bit fragile. We experienced some login issues, that can be solved using a custom credential set. Just open up the section under "Use Custom Credentials" and follow the instruction on the screen.
Creating a project
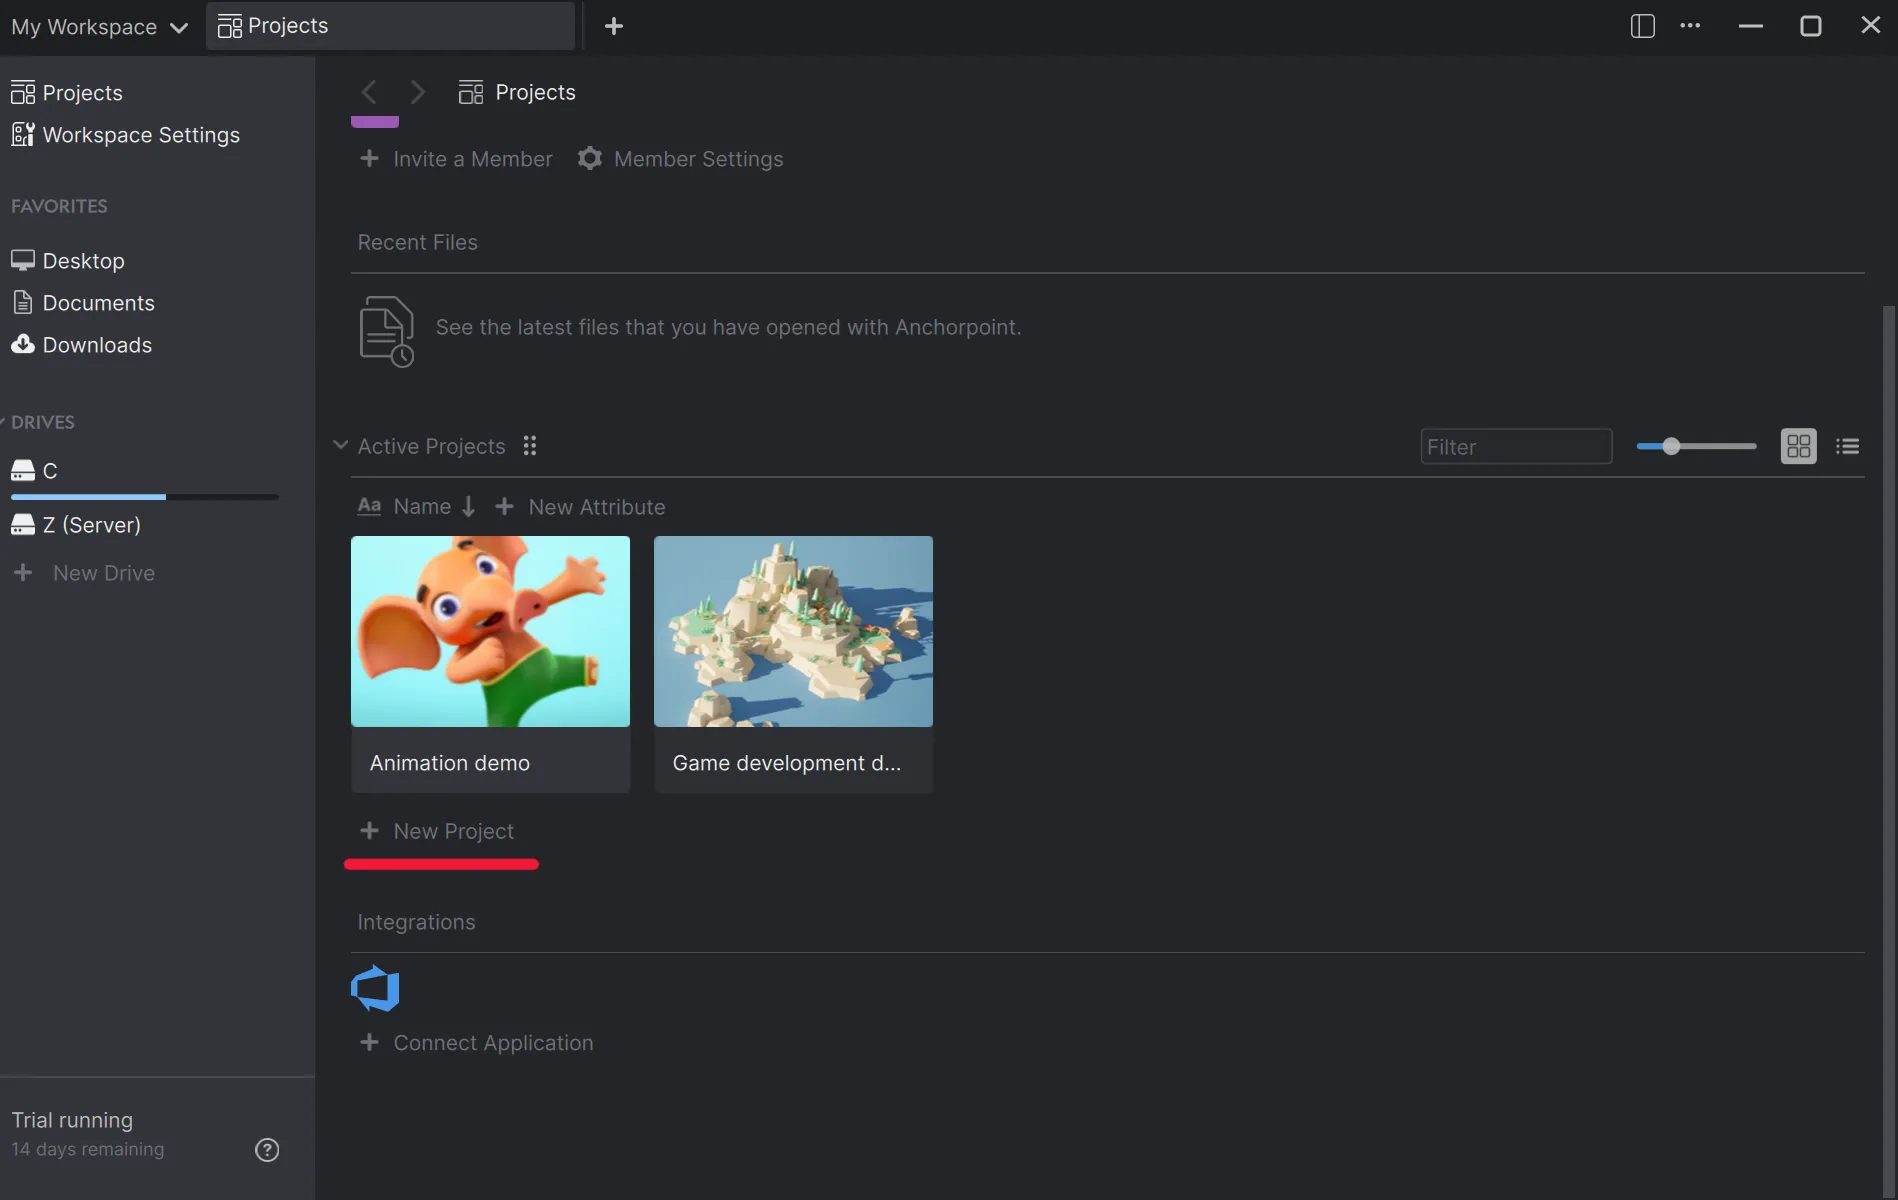
Now it's time to turn your Unreal project into a Git repository that you can upload to DevOps. Create a project in Anchorpoint and select your project folder on your hard drive. Once you create a new project in Anchorpoint, it will be also created on Azure DevOps due to the integration.
Click on the "New Project" button
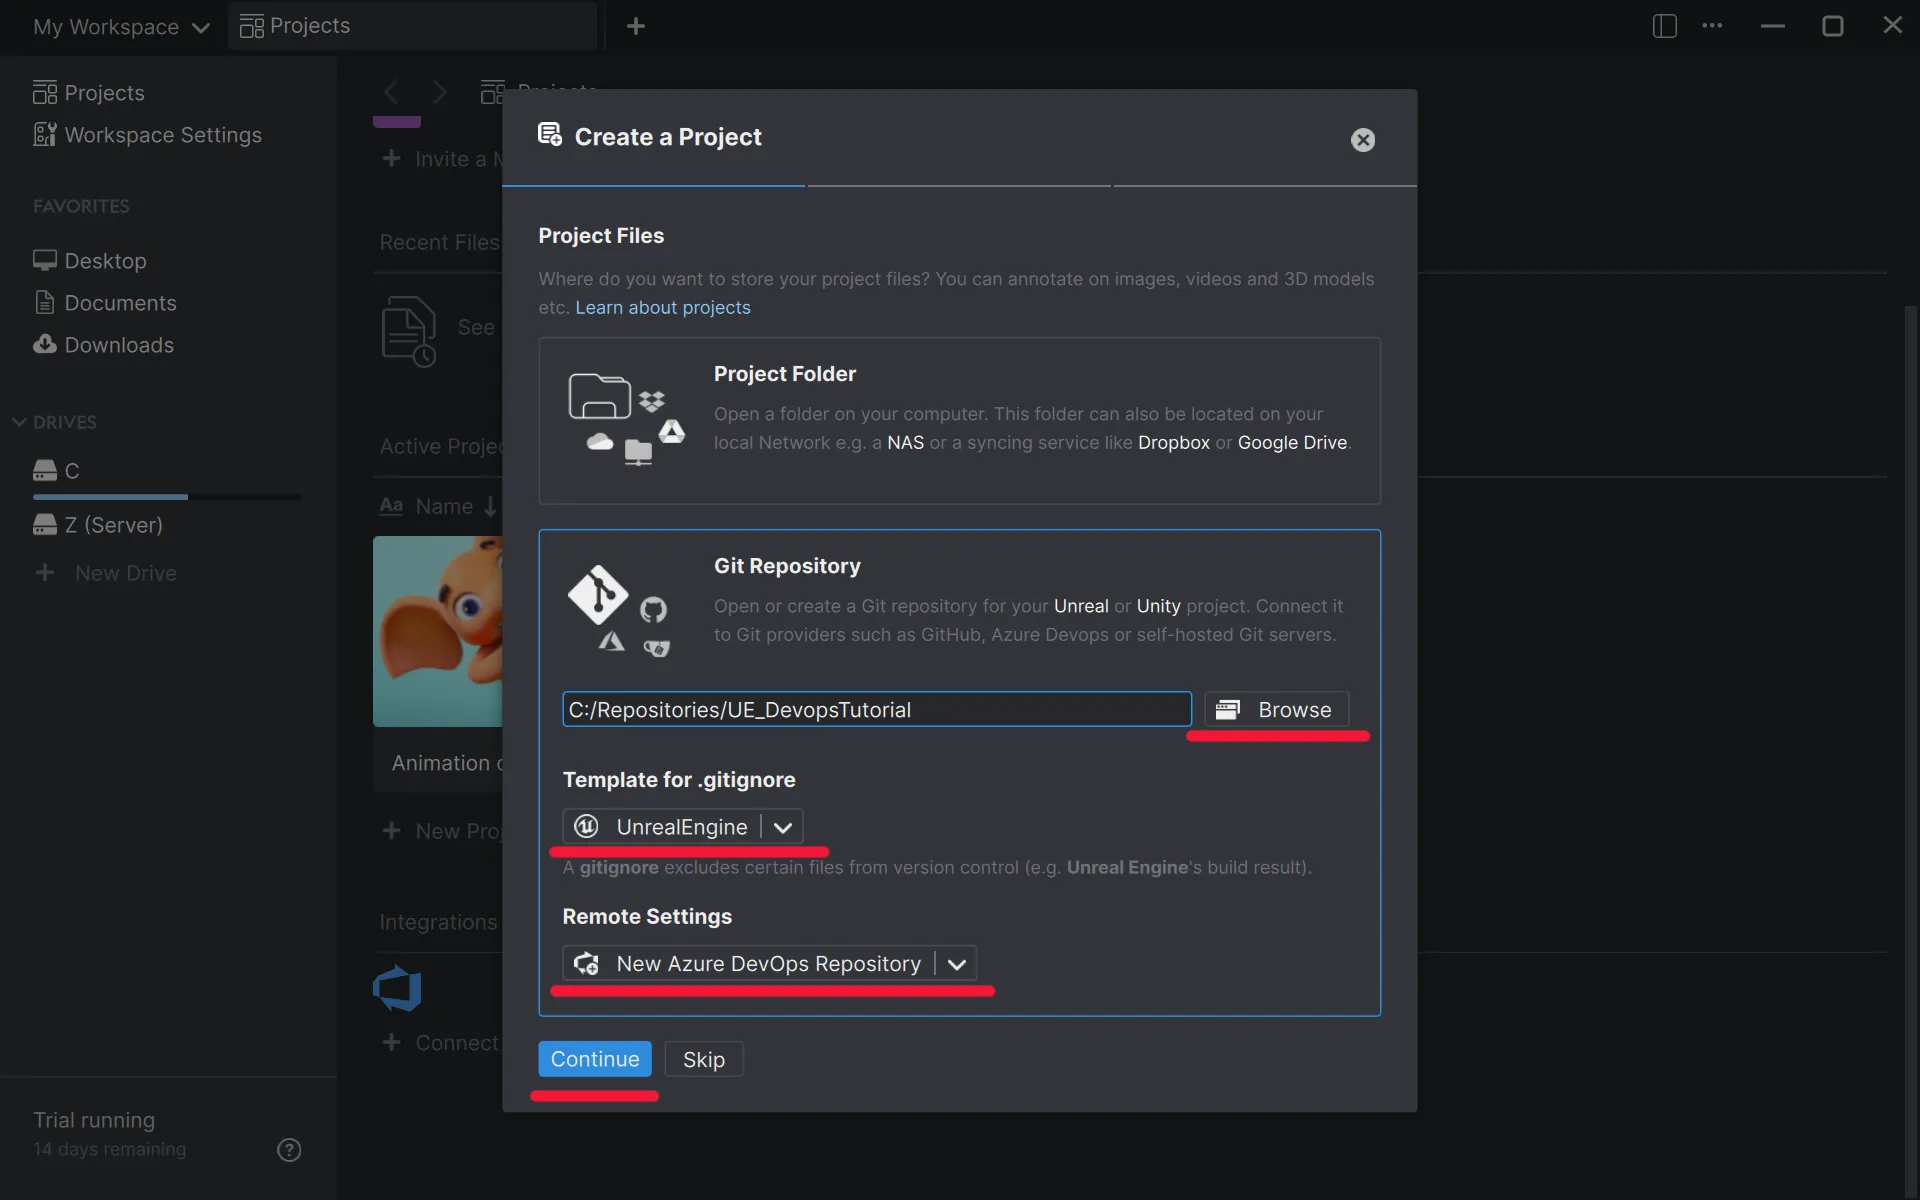
Browse to the folder with your Unreal files and make sure that the "Template for .gitignore" and the "Remote Settings" are set up correctly. Then click on "Continue"
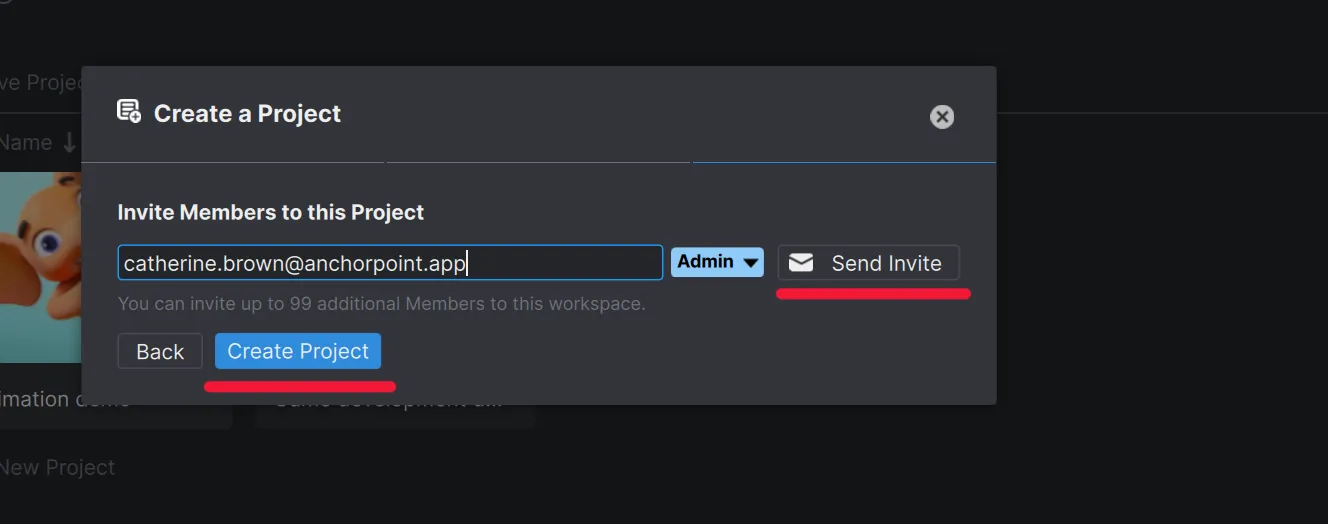
In the last step, you need to invite members, you want to collaborate with. Keep this empty if you don't want to work with them. Each member needs to have an Azure DevOps account as well.
Upload your game project to Azure DevOps
Anchorpoint detects that you have changes that haven't been committed yet. There are files on your computer that are not on the server. You need to enter a message and commit them.
When you entered the message and pressed “commit”, you created a version, which is basically a checkpoint for your project. After that, you can press “Sync” to upload them to Azure DevOps.
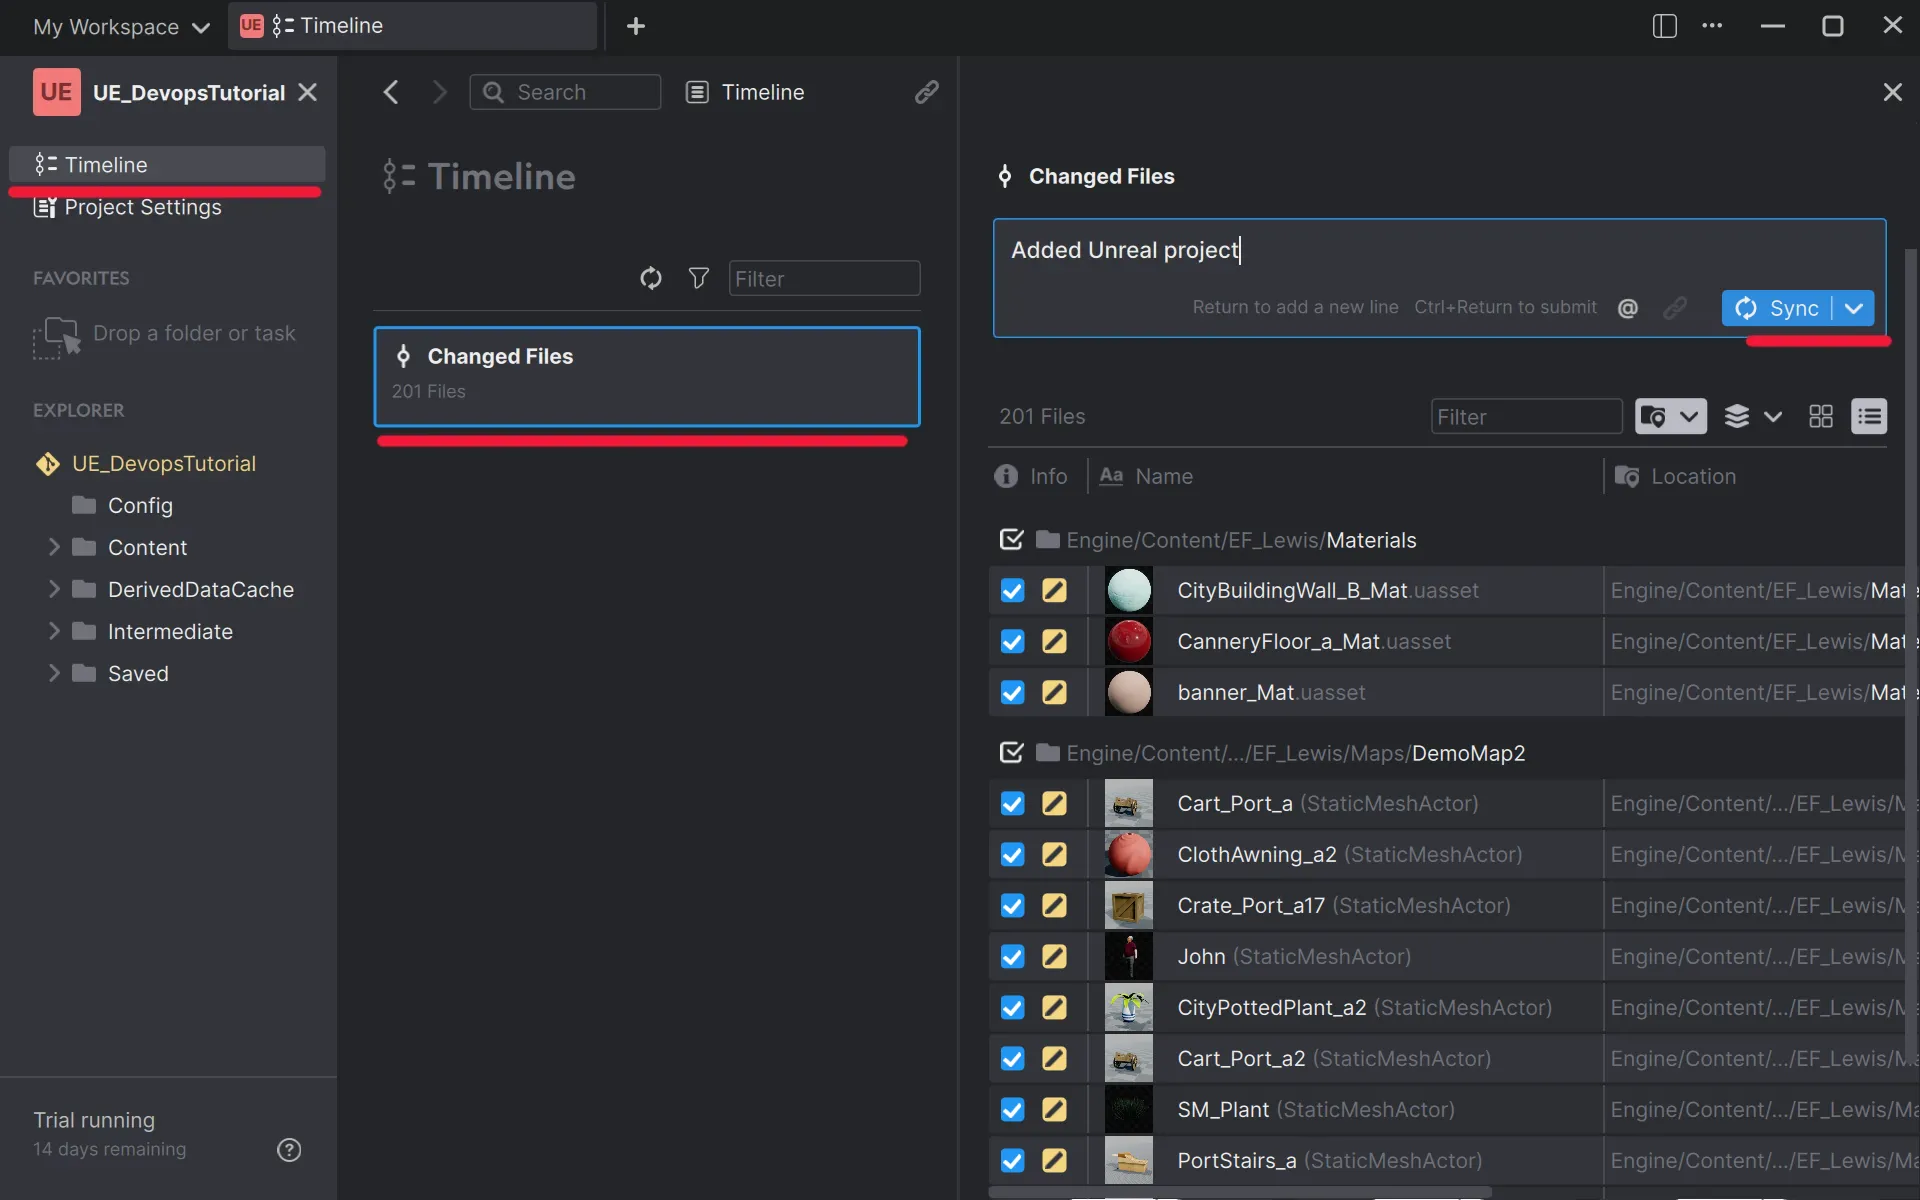
Your history is empty. Click on Timeline, then on Changed files where you will see a list of files from your project. Anchorpoint understands Unreal Engine actor files and shows the proper name and a thumbnail. Write a meaningful message and press "Sync"
Work in Unreal
Your workflow will be always like this:
You work in Unreal
You push
You work in Unreal
You push
etc.
During every push, Anchorpoint will check for file changes, which have been made by your teammates and download them, before uploading your changes.
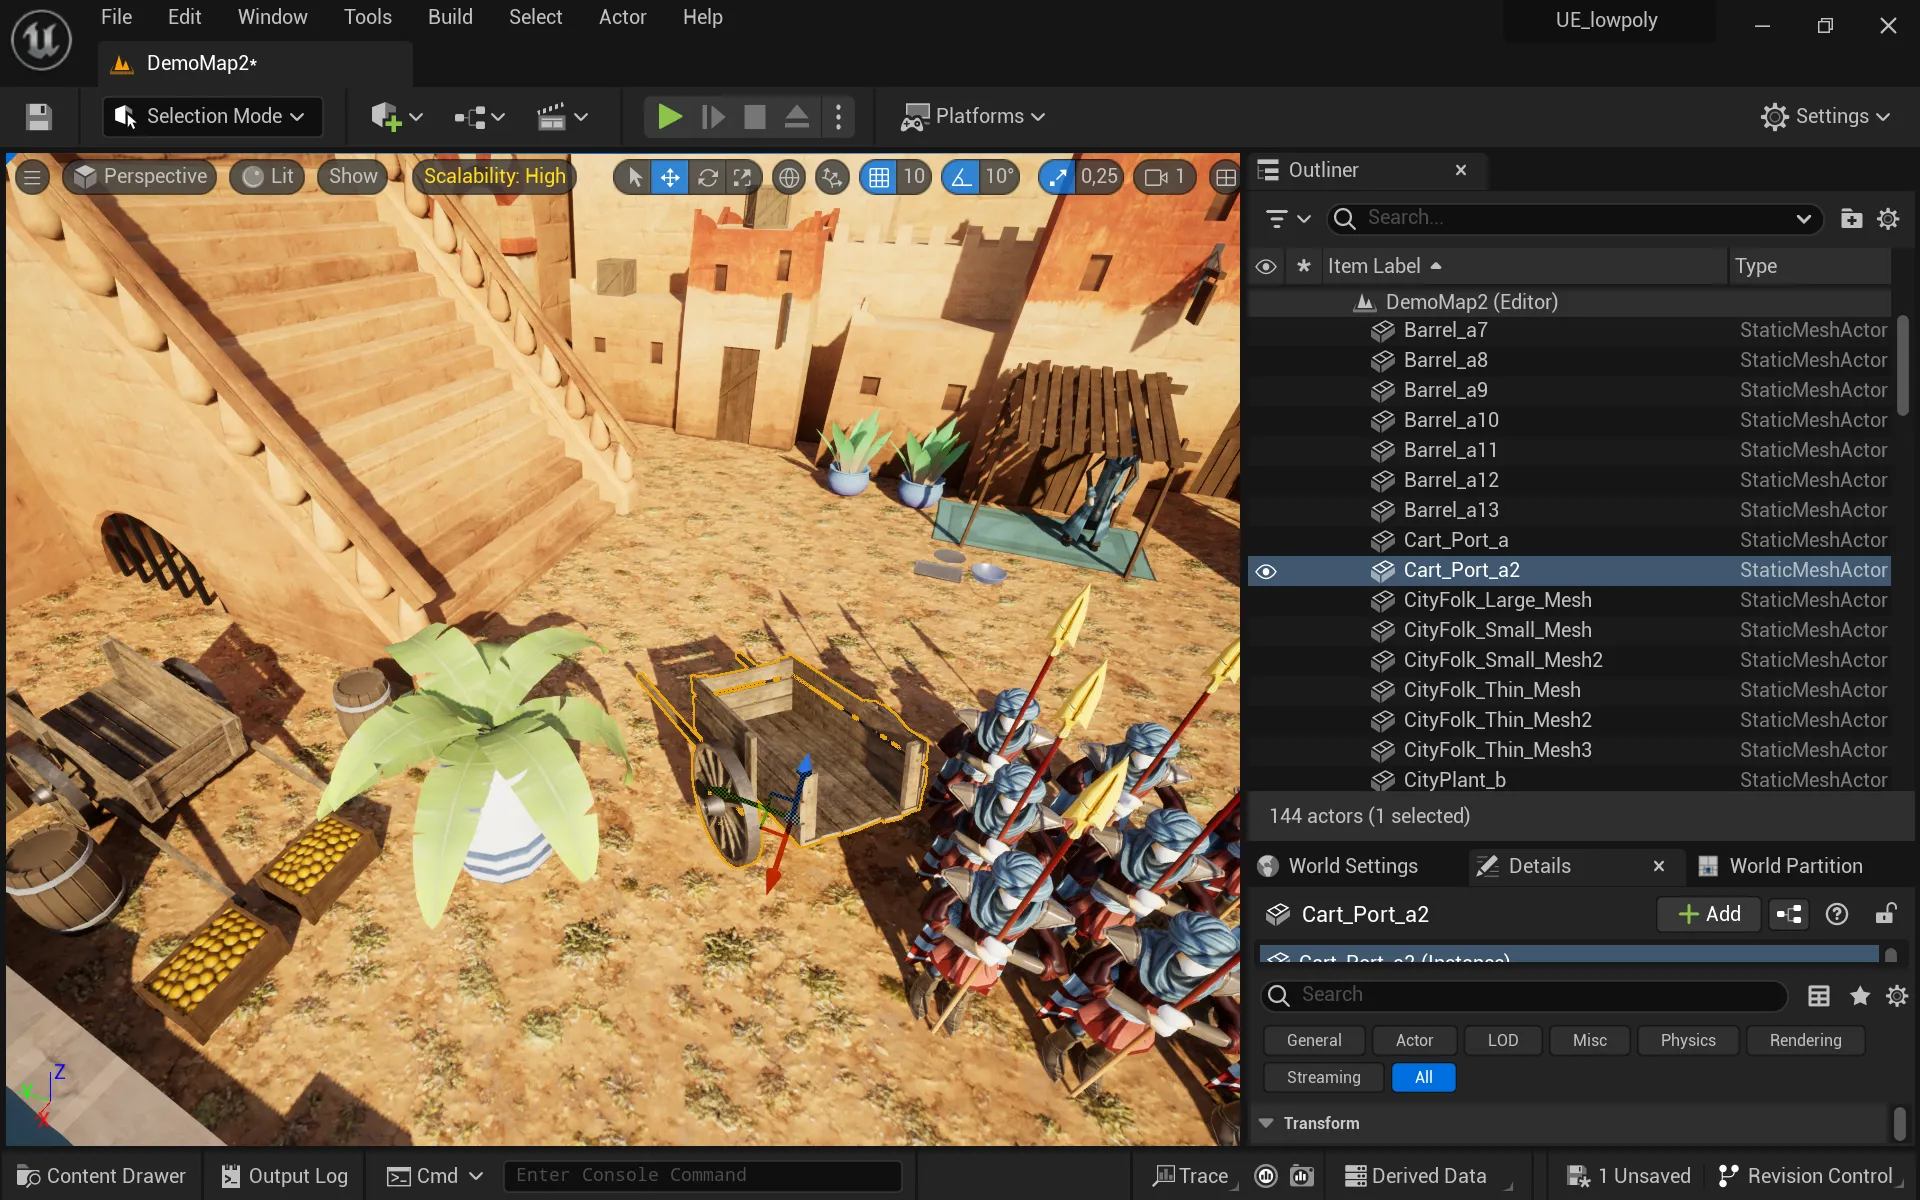
Edit your level in Unreal
Each actor, that you modify in a level will be displayed here. It will also be locked for others (marked as read only) with file locking so that conflicts will be prevented.
What your team members should do
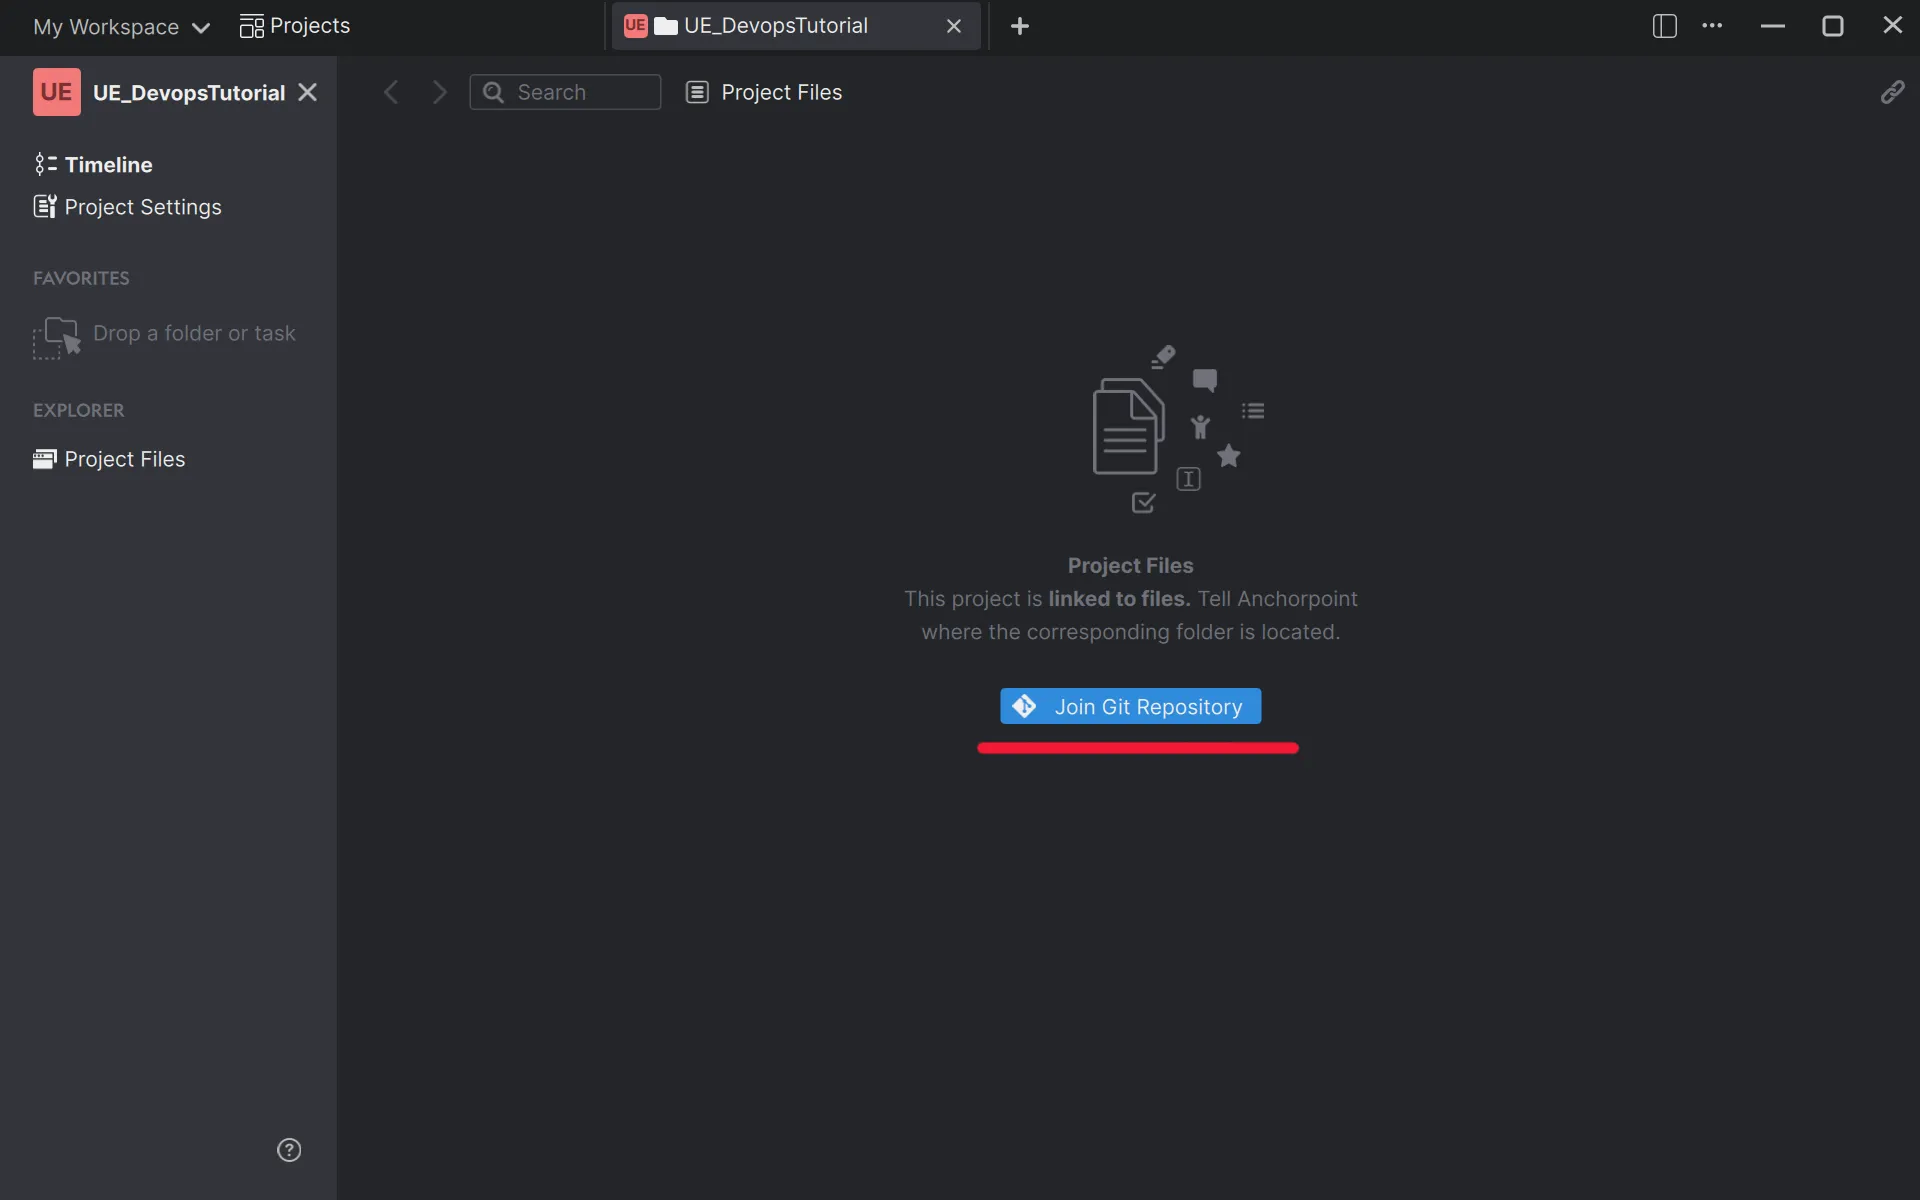
Your team member needs to have an active Azure DevOps account and an Anchorpoint account. When you invited your team member to an Anchorpoint project, which you did in the step above, they will get a notification. They simply need to click on the invite and join the project. Anchorpoint will ask them, where to store the Git repository. They have to pick an empty folder on their hard drive and then Anchorpoint will download the game project from DevOps.
Once your team member is invited to the Anchorpoint project, they will be able to download all the project files from Azure DevOps. When they do it for the first time, they also have to connect Anchorpoint and DevOps by entering the DevOps credentials
Collaborate
This is all you need to do to set up a game project with Azure DevOps and Anchorpoint. From now on, you can make changes in Unreal or Unity and commit, push and pull. That’s everything you need to know about Git.
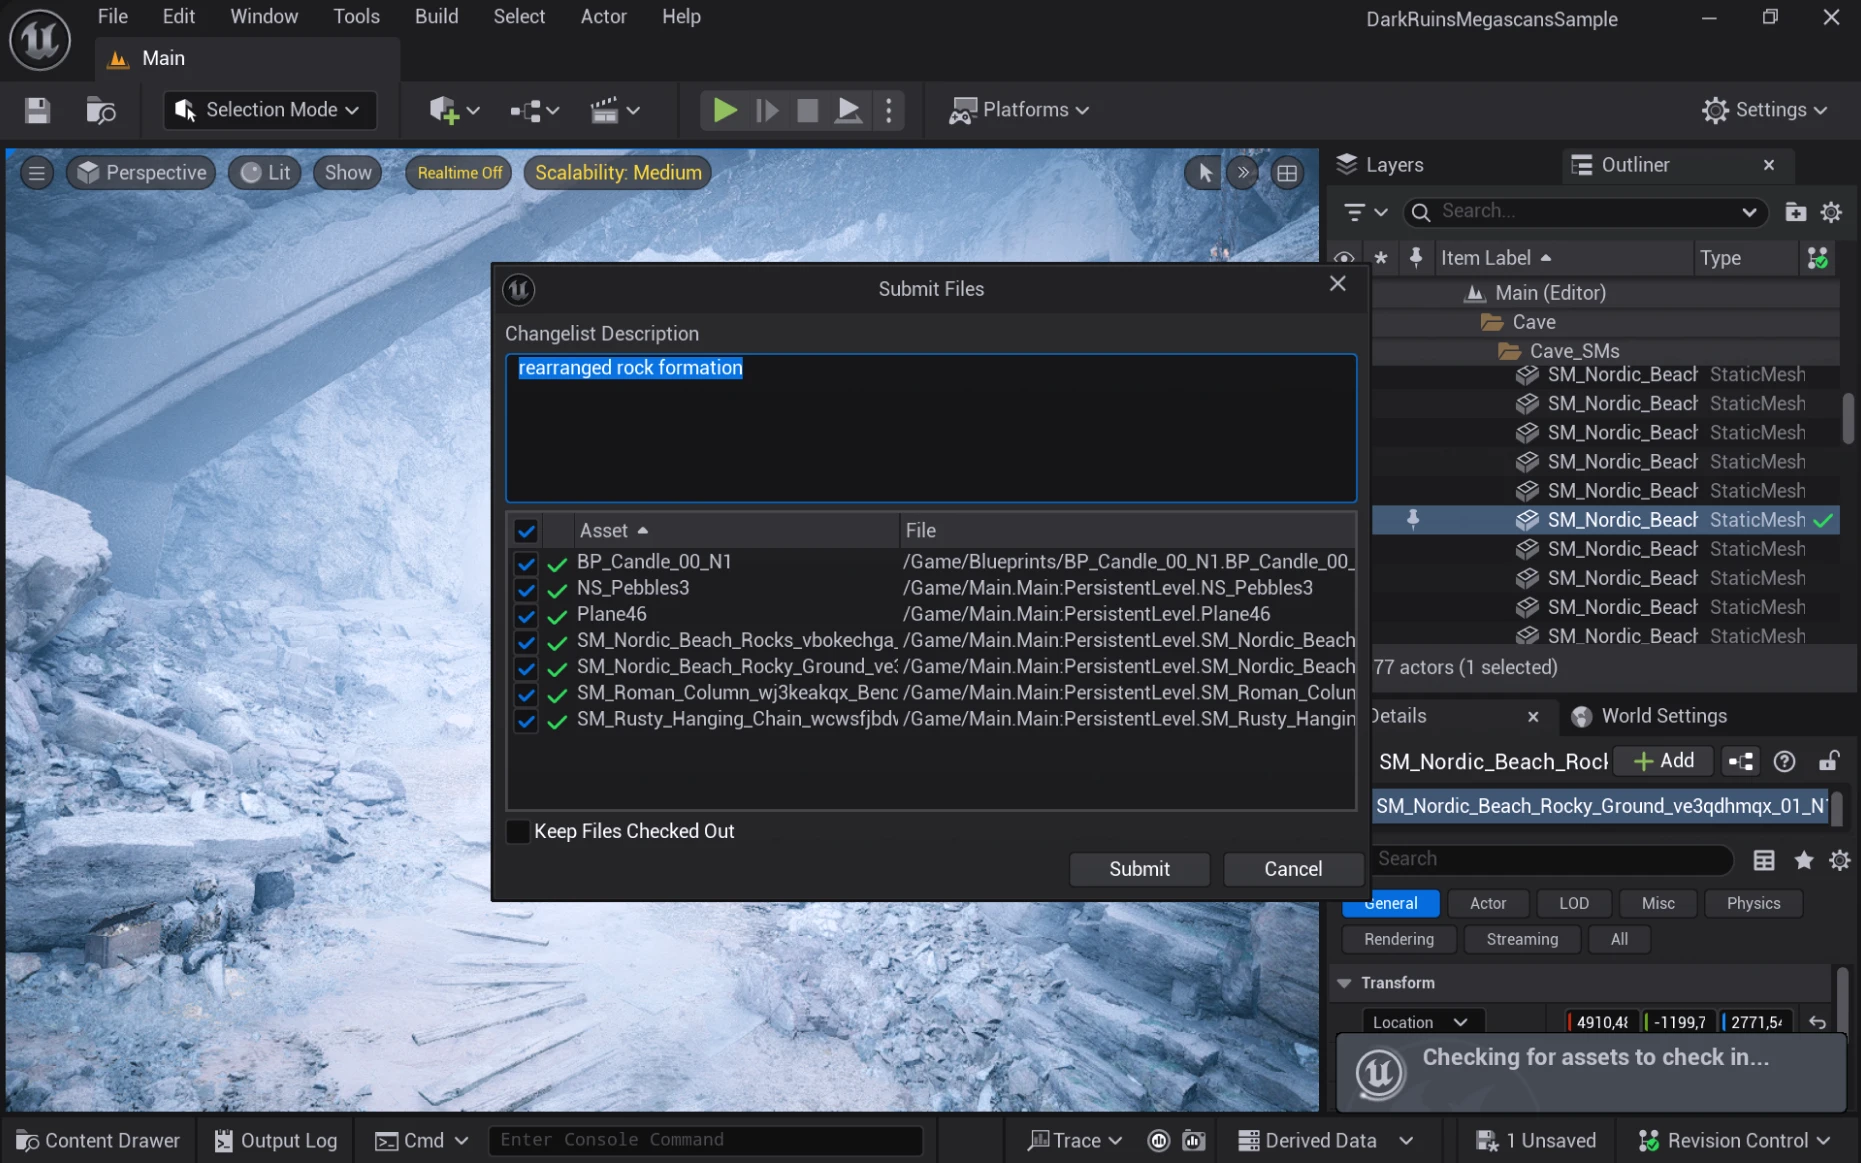
Anchorpoint Unreal Editor integration / plugin
The Anchorpoint Unreal Editor plugin integrates version control solution directly into your game development environment. This allows artists to manage assets without ever leaving Unreal Engine. The plugin automates the asset pipeline by handling Git commits, which function as project checkpoints, and file locking to prevent team members from accidentally overwriting each other's work.
Using Anchorpoint UE5 plugin to submit files directly from the Unreal Engine 5 editor to the repository.
Frequently asked questions
Do I need to be a developer to use Azure's Dev Ops?
Not with Anchorpoint! We designed the interface for non-technical users, such as artists. It simplifies complex Git workflows, providing guidance and explanations so team members can share files and report completed tasks with minimal training.
Does this setup support large binary game files?
Yes. Azure DevOps is ideal for game development because of its generous Git LFS limits. Anchorpoint automates the Git LFS configuration, meaning artists can "publish" a commit (like making a project checkpoint) without ever touching a .gitattributes file.
How much Azure DevOps cost?
Azure DevOps is free for 5 users and costs if your user count is beyond that. Take a look at their pricing. Right now, Azure DevOps does not charge for Git LFS storage. Read more on their blog. This however might change in the future.
What is a .gitignore file?
A .gitignore prevents uploading files, that should not be shared, such as build results or DerivedDataCache. Anchorpoint is setting up a .gitignore file automatically. If you want to know how to customize it, take a look at this article on how to customize your .gitignore for Unreal Engine.
Can I use the Git command line interface instead of Anchorpoint?
You can. Just make sure that you configure your .gitattributes file correctly to use Git LFS.