The Best PDM Software in 2026
Discover the best PDM software to streamline your engineering workflow and eliminate file-naming chaos.
June 11, 2026
6
min read

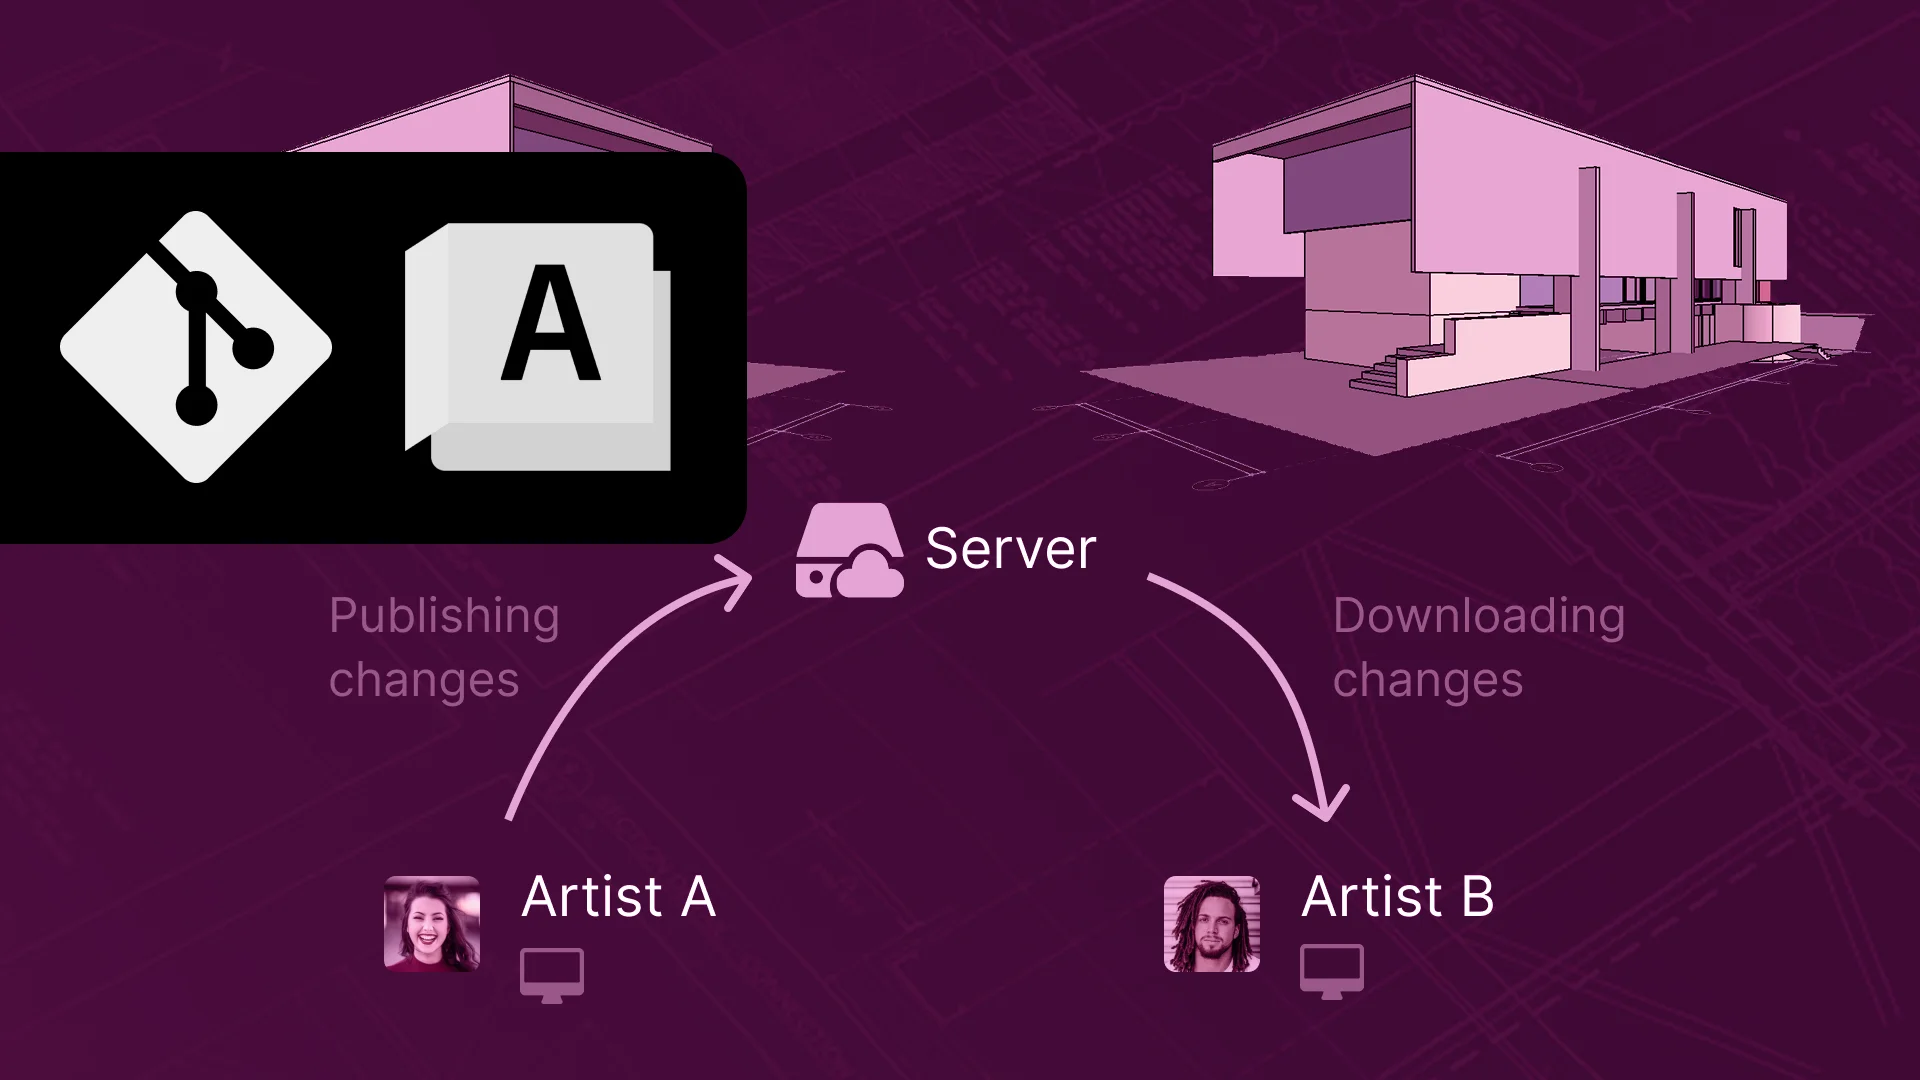
As your projects become more defined and binaries are added to your Git repository, you will encounter issues with execution speed, file size limits, bandwidth, and storage limits.
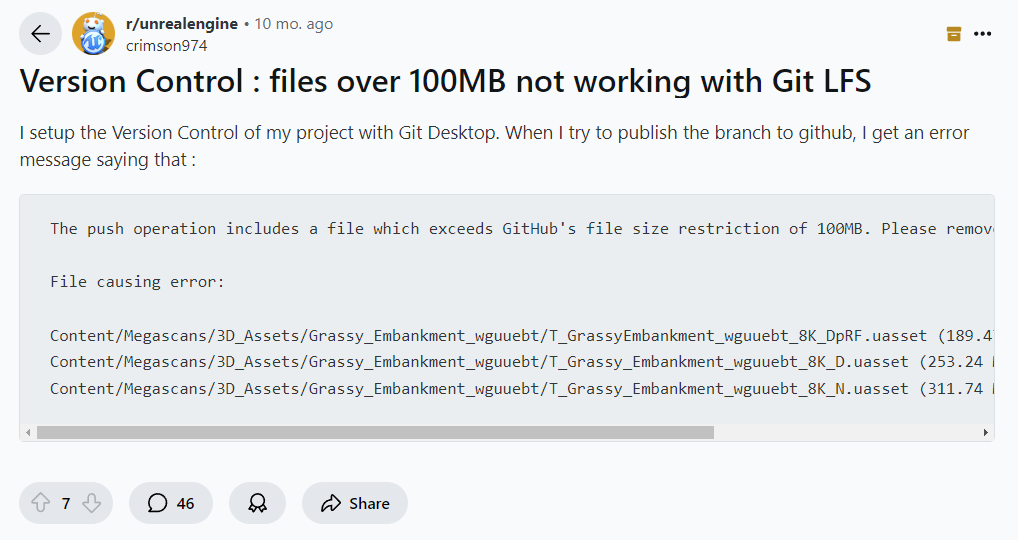
Depending on your repository host, you may encounter file size limits, with 100MB on GitHub and GitLab and 5GB on Azure DevOps without Git LFS. This wouldn't be the only issue, as without Git LFS, clones will take longer to download because you have to download the entire history, and repo sizes on disk will grow.
But what is Git LFS ? Released by GitHub in 2015, it's a much-needed extension to Git to handle large binary files, improve the performance of Git repositories, and add options like shallow cloning (cloning a repo with minimal or custom history, such as the last 2 commits history).
Without Git LFS, Git pushes the binary directly to the repository, which can be slow and fail if it exceeds the hosting limit (100 MB GitHub/GitLab or 5 GB Azure DevOps).
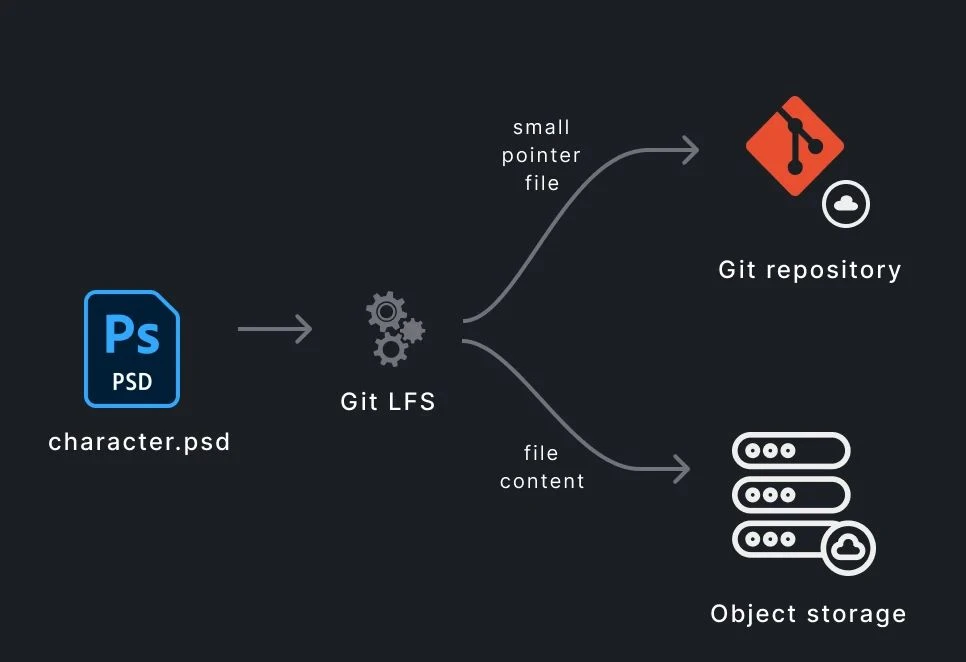
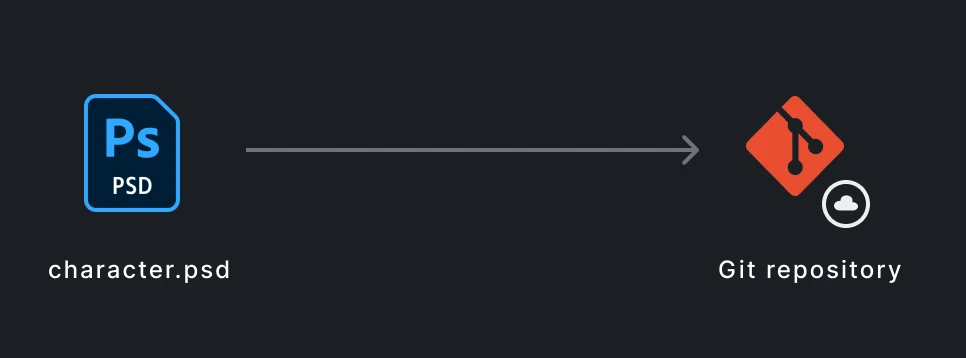
With Git LFS, the extension splits the working file (character.psd) into a small pointer file, which is stored in the Git repository, and the actual content, which is stored in an infinitely scalable object store. File limits start at around 2GB, or unlimited on certain hosts such as Azure DevOps.
The easiest and safest way to migrate your repo to Git LFS is to merge branches into main first, and then create a new repo from scratch with Git LFS installed and proper .gitattributes, unless you use a Git client like Anchorpoint that does this out of the box. This means you'll lose your previous repo history, but it's the safest way for the average user.
Some projects are quite complex, where it is absolutely necessary to keep the history and everything related to CI/CD. In this case, you can do a semi-migration where you commit the latest or all files as Git LFS with git bash or any Git client, like Anchorpoint, and from that point on, the project will become Git LFS based on what files you have tracked, history will be kept, but the old binary files will not become LFS and will still take up space.
Shallow cloning gives you the option to clone only the last X commits. For example, when cloning a repo, you can clone only the last 2 commits instead of 100 if your project is huge and the other 98 are no longer needed.
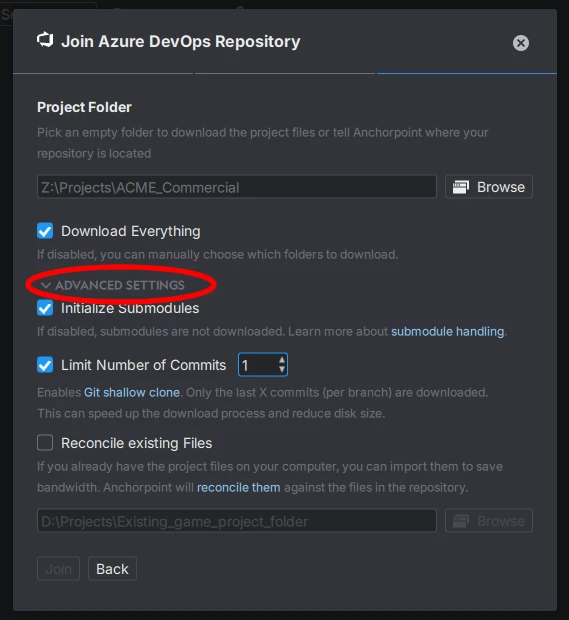
If you decide that a shallow clone is needed, first merge all the branches into main and delete the rest, since Anchorpoint shallow clone uses the no-single-branch flag and it might recreate those branches with old binaries on the clone. After everyone on your team has shallow cloned or just cloned the repo, you can start creating new branches as needed and continue working.
The most advanced option is to use the LFS migrate import command, a mode that will migrate the entire project to Git LFS, but is "destructive" in the sense that it will rewrite your Git history, changing commits and generating new commit SHAs, which will break some projects. There is a submode --no-rewrite, but it requires a lot of work and testing.
The big advantage of using this option is that it will turn your entire project into a Git LFS project, freeing up space and optimizing the speed of the repo, but it will rewrite your Git history, and on complex projects it will cause a lot of conflicts and problems, so it is only recommended for advanced dev ops officers. For simple projects, or projects with a few files that are just starting to get complex, it might be worth a try, but duplicate the repo to test, as this is a one-way process.
After enabling Git LFS, if you're not using a Git client that handles Git LFS tracks on its own, you'll need to add these files to the track pattern in the .gitattributes file before making your commit. This file tells Git which file extensions to handle as LFS. In other words, which files should not be stored directly in the Git repository.
An example:
# init .git folder
git init# installing Git LFS to handle large binary files
git lfs install# it will display the most used binary files, to use in next command
git lfs migrate info --everything# it will migrate your current files to Git LFS, in this example we choose binary files such as .png and .wav and also a .gitattributes file will be created for future commits to handle these files as Git LFS
git lfs migrate import --include="*.png,*.wav" --everything# to track specific new files, for example, all files with the .fbx extension
git lfs track "*.fbx"