Setting up a CI/CD build pipeline for Unity using GitHub Actions
In this tutorial, you will learn how to create a basic CI/CD pipeline for Unity using GitHub and GitHub Actions. This is useful if you want to automate many steps in your development process.
George Neguceanu
01 Jul 2024
Updated on
01 Jul 2024
9
min read
Content
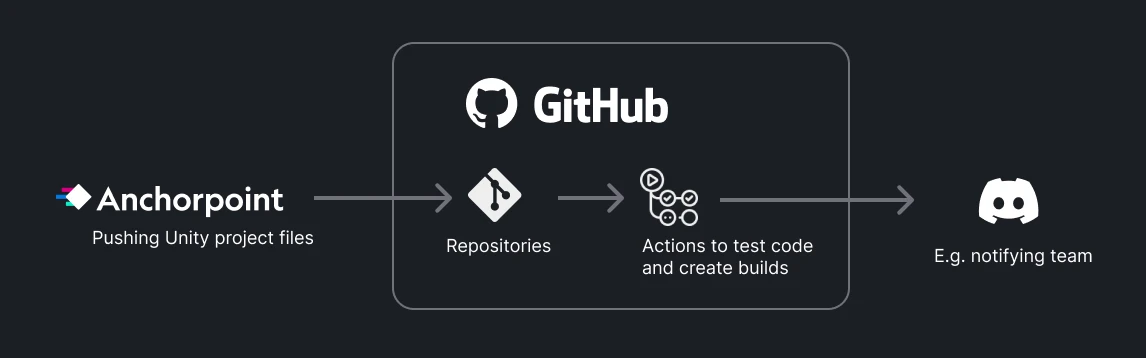
Continuous integration and continuous deployment (CI/CD) is a DevOps practice that helps teams develop and release quality software quickly and efficiently. In the Unity environment, CI/CD can help you automate many tasks, from automatically testing multiple builds to building for multiple platforms with a single action.
An example of the steps you can automate with CI/CD with one click
Continuous integration
This is the practice of using version control applications such as Anchorpoint, GitHub/GitHub Desktop or Perforce linked to a repository to commit and merge code from multiple team members, auto test, and create builds.
Instead of using local backups and versioning, and especially when working on a Unity project in a team, with CI you can store the code in a Git repository like Github / Azure DevOps, use your favorite version control application to commit, merge code, and on certain trigger actions, test the code and even create a build on every major change in the project.
Continuous deployment
Continuous deployment is related to CI and is the stage where code is tested and deployed to QA, a staging area, or even directly to app stores.
Imagine you are working on a mobile game for Android and iOS. When you push code changes to your repository, if your CI actions are triggered on push, it will test the code, create builds, and even (if your script is configured) notify your team members on Slack, Discord, GitHub that builds are ready to be tested/ previewed.
Why use it?
A simple pipeline can help catch bugs early in the production process, and automatically create and deploy builds for the team leads to preview and QA to test on every commit, or daily, weekly. This speeds up the production process and reduces the overhead for team members, allowing them to focus on their specialty (coding, art, design).
In my time in the game industry, CI/CD was and is used by most medium to large companies to merge branches and quickly deliver clean builds to the dev team and QA. It's also useful on a small team where you can test and deploy builds to multiple platforms in a single push using GitHub Actions.
At the end or beginning of each day/week, QA has a new release to test, producers and designers have access to updated builds to review, even if the DevOps/ programmer has already finished the day or is otherwise unavailable, because the pipeline has been run automatically.
Actors in a CI/CD pipeline for Unity
If you follow the instructions in this article, you will end up with a basic CI/CD pipeline where every time a change is committed to your repository, the GitHub action triggers the automatic testing of your project and the creation of builds for multiple platforms.
How to setup the build pipeline using GitHub Actions
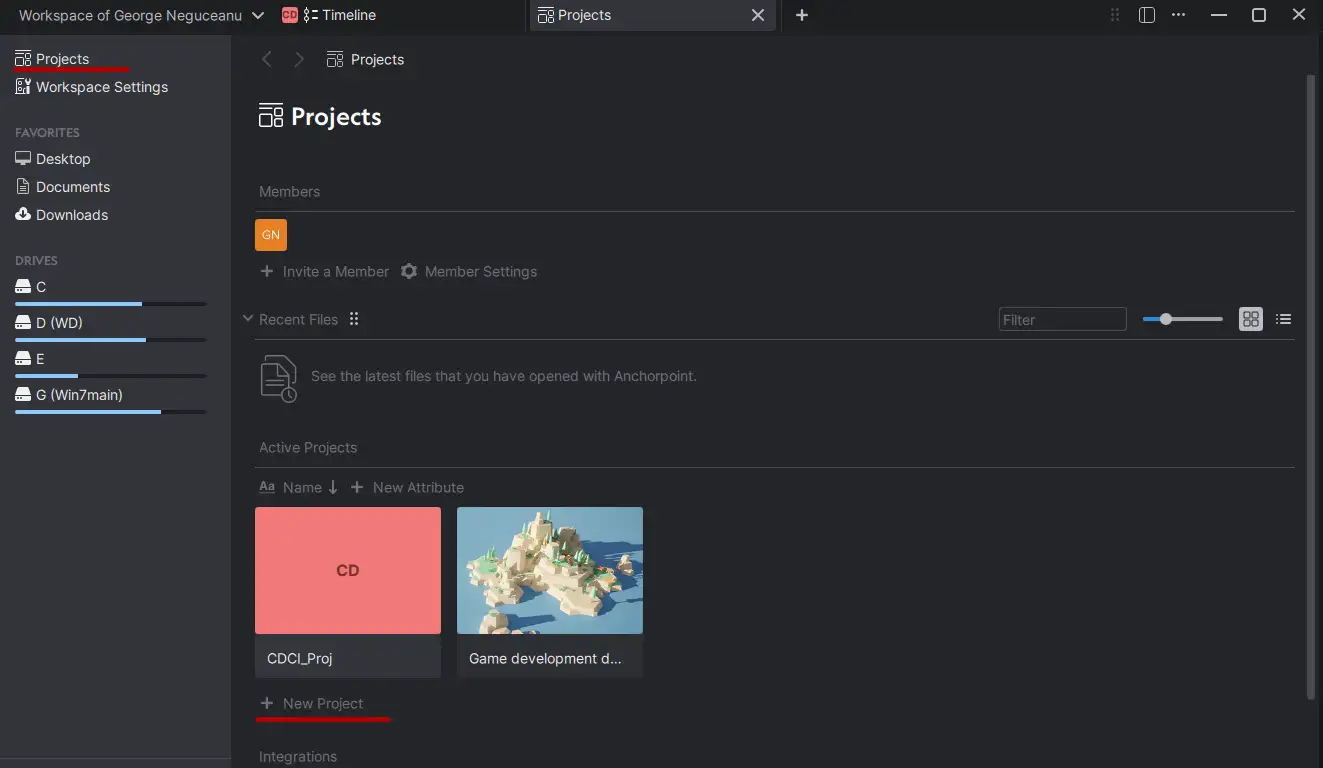
In this example, we will use a GitHub account and an Anchorpoint account to set up our project. This can take up to an hour, depending on your experience with these tools.
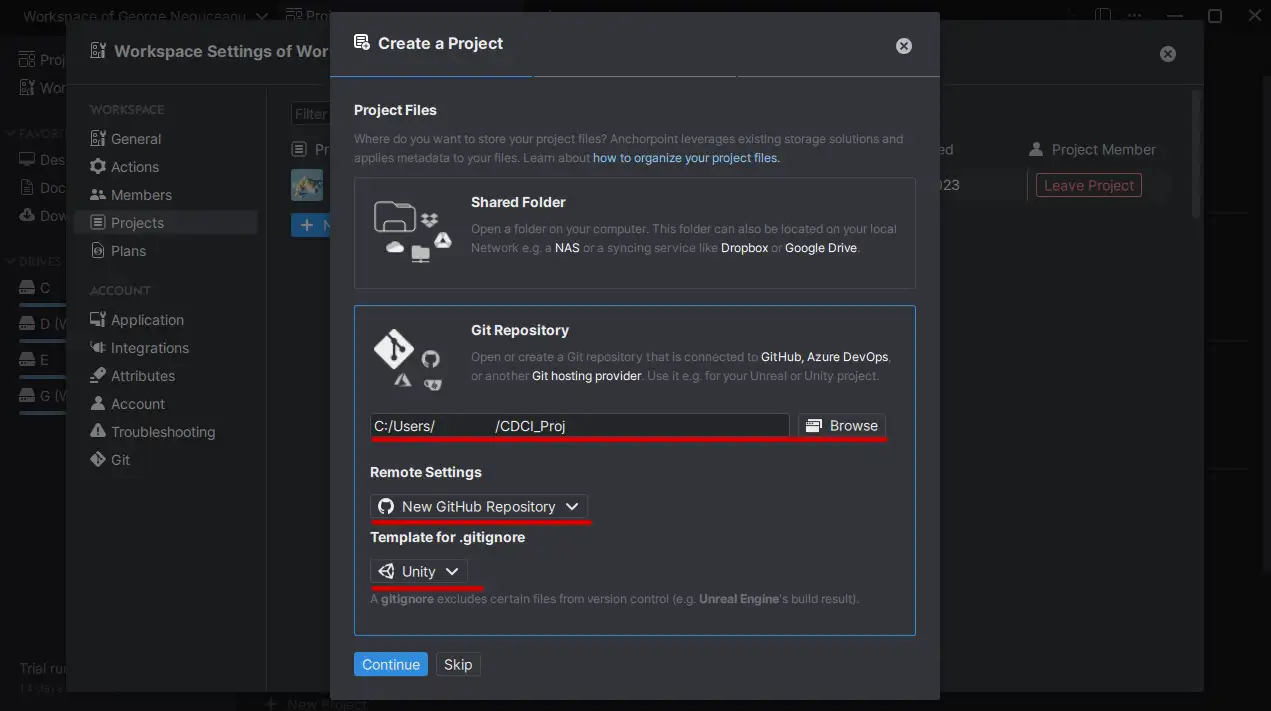
Setting up a GitHub repository
In this example we use Anchorpoint, but you can use any Git client of your choice. If you are new to both applications, take a look at this article on How to setup GitHub for Unity.
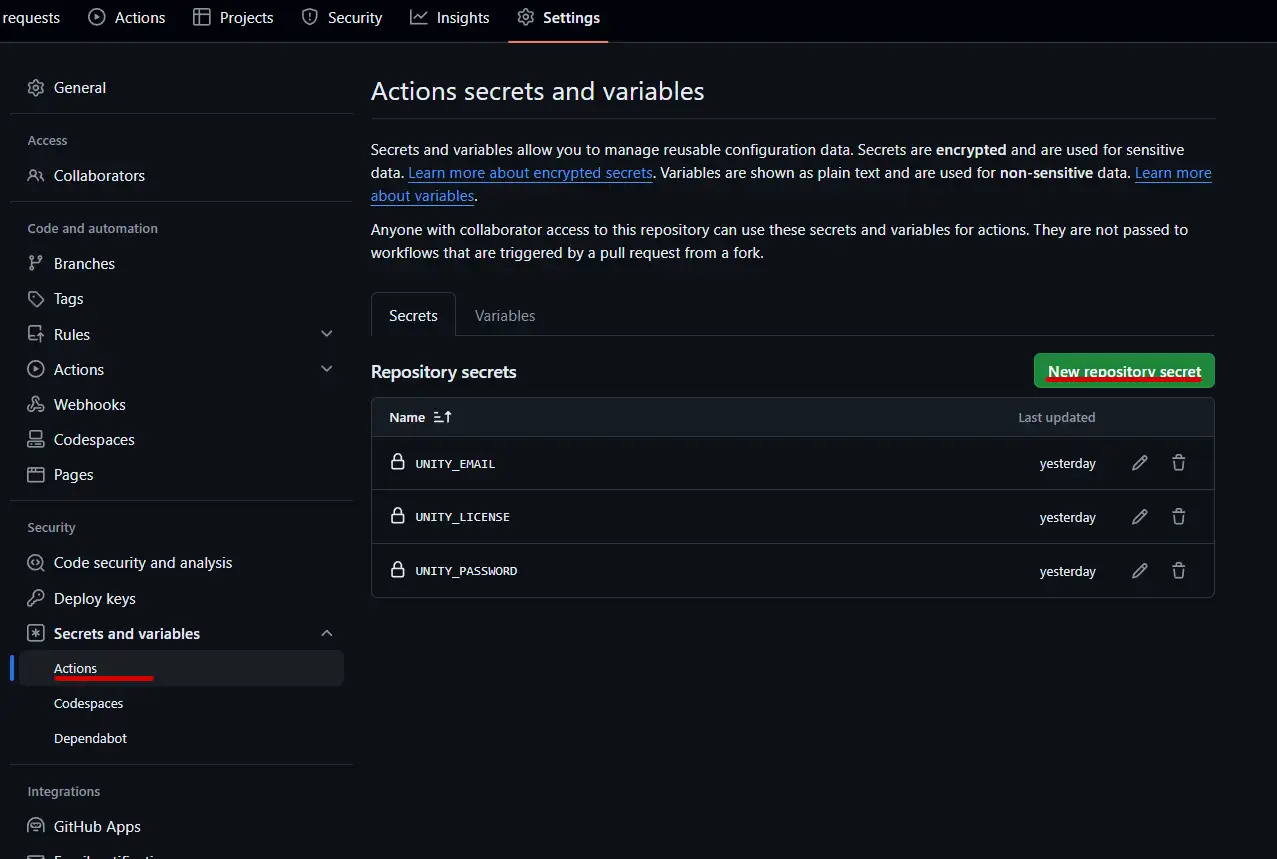
Go to your GitHub repo, then to Settings > Secrets and Variables > Actions.
Create the following secrets:
UNITY_LICENSE - (Copy the contents of your license file into here)
UNITY_EMAIL - (Add the email address that you use to login to Unity)
UNITY_PASSWORD - (Add the password that you use to login to Unity)
Add your repository secrets
Unity Project tweaks
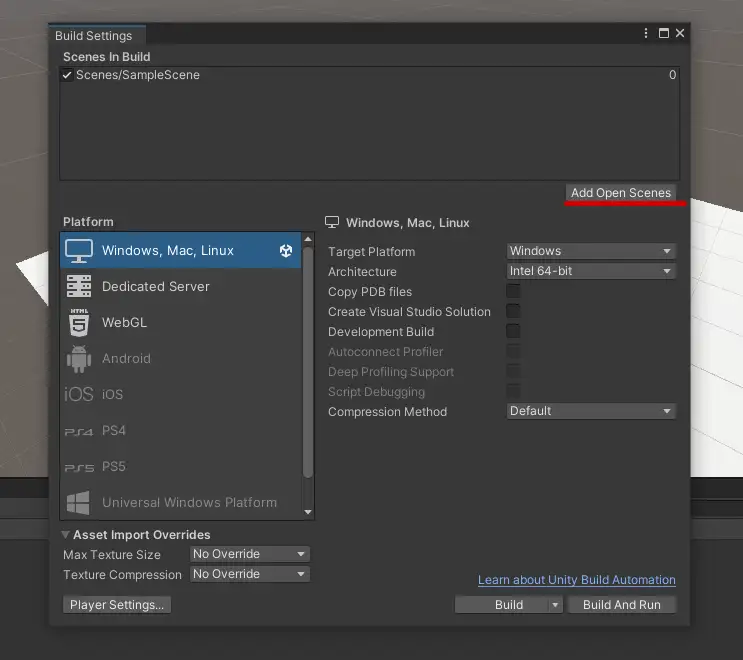
Before we set up our first action on GitHub, we need to make sure that our Unity project has at least one scene in the build settings, and if we want to build for WebGL, we need to make some tweaks. Keep in mind to commit your changes in Anchorpoint, so that they are on GitHub.
If there is no scene in the list, click Add Open Scenes.
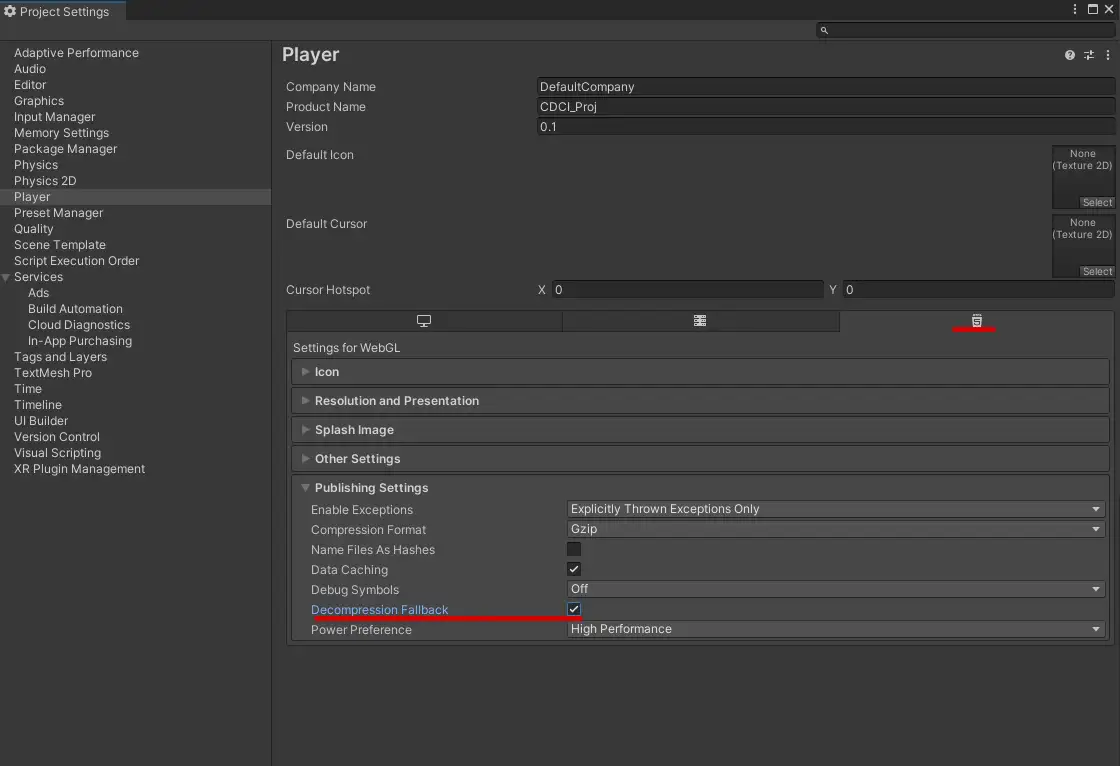
For WebGL disable Auto Graphics API in Project Settings > WebGL Tabs > Other Settings
For WebGL to play in tests, enable Decompression Fallback in Project Settings > WebGL Tabs > Publishing Settings
Finally, save the project and exit and commit changes with Anchorpoint to the GitHub repository.
GitHub Actions test
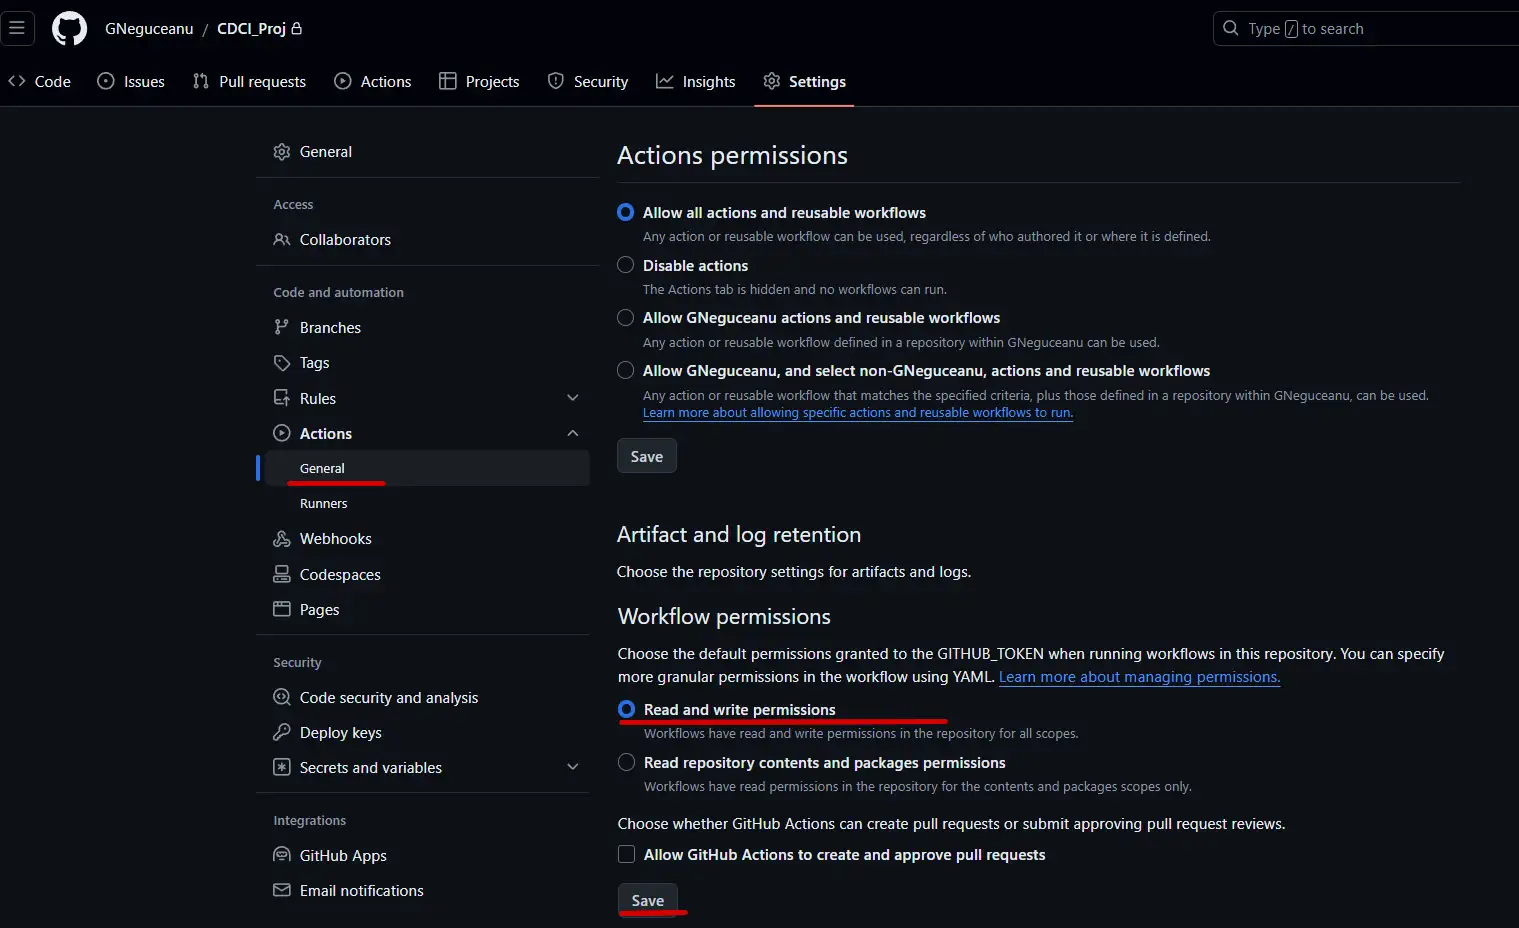
Before we create the first action to test the project, we need to change the workflow permissions to read and write.
So go to Settings > Actions > General > scroll until you find Workflow permissions, select Read and Write Permissions and then Click the Save button under it.
For our first action, we will create a test runner to automatically test our build. To do this:
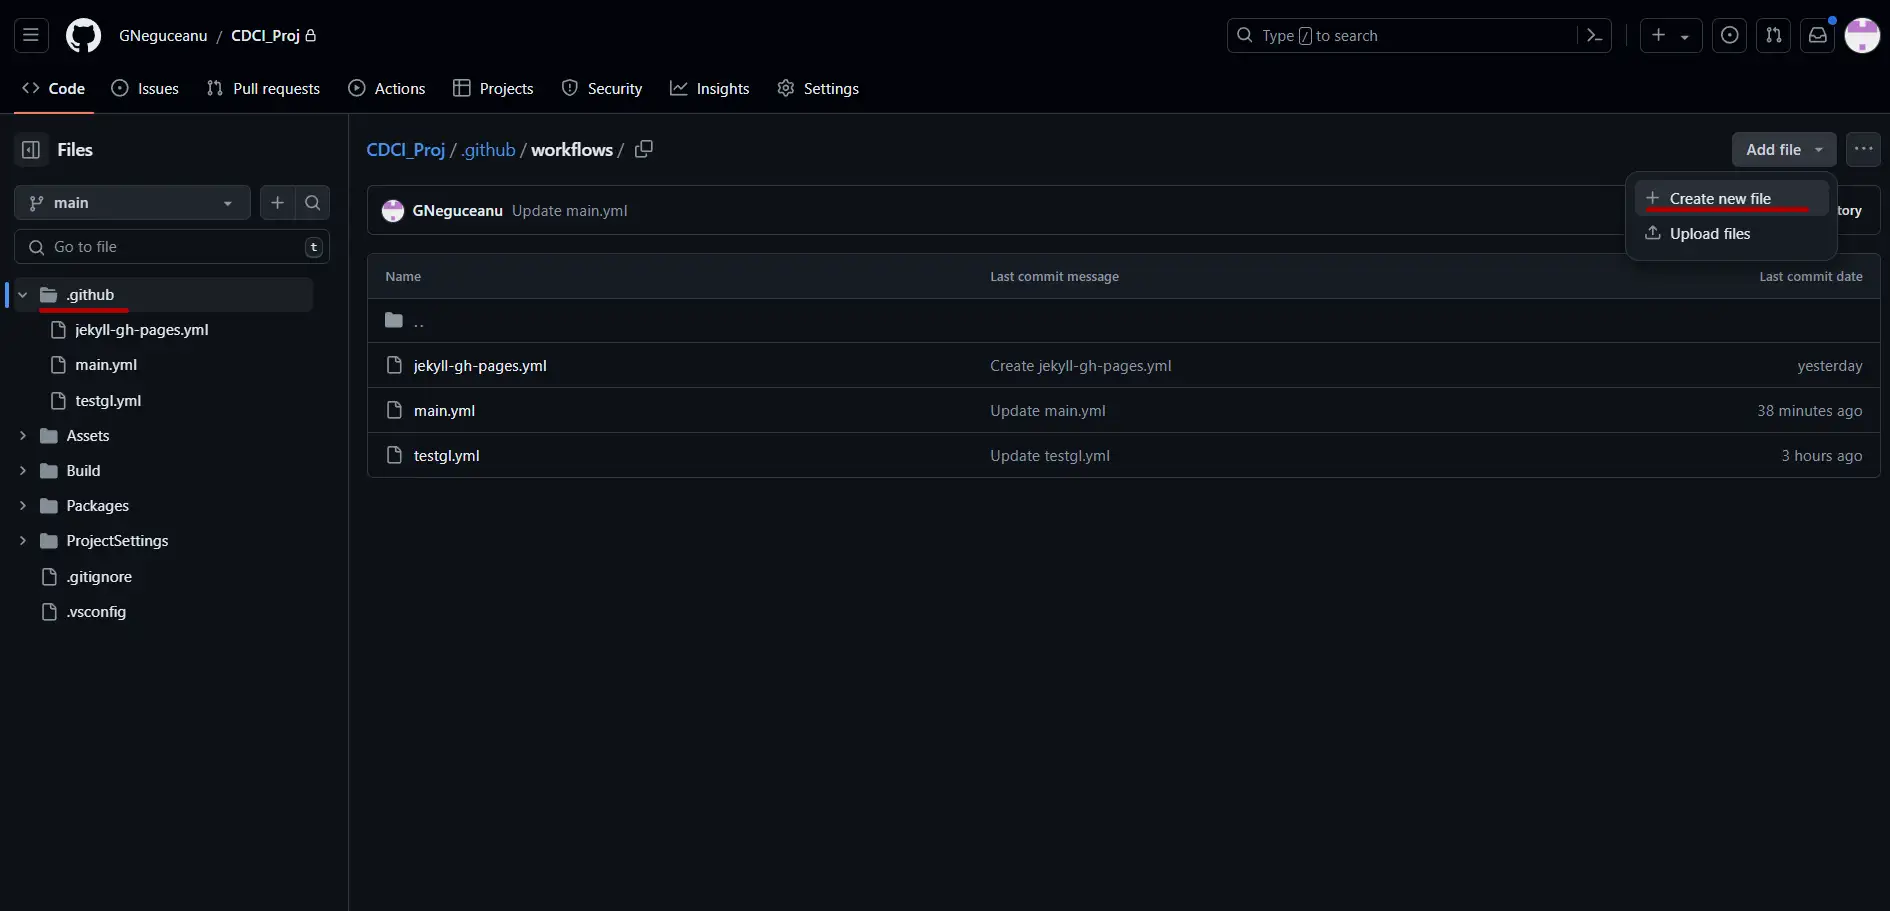
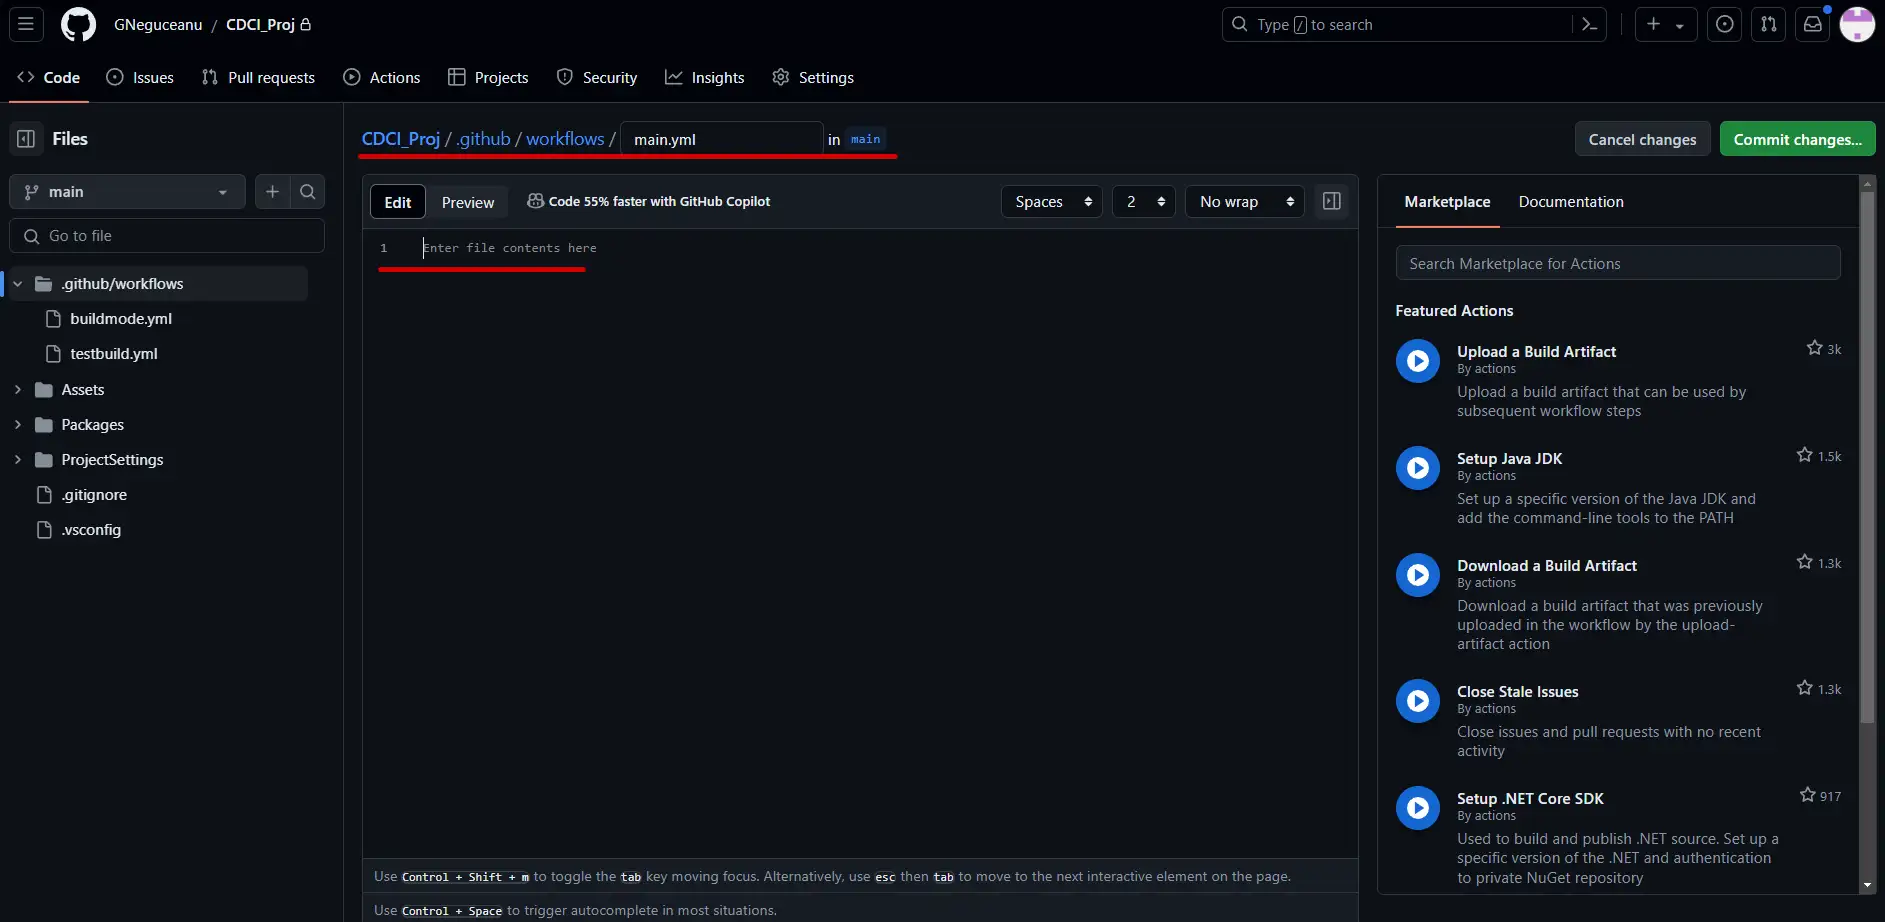
On the GitHub repo page, go to <> Code, click on the .github directory and click on in the top right, Add file button.
At the top you will add /workflow (it will create a new directory) then /main.yml
name: Test project

on:

  workflow_dispatch: # workflow dispatch is for manual run from actions page
  push: # on push
  pull_request: # on pull request
  schedule: # cron will trigger this pipeline everyday at 9.00 AM and 19.00 PM UTC
  - cron: '00 9,19 * * *'


jobs:
  testProject:
    name: Test in ${{ matrix.testMode }}
    runs-on: ubuntu-latest
    strategy:
      fail-fast: false
      matrix:
        # name of project folder or ./
        projectPath:
          - ./
        testMode:
          - playmode
          - editmode

    steps:
      - uses: actions/checkout@v4
        with:
          lfs: true
      - uses: actions/cache@v4
        with:
          path: ${{ matrix.projectPath }}/Library
          key: Library-${{ matrix.projectPath }}
          restore-keys: |
            Library-
      - uses: game-ci/unity-test-runner@v4
        id: tests
        env:
          UNITY_LICENSE: ${{ secrets.UNITY_LICENSE }}
          UNITY_EMAIL: ${{ secrets.UNITY_EMAIL }}
          UNITY_PASSWORD: ${{ secrets.UNITY_PASSWORD }}
        with:
          projectPath: ${{ matrix.projectPath }}
          testMode: ${{ matrix.testMode }}
          artifactsPath: ${{ matrix.testMode }}-artifacts
          githubToken: ${{ secrets.GITHUB_TOKEN }}
          checkName: ${{ matrix.testMode }} Test Results
      - uses: actions/upload-artifact@v4
        if: always()
        with:
          name: Test results for ${{ matrix.testMode }}
          path: ${{ steps.tests.outputs.artifactsPath }}
In the file contents we will add this YAML code.
This will automatically test edit and play mode in unity and generate a report at the end. Based on if the test passes, we can then expand this code, to generate builds for the platforms that we want.
After replacing the code click on the green Commit changes… button on the top right.
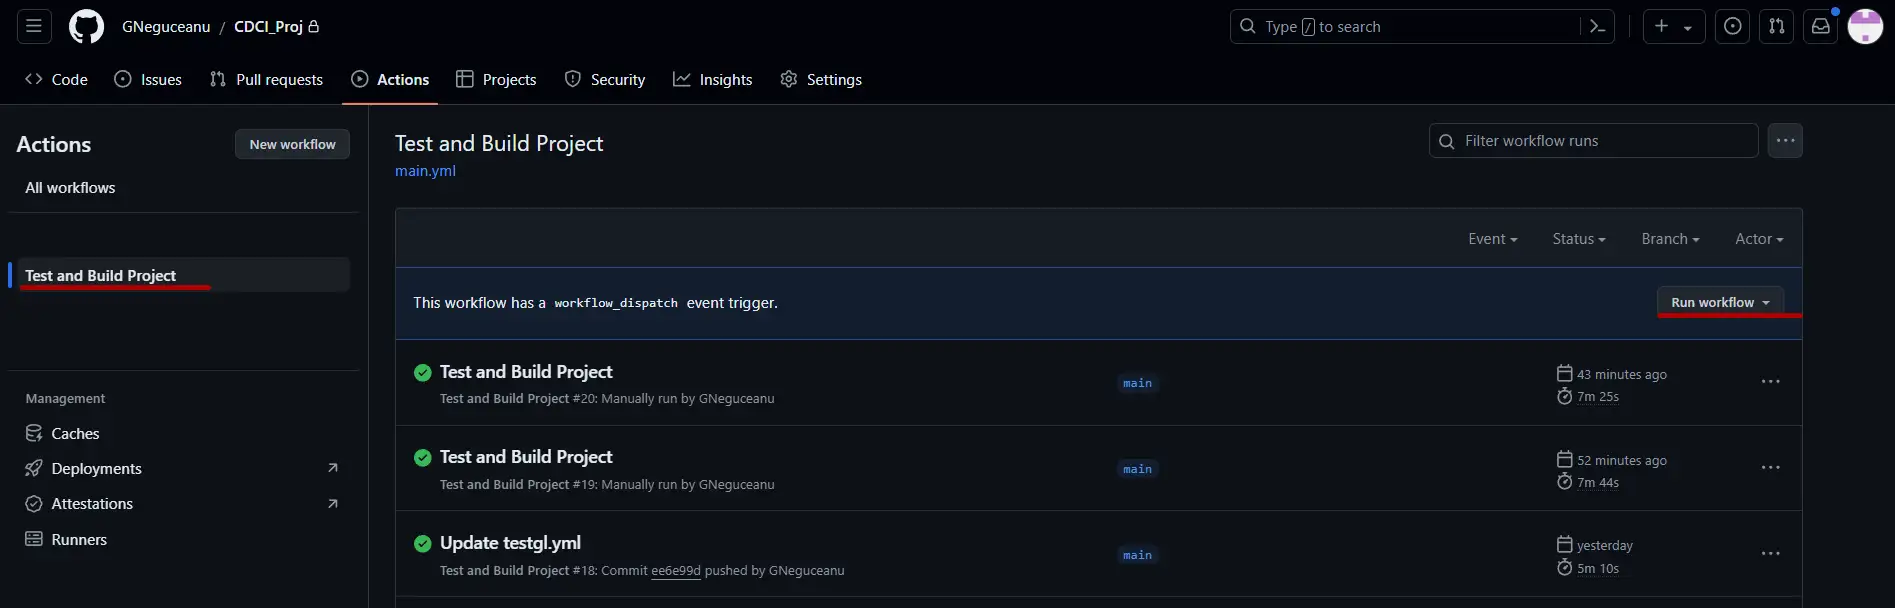
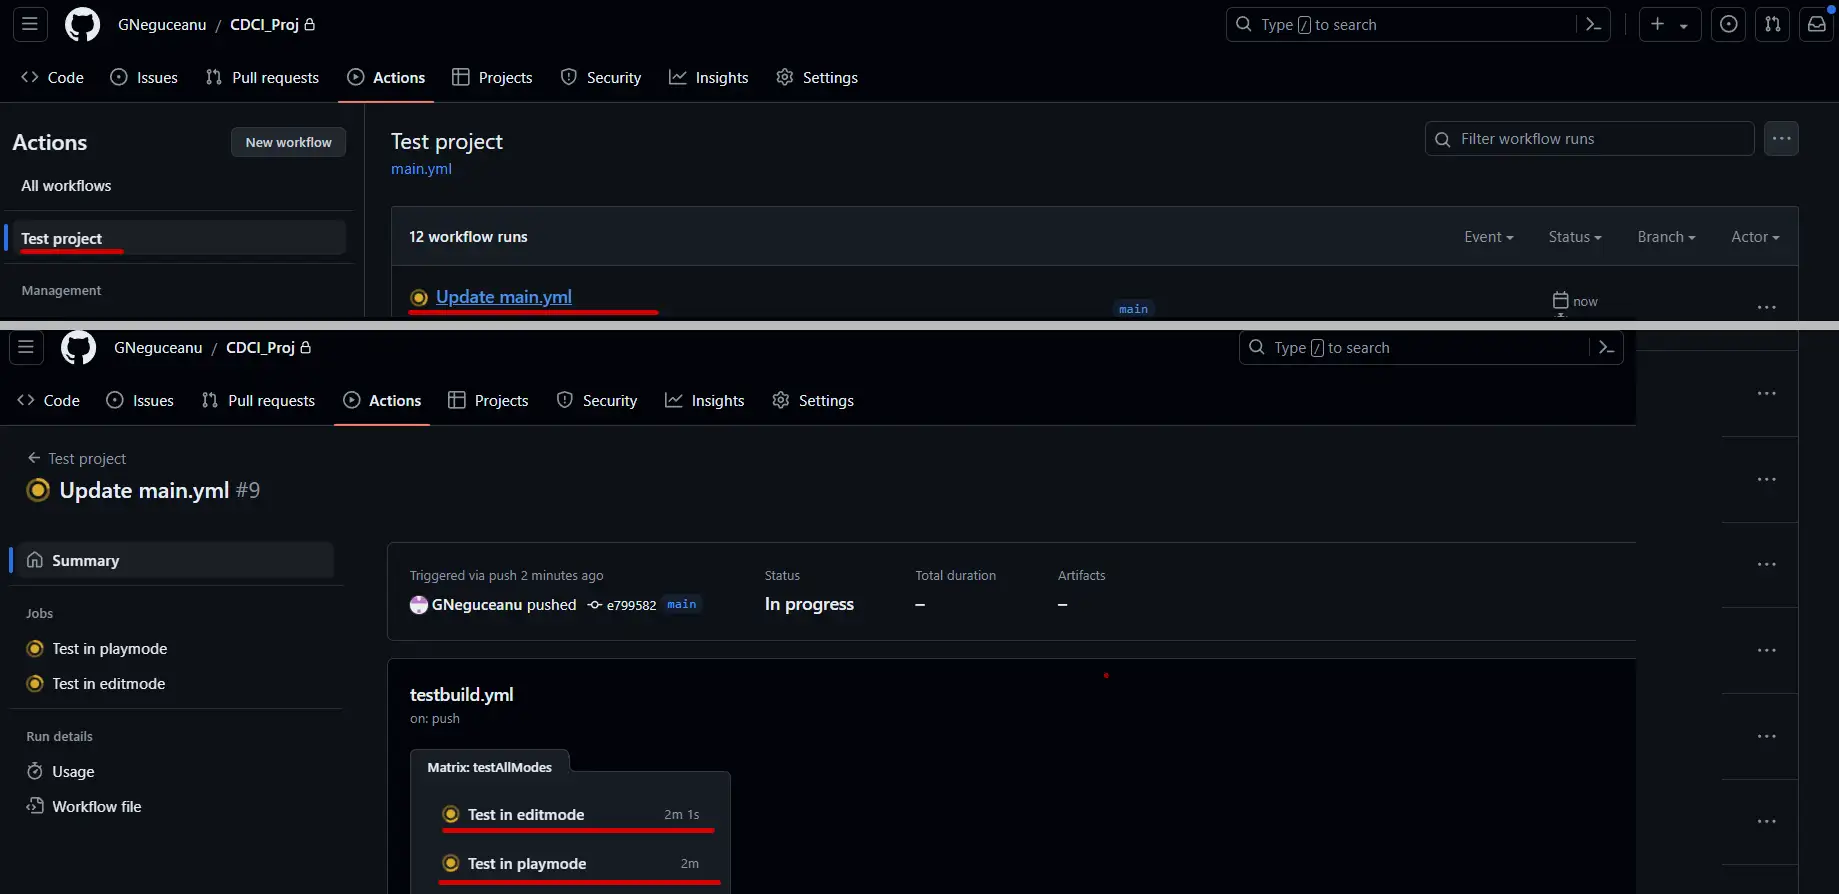
Next, go to the Actions section, select your Test Project or Test and Build Project action, right-click Run Workflow, and wait a few seconds for the project to appear in the queue.
You can click in the middle to get additional information as it is being processed, and click again on Test in Edit Mode or Test in Play Mode to see each step of the process and useful details if it fails.
When it finishes, you will get the results. The warnings are not always important as it depends on the current runners or what actions you have added to the script. If it fails here you will find the errors and you can even expand further by clicking on show all jobs and clicking on a specific test if they are more like in our case.
Advanced workflows using GitHub Actions
To further expand the actions for our pipeline, we will create builds for multiple platforms if our test above passes. To do this, return to the <> code view on github, navigate to our file > .github/workflows/main.yml, press edit, and replace the old code with the code below.
name: Test and Build Project

on:

  workflow_dispatch: # workflow dispatch is for manual run from actions page
  push: # on push
  pull_request: # on pull request
  schedule: # cron will trigger this pipeline everyday at 9.00 AM and 19.00 PM UTC
  - cron: '00 9,19 * * *'


jobs:
  testProject:
    name: Test in ${{ matrix.testMode }}
    runs-on: ubuntu-latest
    strategy:
      fail-fast: false
      matrix:
        # name of project folder or ./
        projectPath:
          - ./
        testMode:
          - playmode
          - editmode

    steps:
      - uses: actions/checkout@v4
        with:
          lfs: true
      - uses: actions/cache@v4
        with:
          path: ${{ matrix.projectPath }}/Library
          key: Library-${{ matrix.projectPath }}
          restore-keys: |
            Library-
      - uses: game-ci/unity-test-runner@v4
        id: tests
        env:
          UNITY_LICENSE: ${{ secrets.UNITY_LICENSE }}
          UNITY_EMAIL: ${{ secrets.UNITY_EMAIL }}
          UNITY_PASSWORD: ${{ secrets.UNITY_PASSWORD }}
        with:
          projectPath: ${{ matrix.projectPath }}
          testMode: ${{ matrix.testMode }}
          artifactsPath: ${{ matrix.testMode }}-artifacts
          githubToken: ${{ secrets.GITHUB_TOKEN }}
          checkName: ${{ matrix.testMode }} Test Results
      - uses: actions/upload-artifact@v4
        if: always()
        with:
          name: Test results for ${{ matrix.testMode }}
          path: ${{ steps.tests.outputs.artifactsPath }}

  buildForAllDesiredPlatforms:
    needs: testProject
    name: Build for ${{ matrix.targetPlatform }}
    runs-on: ubuntu-latest
    strategy:
      fail-fast: false
      matrix:
        targetPlatform:
          - StandaloneWindows # Build a Windows standalone.
          - StandaloneWindows64 # Build a Windows 64-bit standalone.
          - WebGL # Build for WebGL.

         # comment or uncomment your desired platforms

    steps:
      - uses: actions/checkout@v4
        with:
          fetch-depth: 0
          lfs: true
      - uses: actions/cache@v4
        with:
          path: Library
          key: Library-${{ matrix.targetPlatform }}
          restore-keys: Library-
      - uses: game-ci/unity-builder@v4
        env:
          UNITY_LICENSE: ${{ secrets.UNITY_LICENSE }}
          UNITY_EMAIL: ${{ secrets.UNITY_EMAIL }}
          UNITY_PASSWORD: ${{ secrets.UNITY_PASSWORD }}
        with:
          targetPlatform: ${{ matrix.targetPlatform }}
      - uses: actions/upload-artifact@v4
        with:
          name: Build-${{ matrix.targetPlatform }}
          path: build/${{ matrix.targetPlatform }}
Once you are done, click on Commit changes...
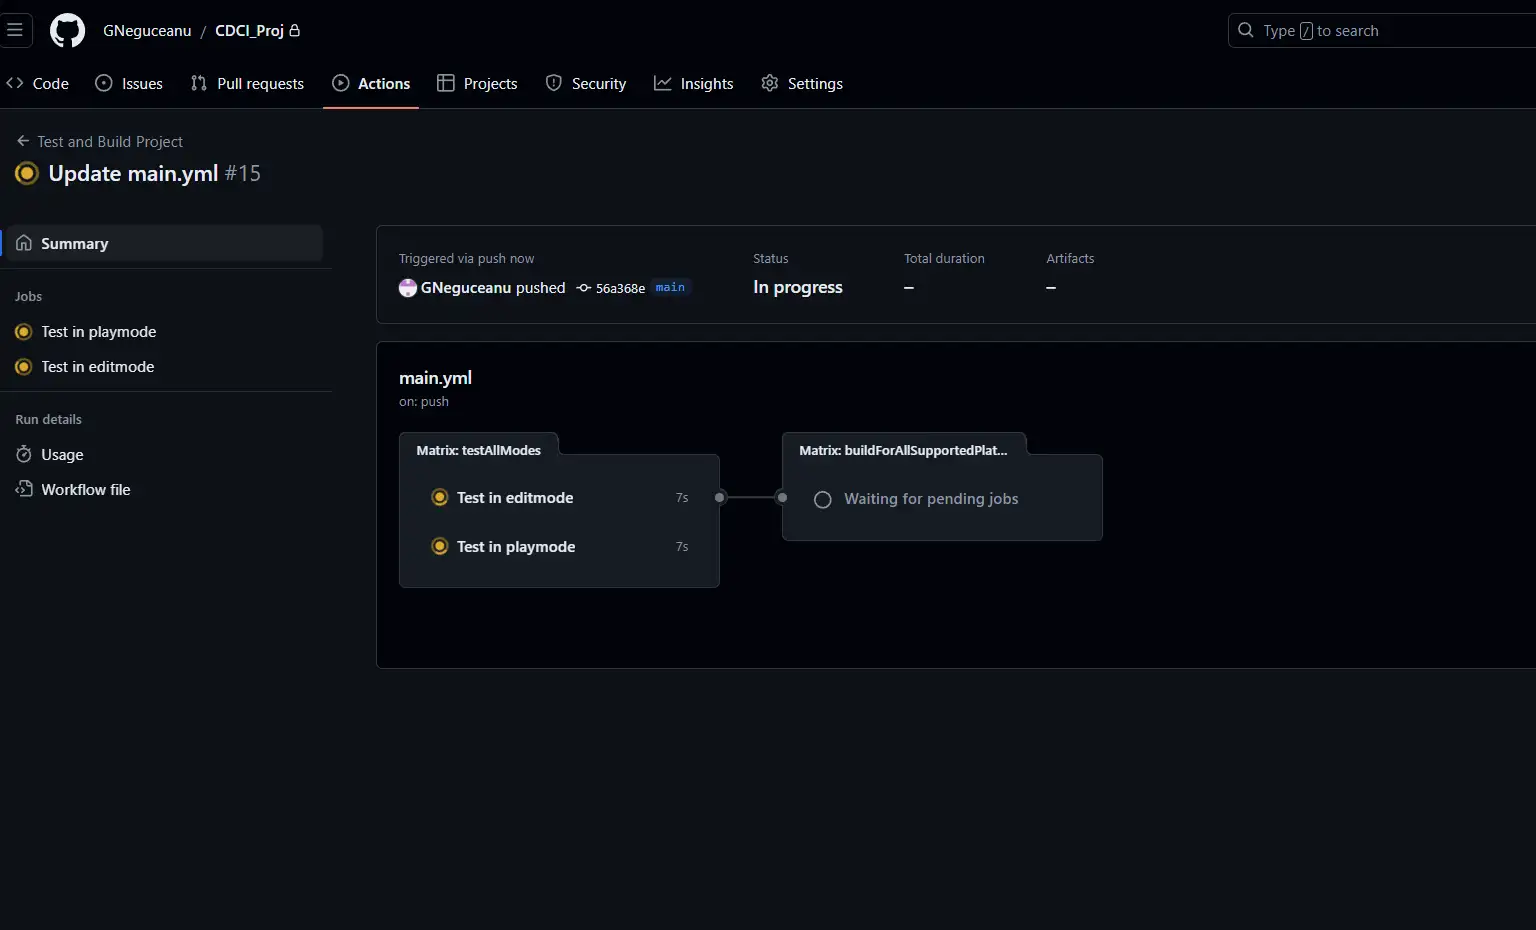
This new workflow should be already in progress.
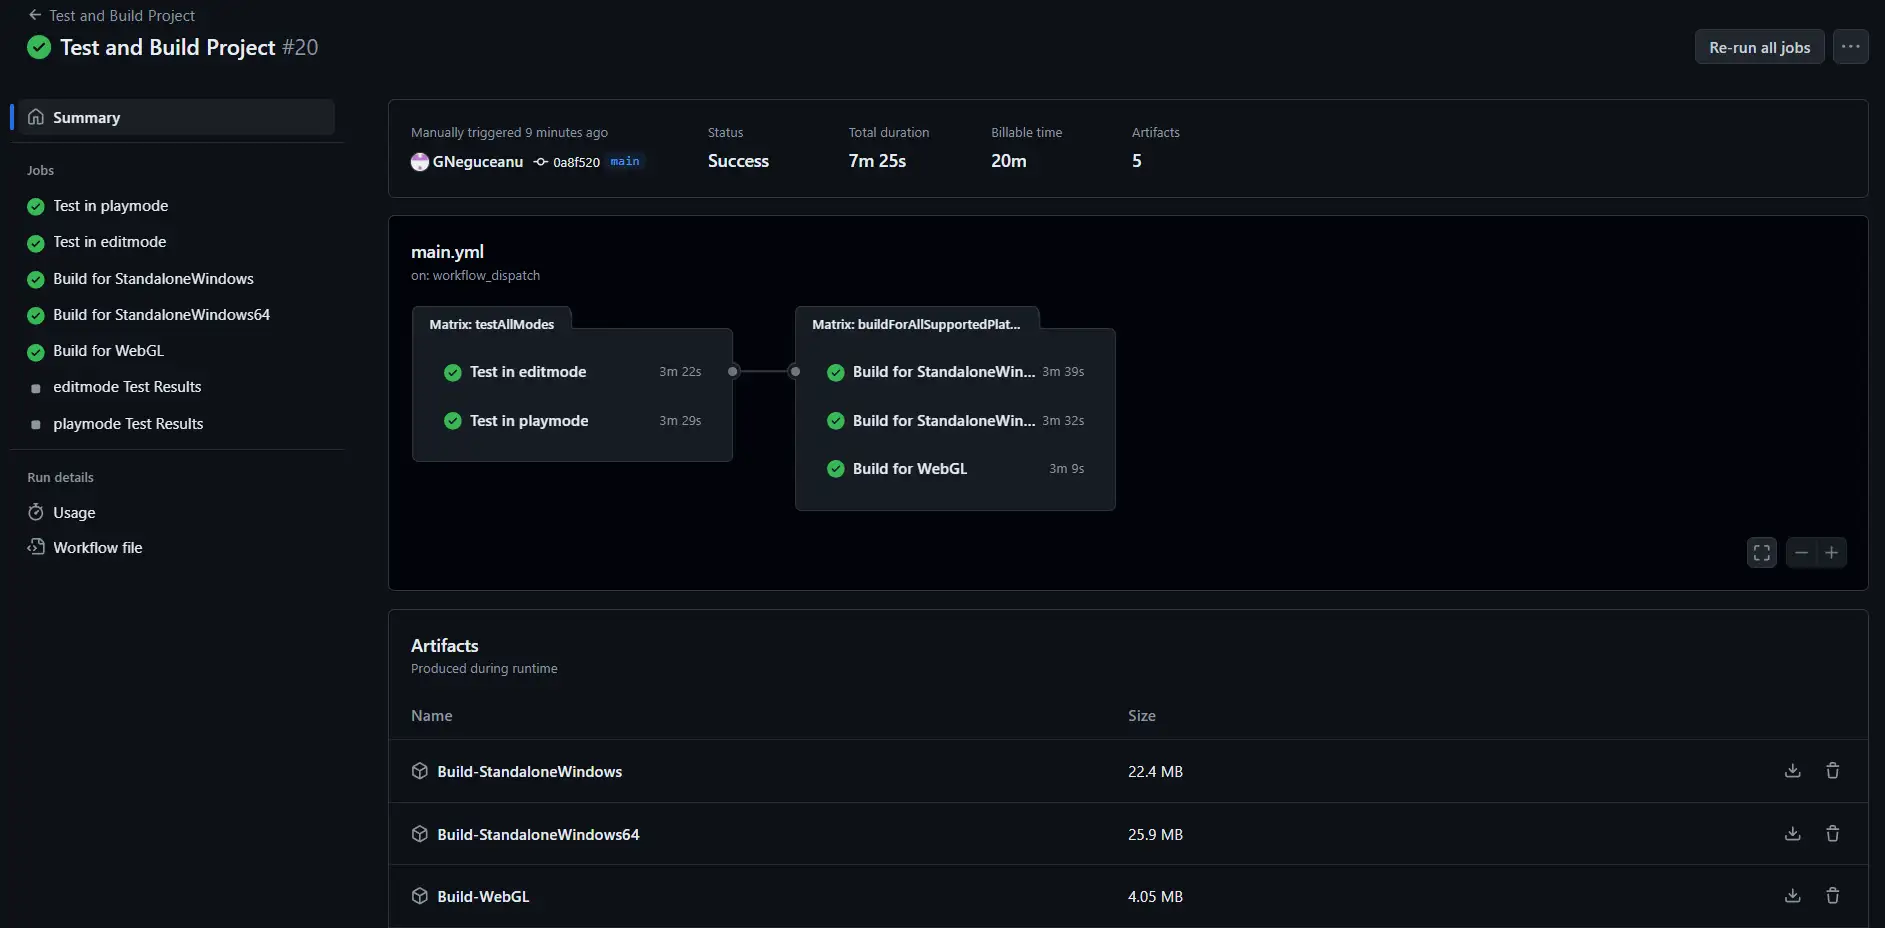
Once the workflow finishes, it will generate some logs and the builds ready to be downloaded under the Artifacts section.
To access the latest builds and logs at any time, just go to the Actions section on Github, click on the latest workflow, and the contents of the workflow will appear under Artifacts, similar to the image above.
Finally
As you can see, having a pipeline for Unity, even a simple one like the one we created in this article, can be quite helpful. From here, we can expand it by deploying builds to GitHub's release page, notifying team members via Discord and Slack, maybe even deploying builds directly to app stores like Google Play and Steam, in a similar fashion with the addition of more secret keys and lines of code.
To further improve the pipeline, check out the GitHub Action docs, GameCI, and the Github Actions marketplace.
Git based version control for Unity
Use file locking on binary files and work with TB-sized Git repositories to manage code and art assets.
GitHub Actions is a feature of GitHub that allows you to automate, customize, and execute software development workflows directly in your GitHub repository. With GitHub Actions, you can create workflows that build, test, and deploy your code, triggered by events like pushes, pull requests, or on a schedule. These workflows are defined using YAML files and can integrate with various third-party services, making it a versatile tool for continuous integration and continuous deployment (CI/CD) practices.
Can I also use other solutions than GitHub?
Yes, you can use other solutions besides GitHub for version control and CI/CD. Some popular alternatives include GitLab, Bitbucket, and Azure DevOps. Each of these platforms offers similar capabilities for managing repositories, automating workflows, and integrating with various tools and services. The principles of CI/CD remain the same across these platforms, allowing you to choose the one that best fits your team's needs and preferences.
What does DevOps mean and what has it to do with CI/CD?
DevOps is a set of practices that combines software development (Dev) and IT operations (Ops) to shorten the development lifecycle and deliver high-quality software continuously. In game development is applied in the same way. It emphasizes collaboration, automation, and monitoring at all stages of software development. CI/CD, which stands for Continuous Integration and Continuous Deployment, is a core component of DevOps. CI involves automatically testing and integrating code changes from multiple contributors into a shared repository, while CD automates the deployment of these changes to production environments. Together, CI/CD helps teams deliver updates faster and more reliably, embodying the principles of DevOps.