If your team is considering a move from Git to Perforce to solve collaboration issues, this article explains the migration process.
George Neguceanu
20 Apr 2026
Updated on
20 Apr 2026
5
min read
Content
These days in game development, there is a common story: your project grows, your assets become more extensive, and suddenly, Git seems to be working against you. If you're an artist or a non-technical team member, you probably don't care about DevOps intricacies. You just want to do your work with as little friction as possible.
Perforce is seen as the industry standard but nowadays, the development of Git has changed and solutions such as Anchorpoint came up that cover all topics such as artist friendliness, file locking and engine integrations while allowing you to continue working with Git.
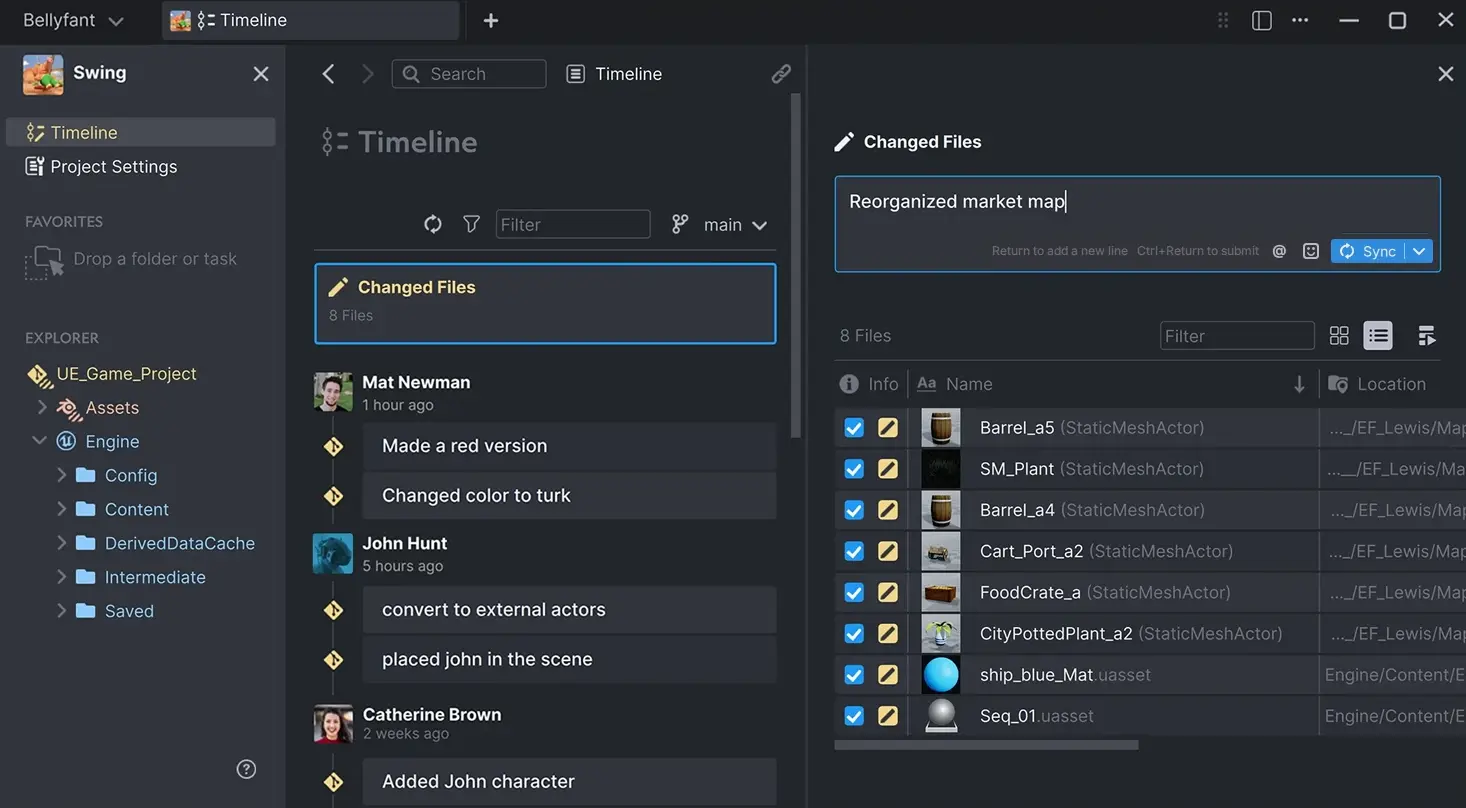
An Unreal project managed with Anchorpoint
100% compatible with Git, Anchorpoint solves the "Git is too hard" problem by providing artists with a simple interface while adding Git's missing features, such as file locking, thumbs and previews, selective checkout, tags and file reviews. But, if your team has decided that a centralized system like Perforce is the way to go, here's how you can start the transition.
How to Migrate from Git to Perforce
Migrating your project is essentially moving your "checkpoints" (what we call Git commits) from one system to another. Follow these steps to ensure nothing gets lost in transit.
1. Clean Up Your Git Repository
Before moving anything, you need to tidy up. Git repositories can become bloated with temporary files or large build artifacts that don't need to be in Perforce.
Run a final git gc (garbage collection) to optimize your local database.
Ensure all team members have pushed their final Git commits so no work is left on local machines.
Merge all of the branches into one.
2. Set Up Your Perforce Depot and Workspace
You’ll need a destination.
Create a new stream Depot on your Perforce server and a stream for it.
Set up a Workspace on your local machine that points to a fresh, empty folder. This folder will eventually hold your project files.
3. Choose Your Migration Path (History vs. Snapshot)
The Snapshot Method
This is the simplest and safest way. You take the latest version of your files from Git and add them to Perforce. You lose your version history, but you start with a clean slate.
The History Method
If you want to maintain your Git history, you’ll require a tool such as Git-P4. This script allows you to sync Git commits directly into Perforce changesets. Using it requires a lot of technical know-how and research. While Git-P4 works quite well for migrating from Perforce to Git, migrating from Git to Perforce requires much more work.
Some problems you might encounter during the migration process:
a) Git P4 clone is not recognized as a command. In the current version of Git, Git P4 is not included for some reason. To fix this download git p4 from http://git.kernel.org/cgit/git/git.git/plain/git-p4.py , remove the .py extension so the file remains git-p4 only, and place it in git-core directory where you installed Git. The default Win is : C:\Program Files\Git\mingw64\libexec\git-core and try the command again.
b)Git P4 clone in the current directory where you have your Git Project use:
git p4 clone //depot/main .
. means current directory, main is the stream.
c)Head errors, at least until ~3, means you don't have history in your Git project, so try to have at least three commits, which you should have since that is why you are using Git P4 script. Over 3 you might have conflicts in history.
d) The P4 Remote is missing. Check with:
git branch -a
If remotes/p4/head is there, if not to link with:
git update-ref refs/remotes/p4/master HEAD
This will tell Git: "Treat my current position as the starting point for Perforce."
e) Useful commands to debug with:
p4 clients
show clients(workspaces) and their assigned file path root.
p4 where .
checks depot mapping, if you get an error you need to change the view and root in with P4 client command.
p4 depots
shows the list of current P4 depots on your PC.
f) Fixing mapping by using the command:
p4 client
On Root should be the current directory (Example: Root: C:\P4Migration-repo ) of your project and on View section, add:
//depot/main... //CLIENT_NAME/main...
Depot is the name of the depot, main is the stream, and client name is actually the workspace name (use p4 clients to check).
To learn the full process and more, check these resources on Git to Perforce migration:
Typemapping: Perforce handles binary files differently than Git. You must configure your binary files with p4 typemap to ensure that .psd, .fbx, and .uasset files are marked as binary.
To add a typemap, use the command p4 typemap on command window (P4 client > File > Open command window) and mark the desired files as binary:
binary //....pdf ## all pdfs in the project
binary //....uasset ## all uassets in the project
Ignoring temp files and others: .p4ignore (in project root) is very similar to .gitignore, so you can rename your old git ignore and use this format:
# Ignore temporary and build directories
Saved/
Intermediate/
DerivedDataCache/
# Ignore specific file types
*.so
*.pdb
*.tmp
5. Add the Project files
If you are doing a manual migration:
Copy your project files (excluding the .git folder) into your Perforce workspace folder.
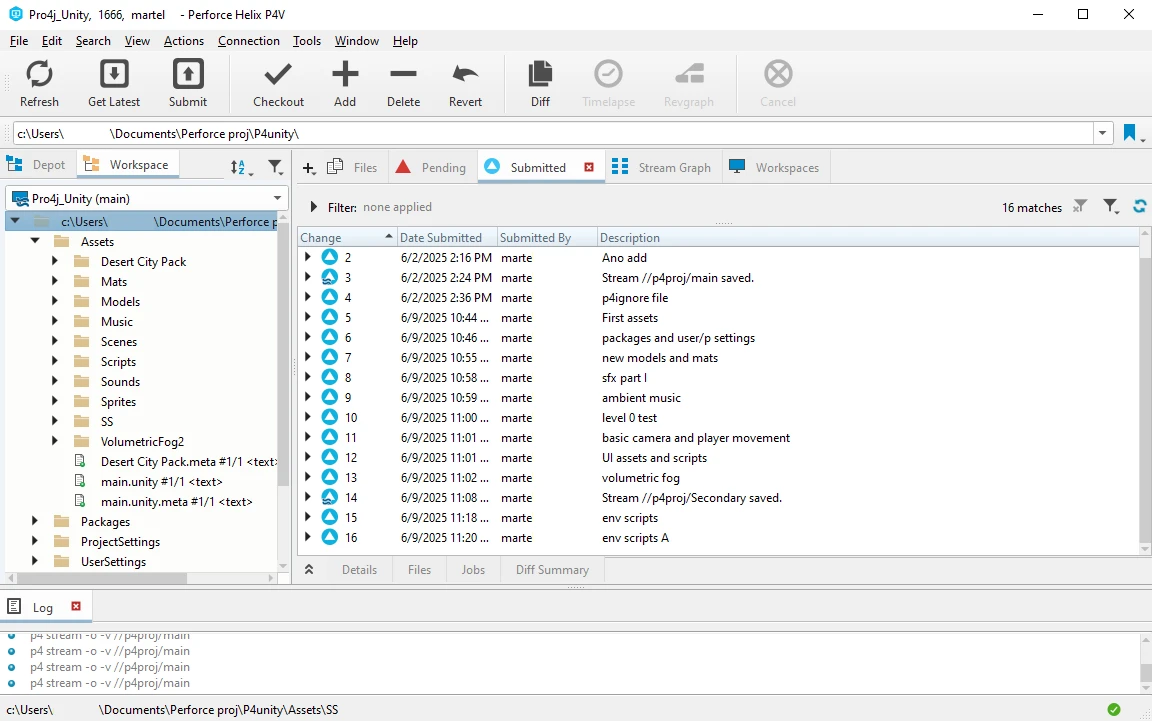
Open P4V (the Perforce visual client), select your files, and choose "Mark for Add."
Submit the changelist to the server.
Switching from Git to Perforce is not easy, especially if you want to keep your commit history. Perforce has its own advantages, but once you learn the Git system, Perforce might be confusing and not user-friendly, even if you hate the Git command line. Instead, try using a Git-compatible tool, such as Anchorpoint, GitHub Desktop, or SourceTree. However, if you are set up on Perforce, I recommend starting with a clean migration with no history, since it's much easier.