Git with KiCad - Version control for PCB design workflows
Learn why KiCad’s open-source text files are the perfect complement to Git and how to use version control as the ultimate safety net for your hardware layouts.
July 1, 2026
9
min read

Gitea is a self-hosted GitHub alternative that is lightweight and provides all the features we need for our Unreal or Unity project. In this article we will
While GitHub or Azure DevOps are popular as a good plug-and-play solution for version control, choosing a self-hosted Git server like Gitea on a generic cloud hosting solution has three main advantages:
That depends mostly on your storage needs. It also depends on the type of virtual machine you are using. In this example, we will use Vultr as our cloud storage provider because it has an overall good UX and pricing structure. You can also look at services like Digital Ocean, Linode and of course the big ones like AWS, Microsoft Azure and Google Cloud.
For a project with 1TB of storage and traffic, you can expect to pay around $16 - $20 per month.
Cost Breakdown
Virtual Machine: A 2GB RAM machine costs about $10 - $14 (Vultr pricing table).
Object storage: About $6 for 1TB of storage and traffic (Vultr object storage pricing).
Instead of using the virtual machine for storage (which can be expensive and limited), we will use scalable and inexpensive object storage for all our binary files.
Setting up Gitea and Git LFS is relatively easy if you follow the procedure in this article:
Before you start, make sure you have
We won't need Docker here because Vultr has a preset for installing Gitea.
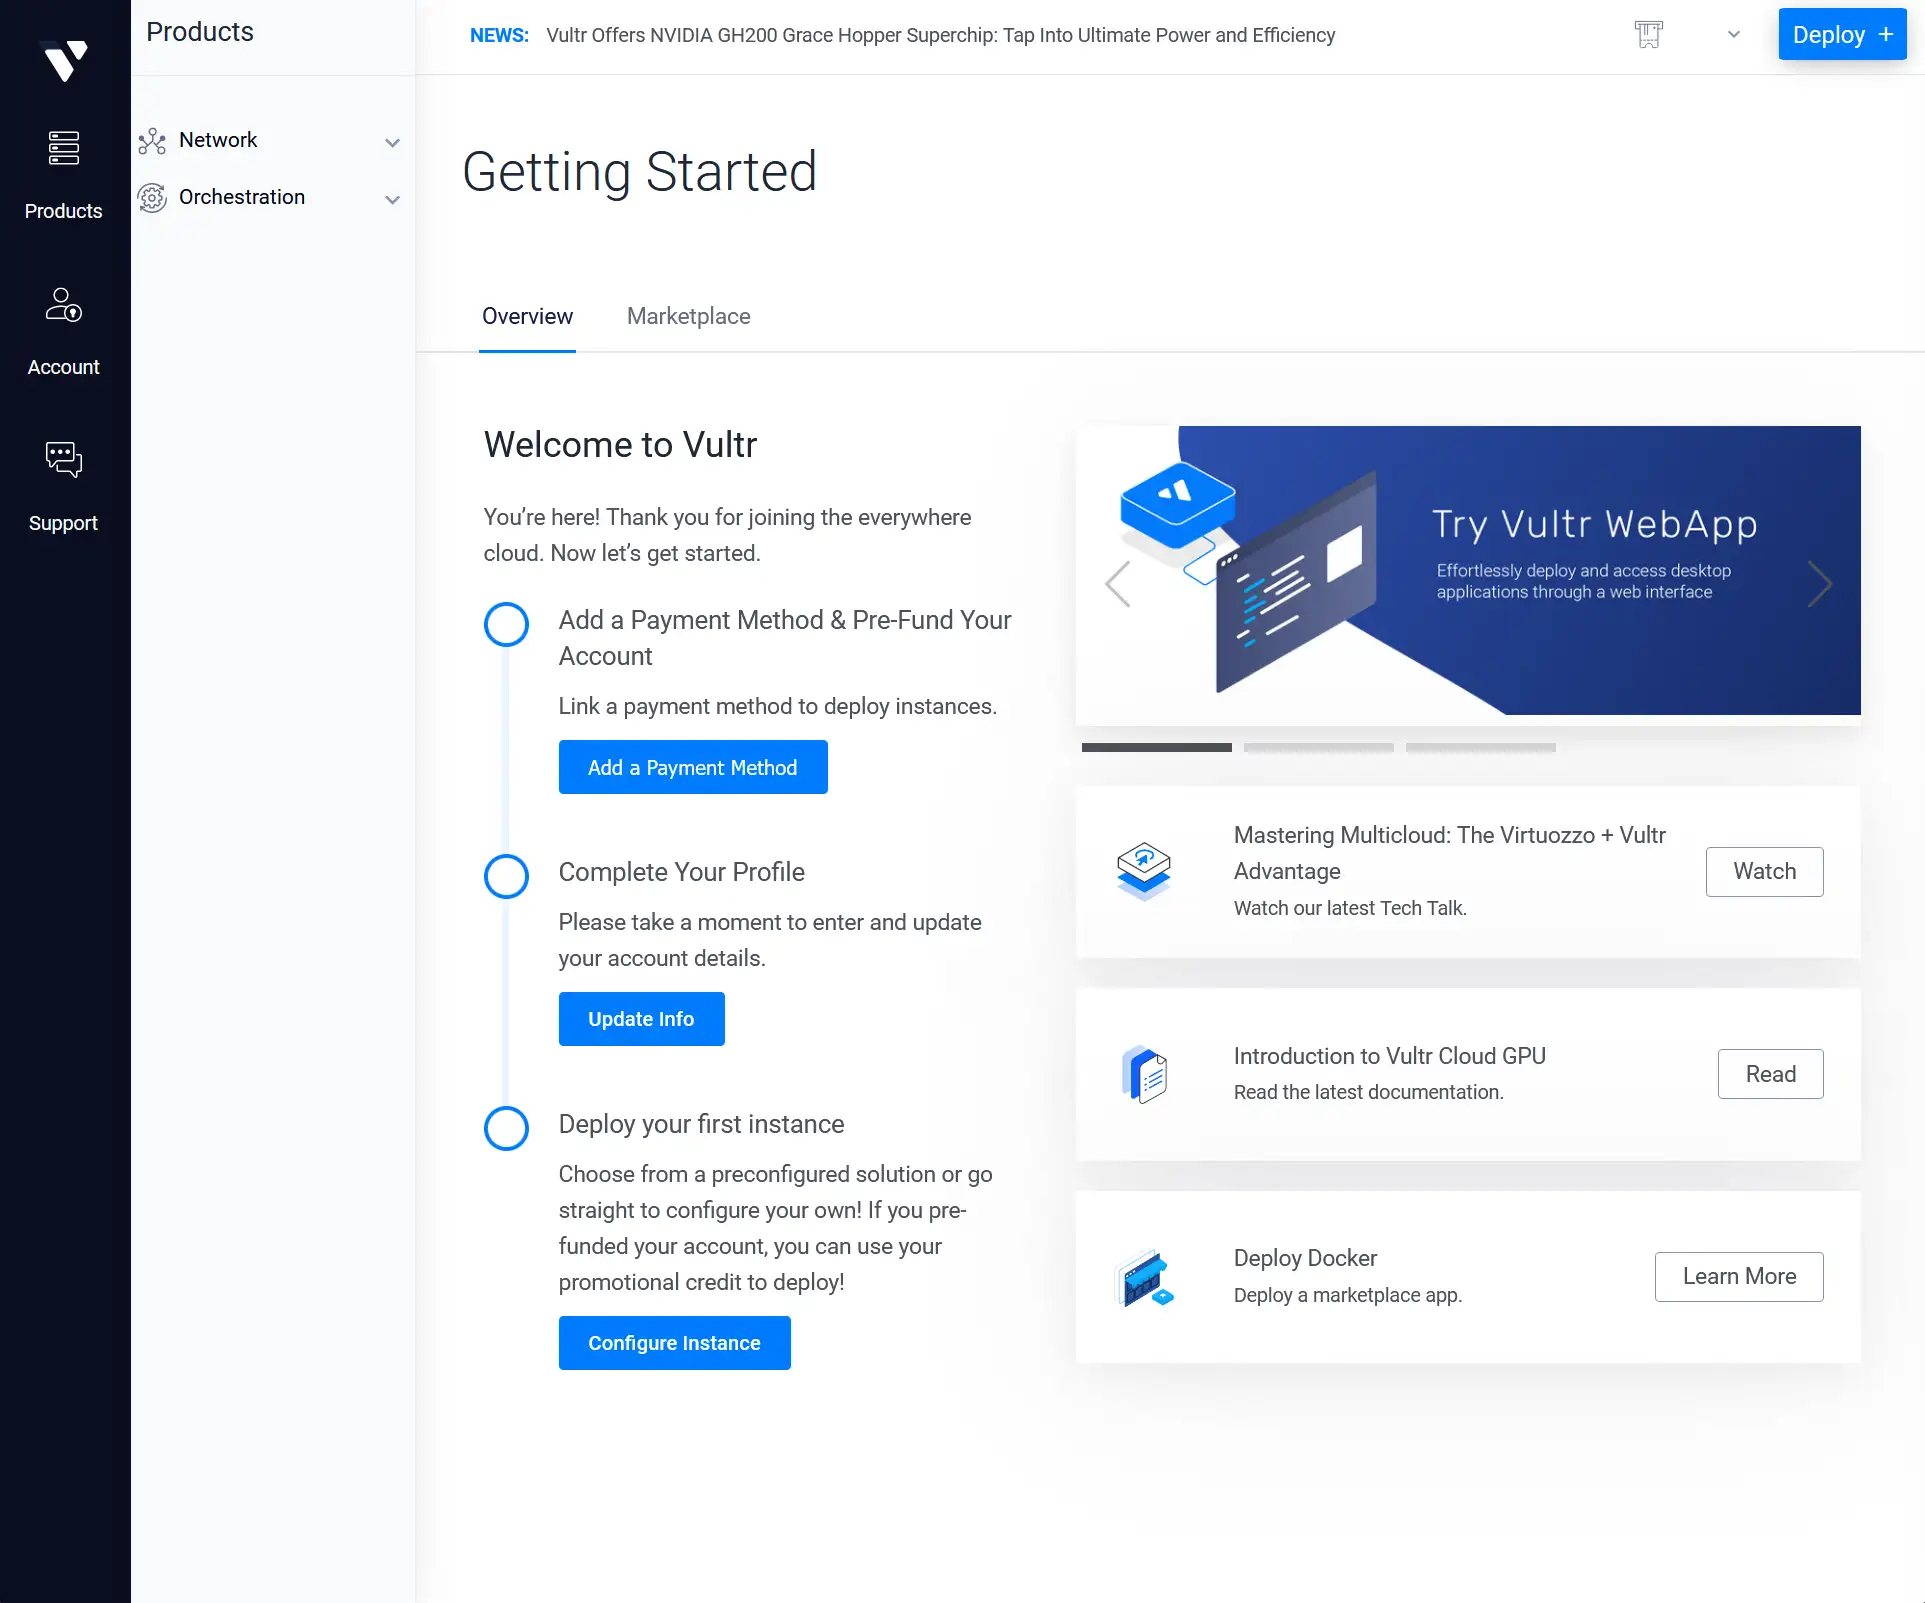
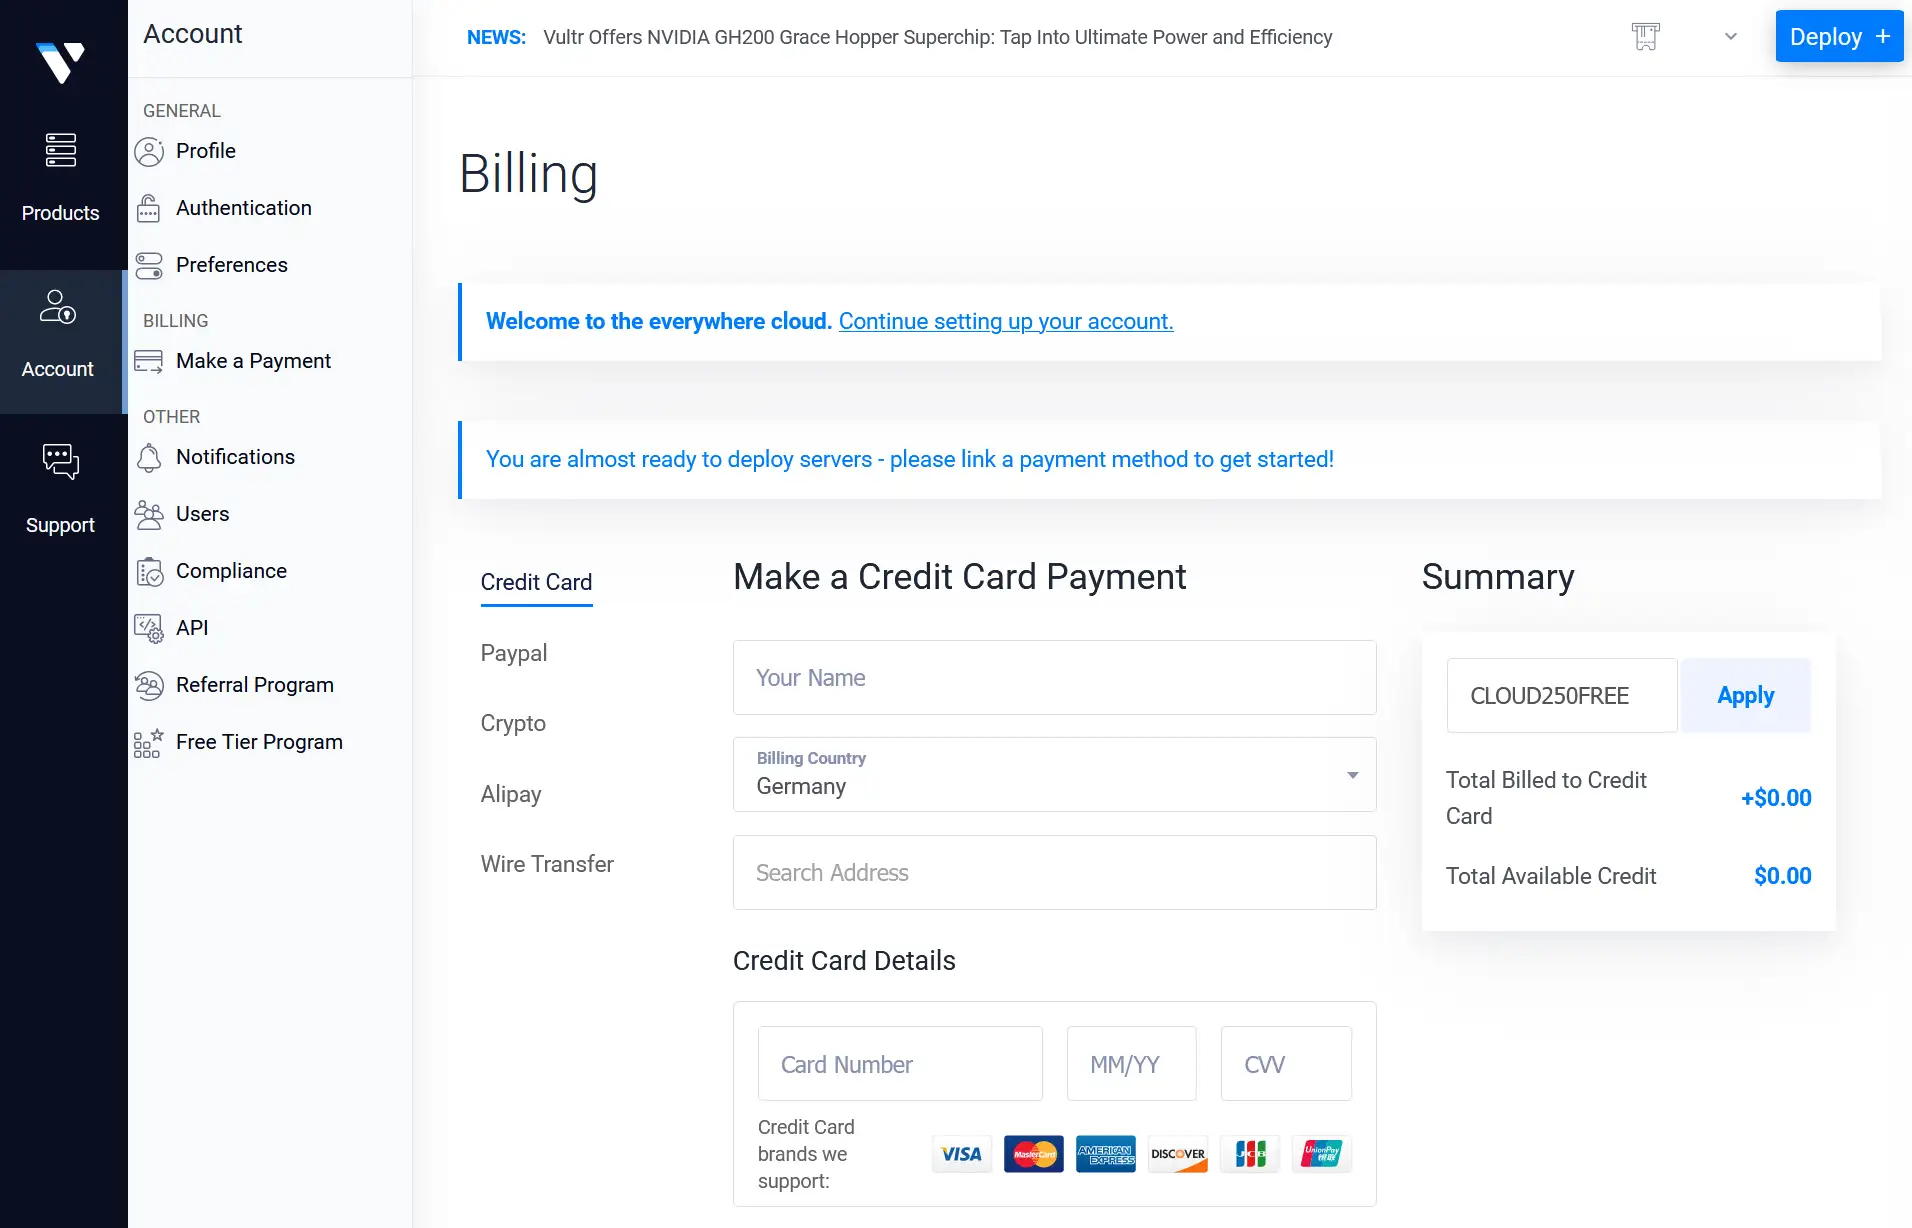
Go to Vultr.com and sign up for an account. The next step is to add your credit card, PayPal or other payment method. You can also tell Vultr not to take a deposit, because we will use some free credits first, which will allow us to use the service for 30 days without being charged.
Vultr provides coupon codes on their website. Use “CLOUD250FREE” to get some free credits.
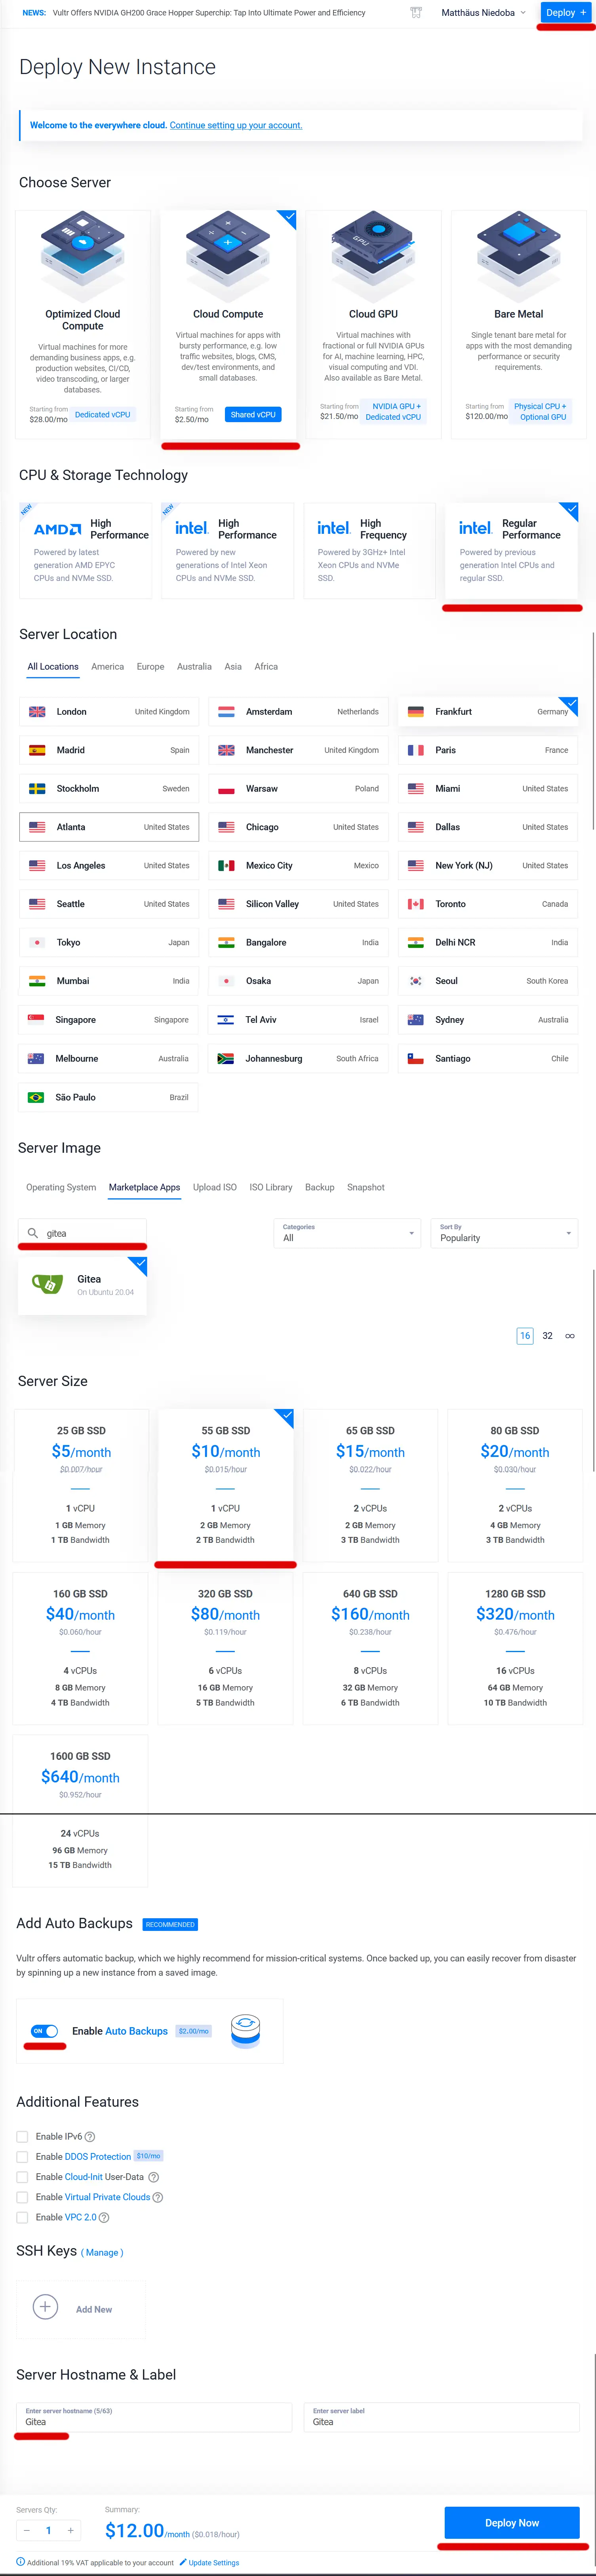
Now we need to deploy a new server with the following settings:
Now we have to wait for the server to be installed. This may take a few minutes. When it's done, click on the entry to get to the server settings.
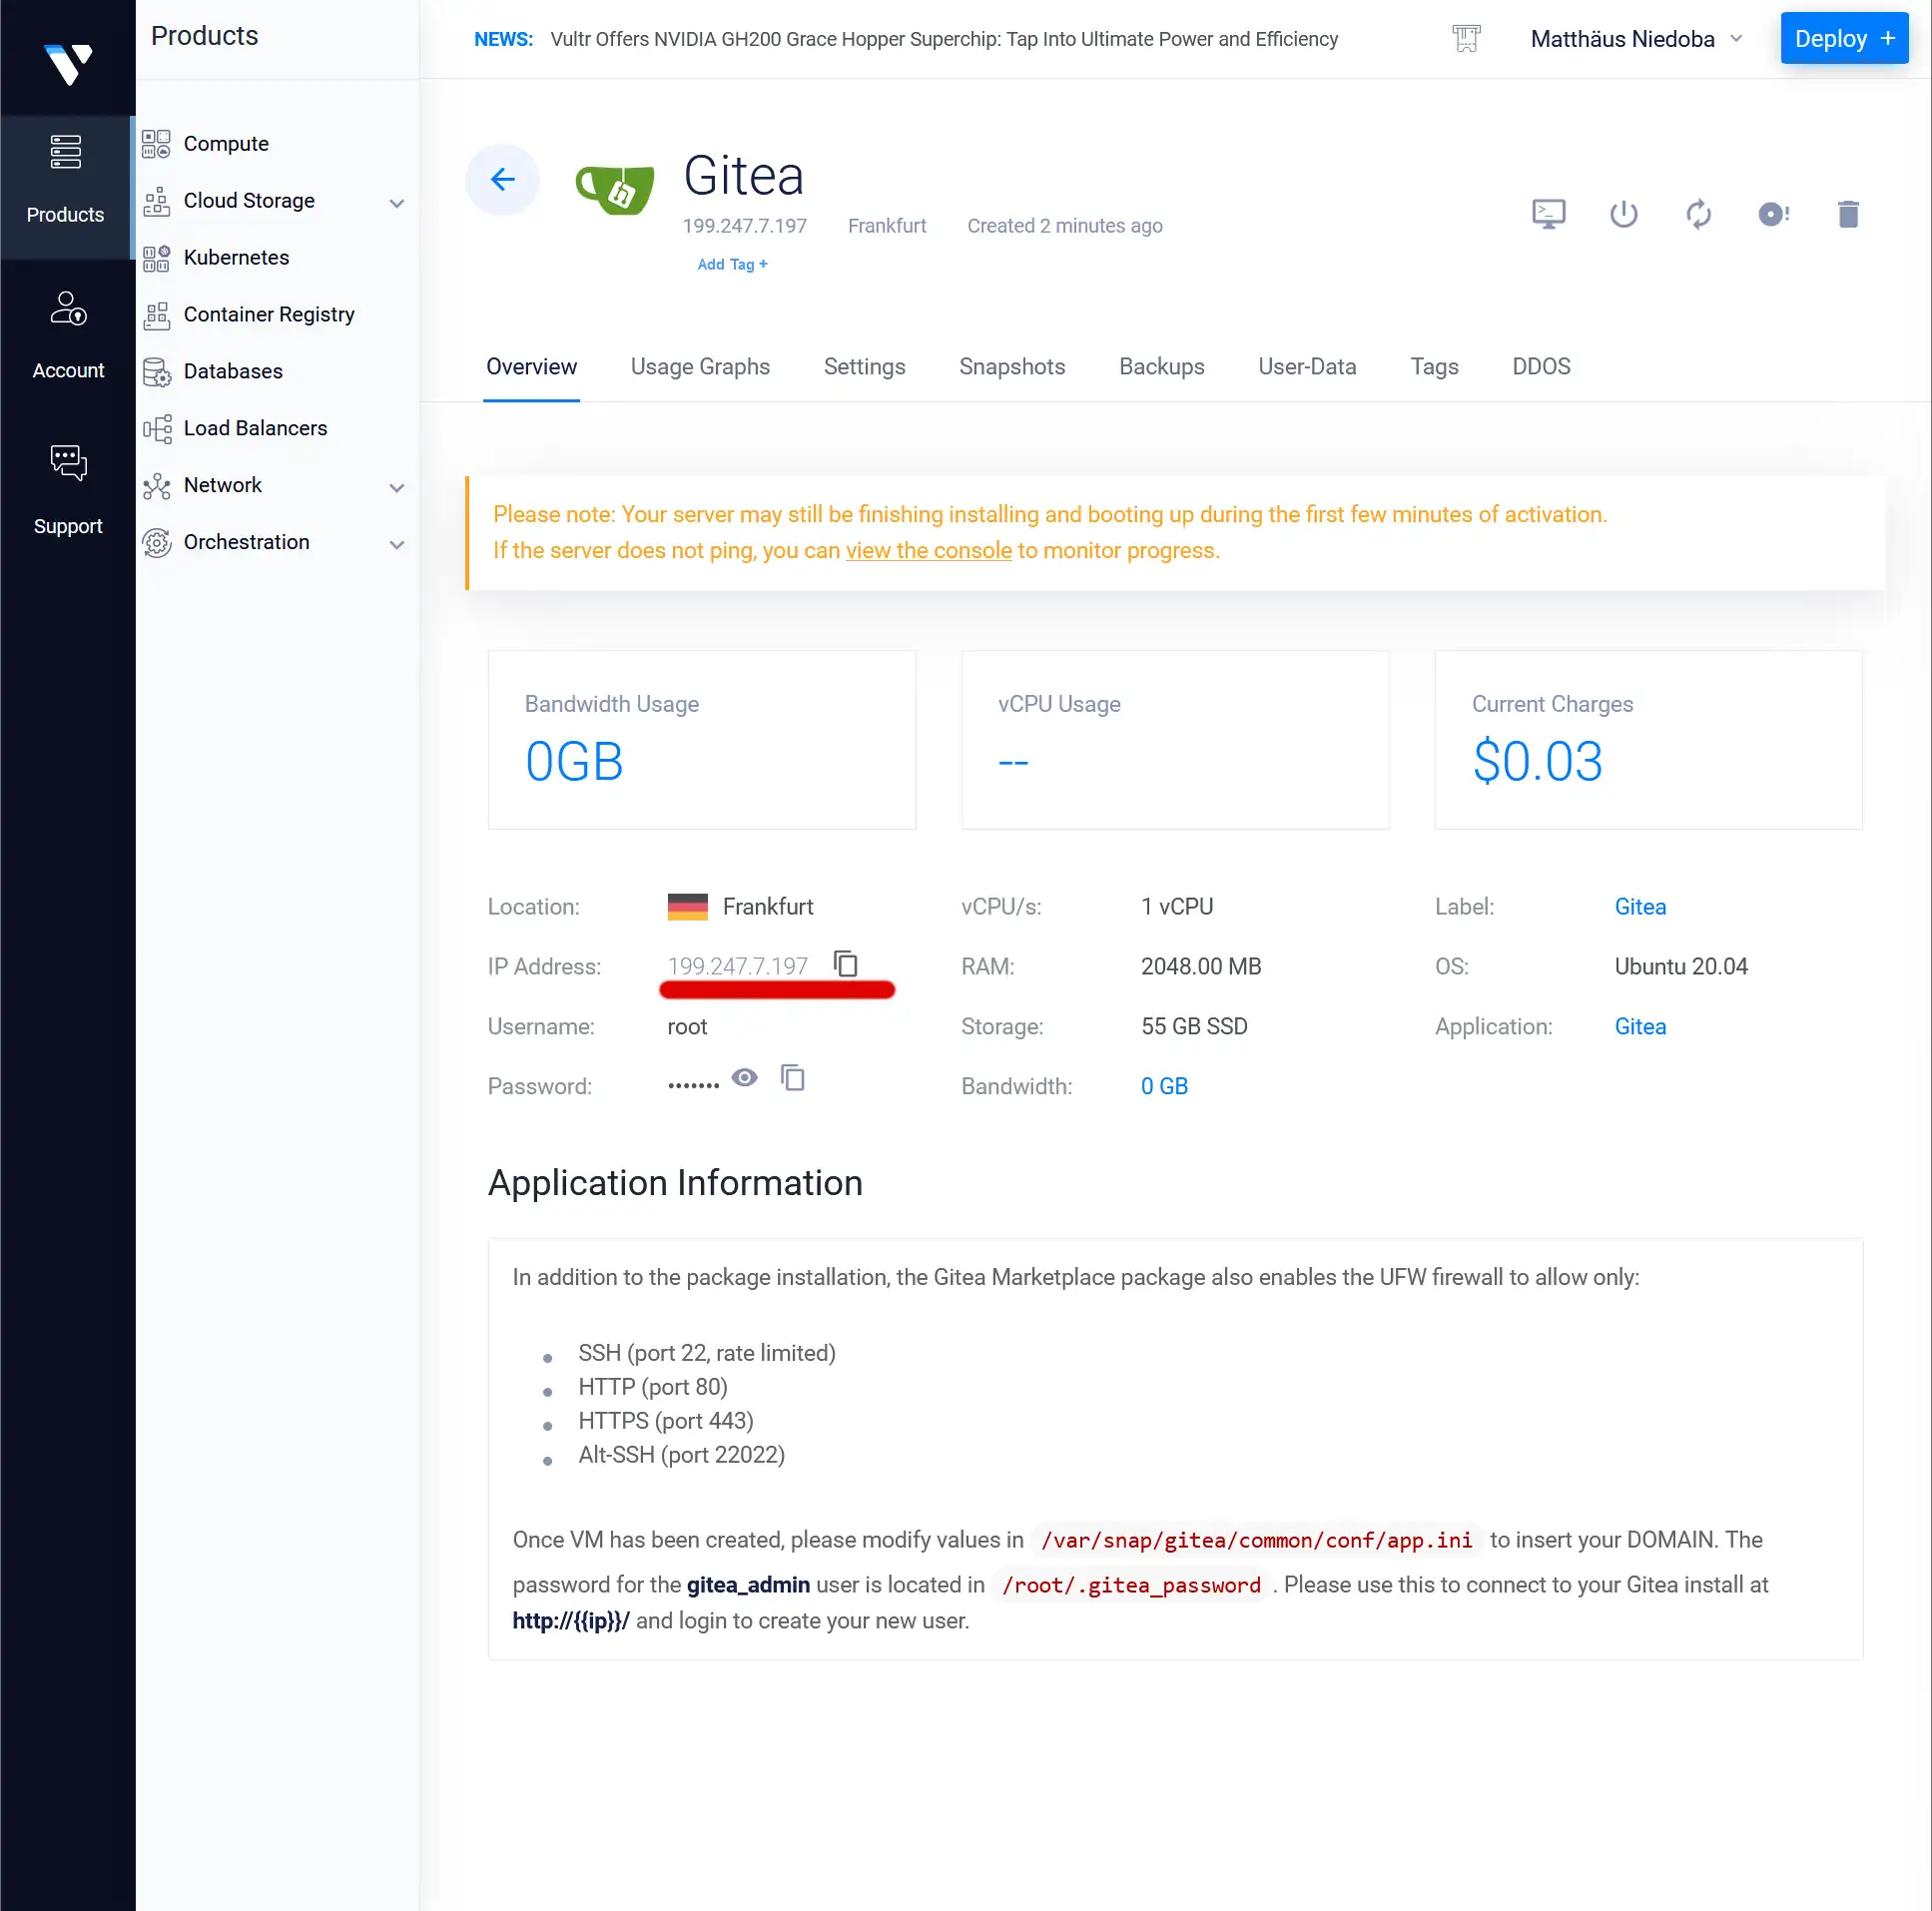
If you copy the IP address and paste it in a new browser tab, you can see that Gitea should been successfully installed.
For our binary files we will be using Git LFS (Large File Storage). It is an extension to Git that allows us to work with GB-sized repositories by efficiently managing binary files. Without it, we will quickly hit limits and have to spend hours debugging.
One of the things that Git LFS gives us is the ability to put all of our binaries on external storage, which results in much lower costs and infinite scalability. Keep in mind that our virtual machine only has 55GB of storage.
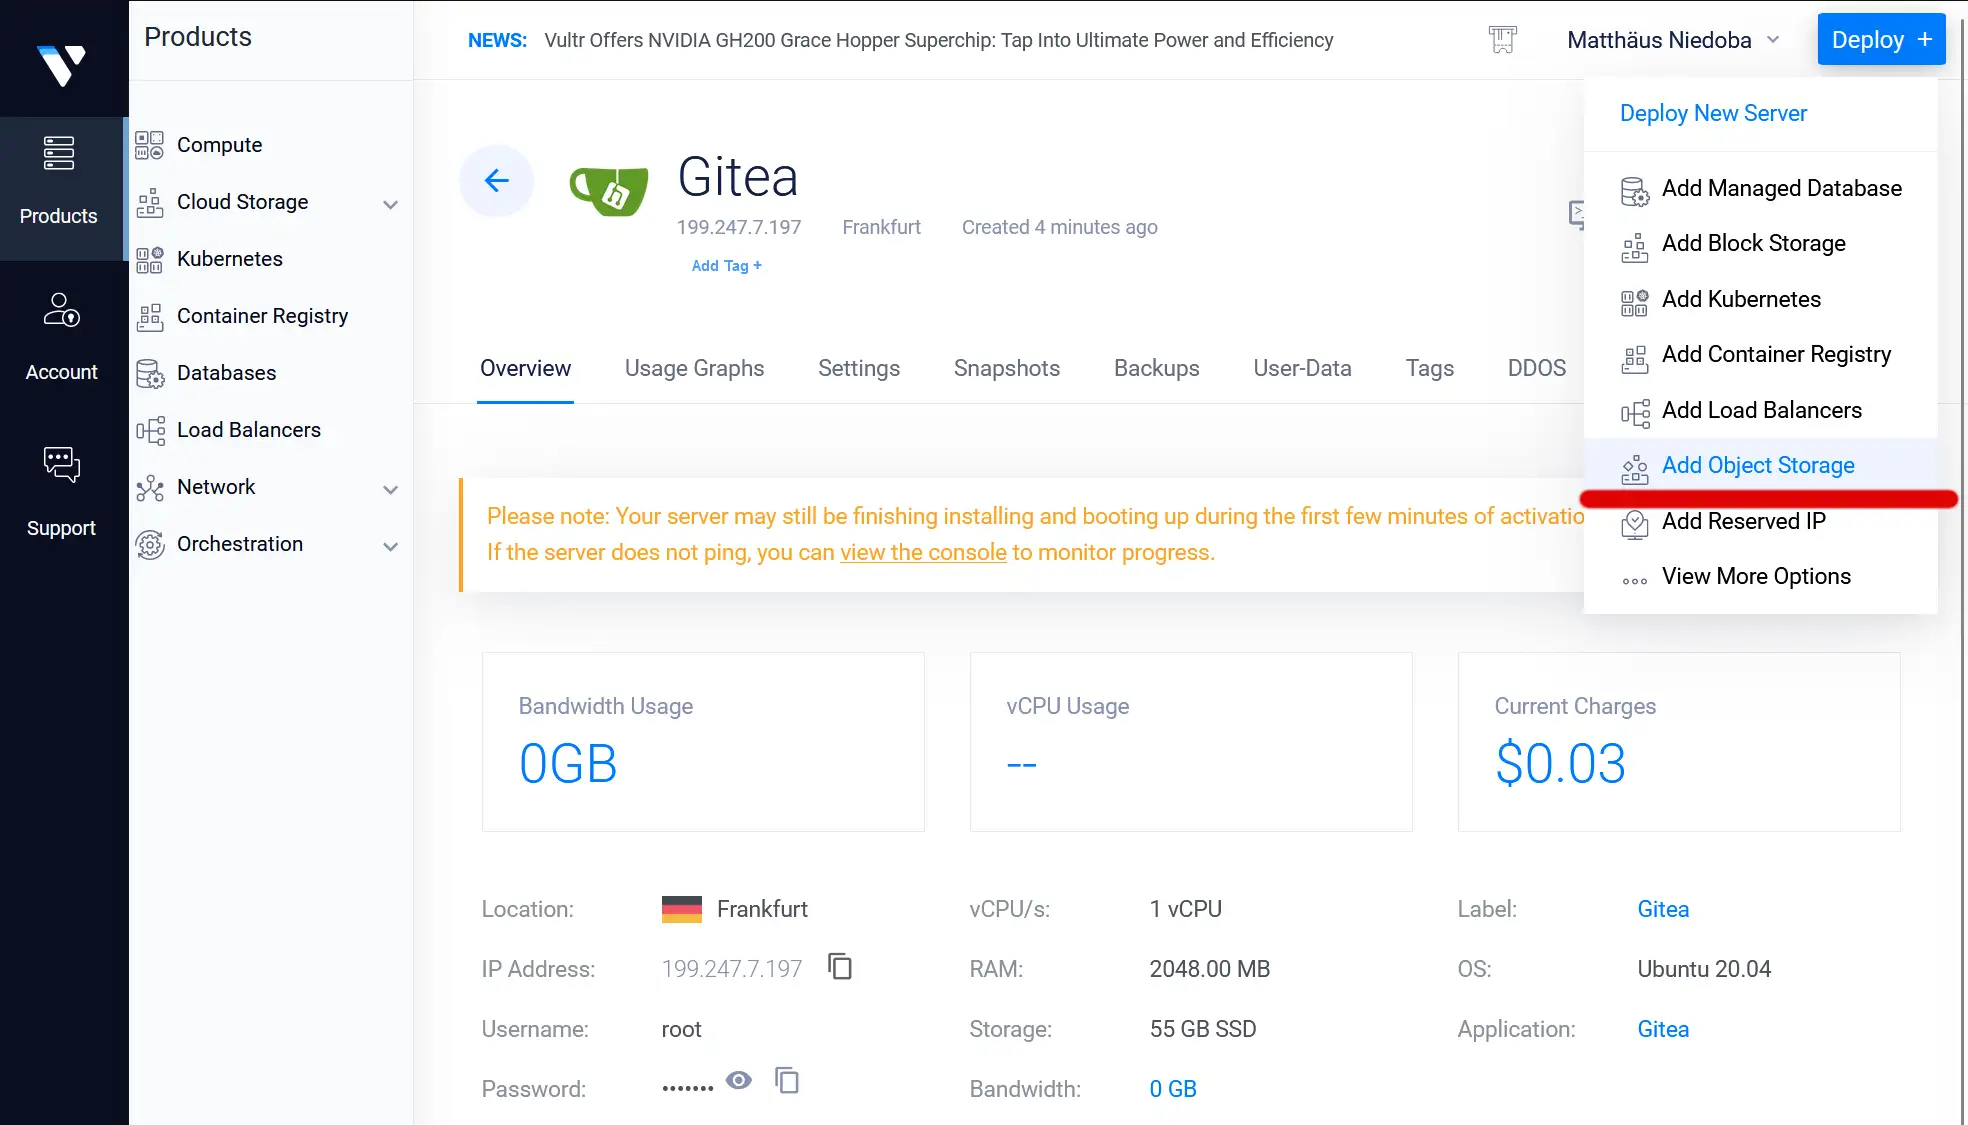
Setup Object Storage by following these steps.
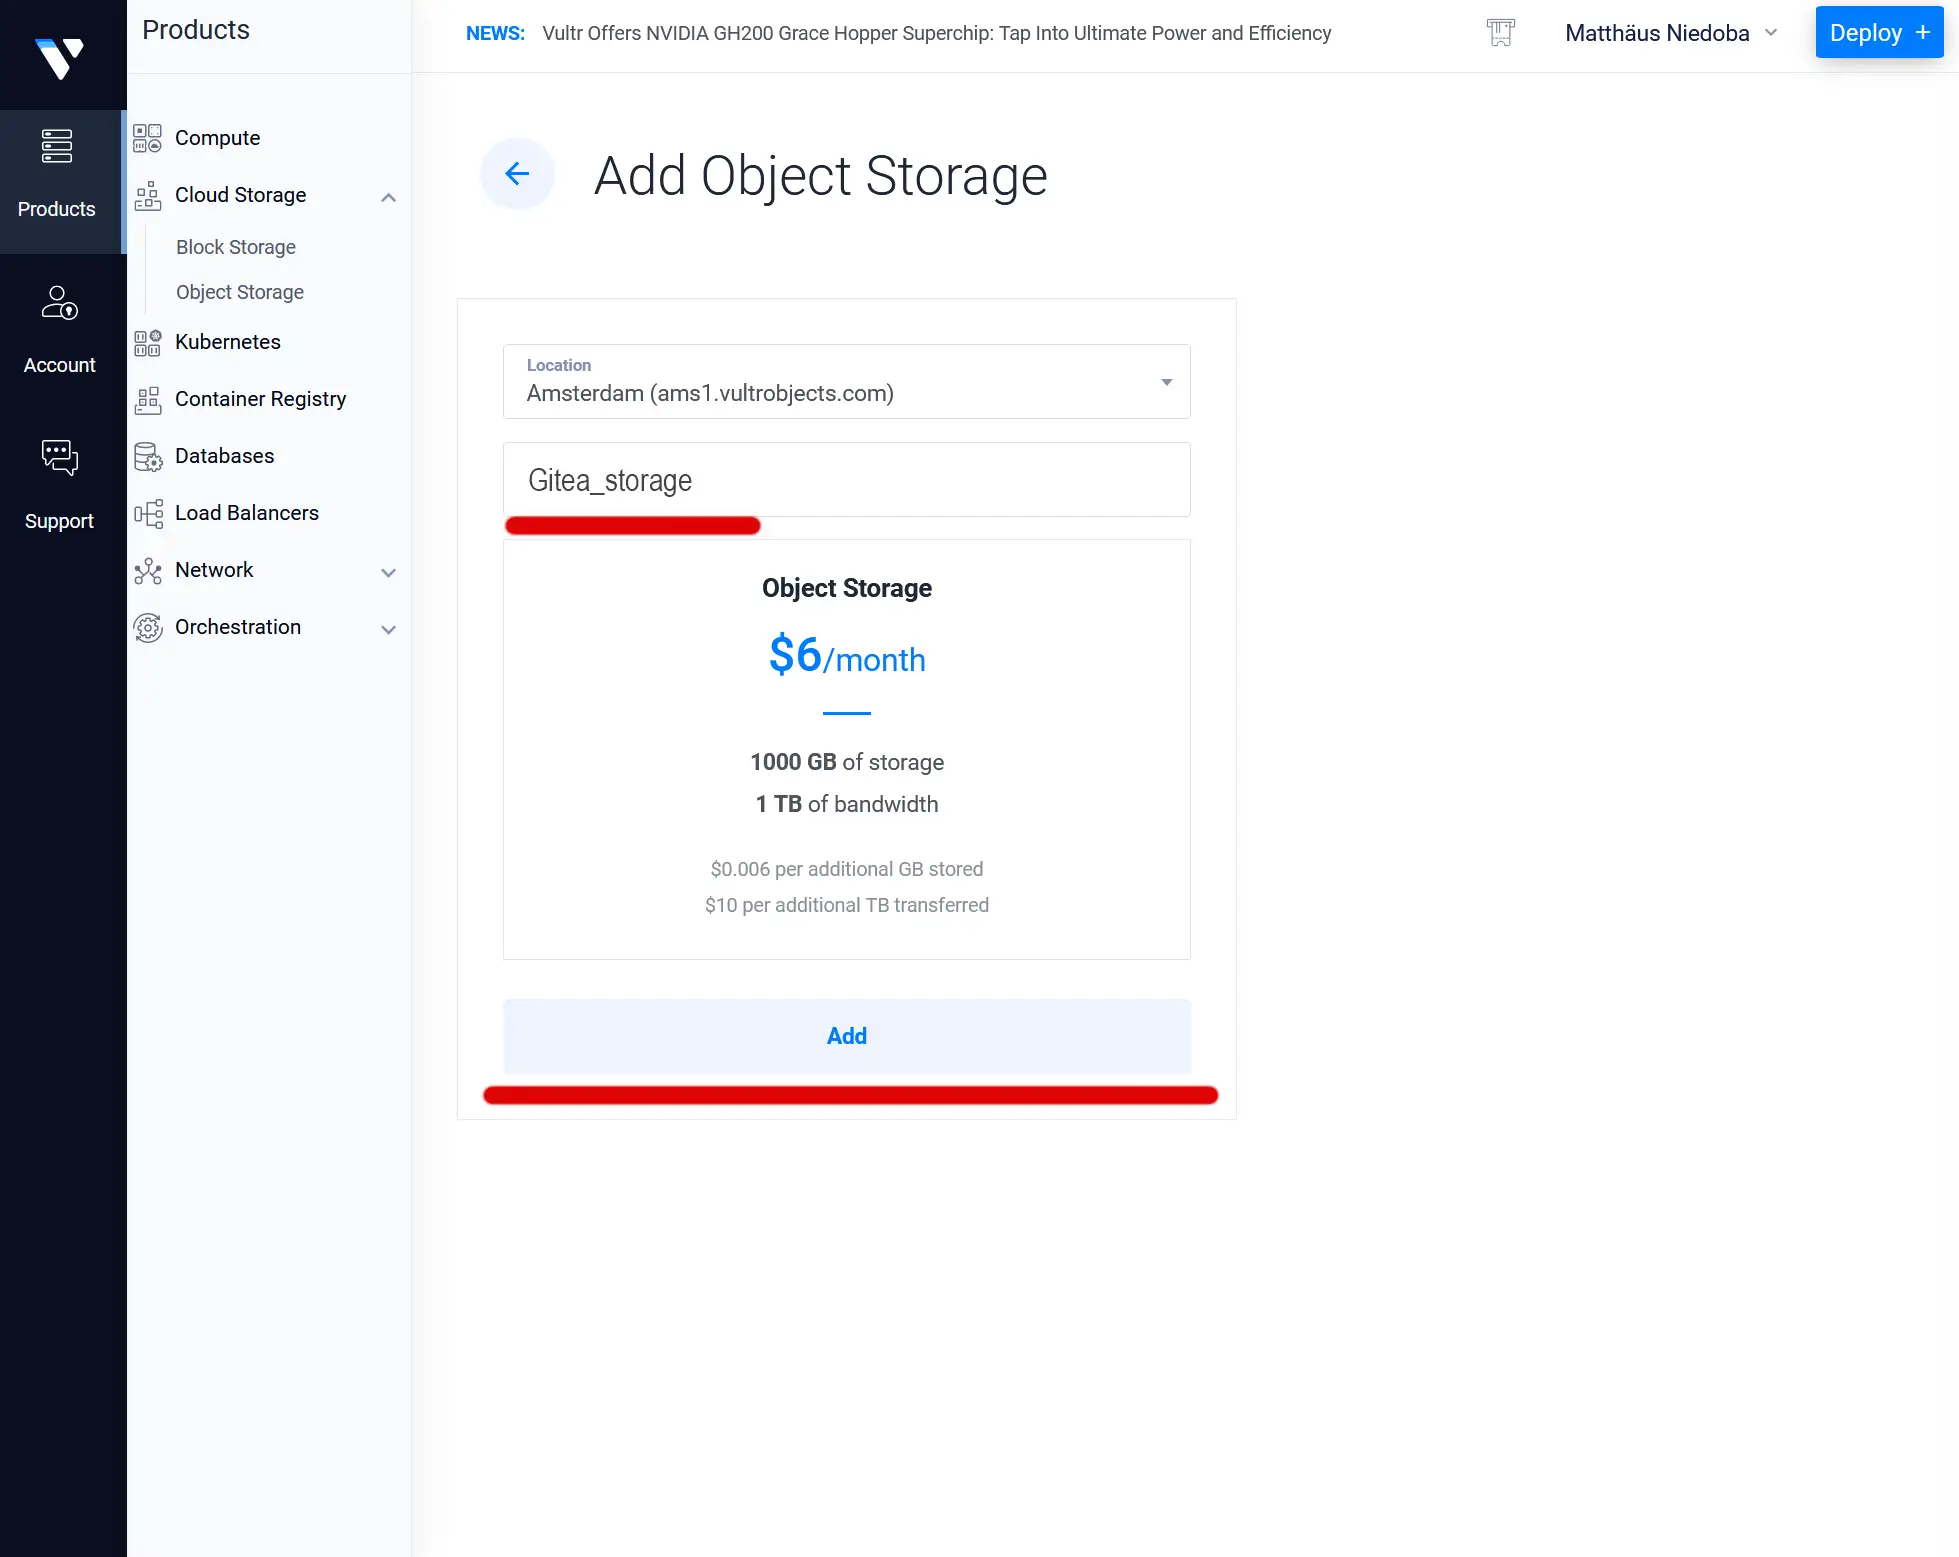
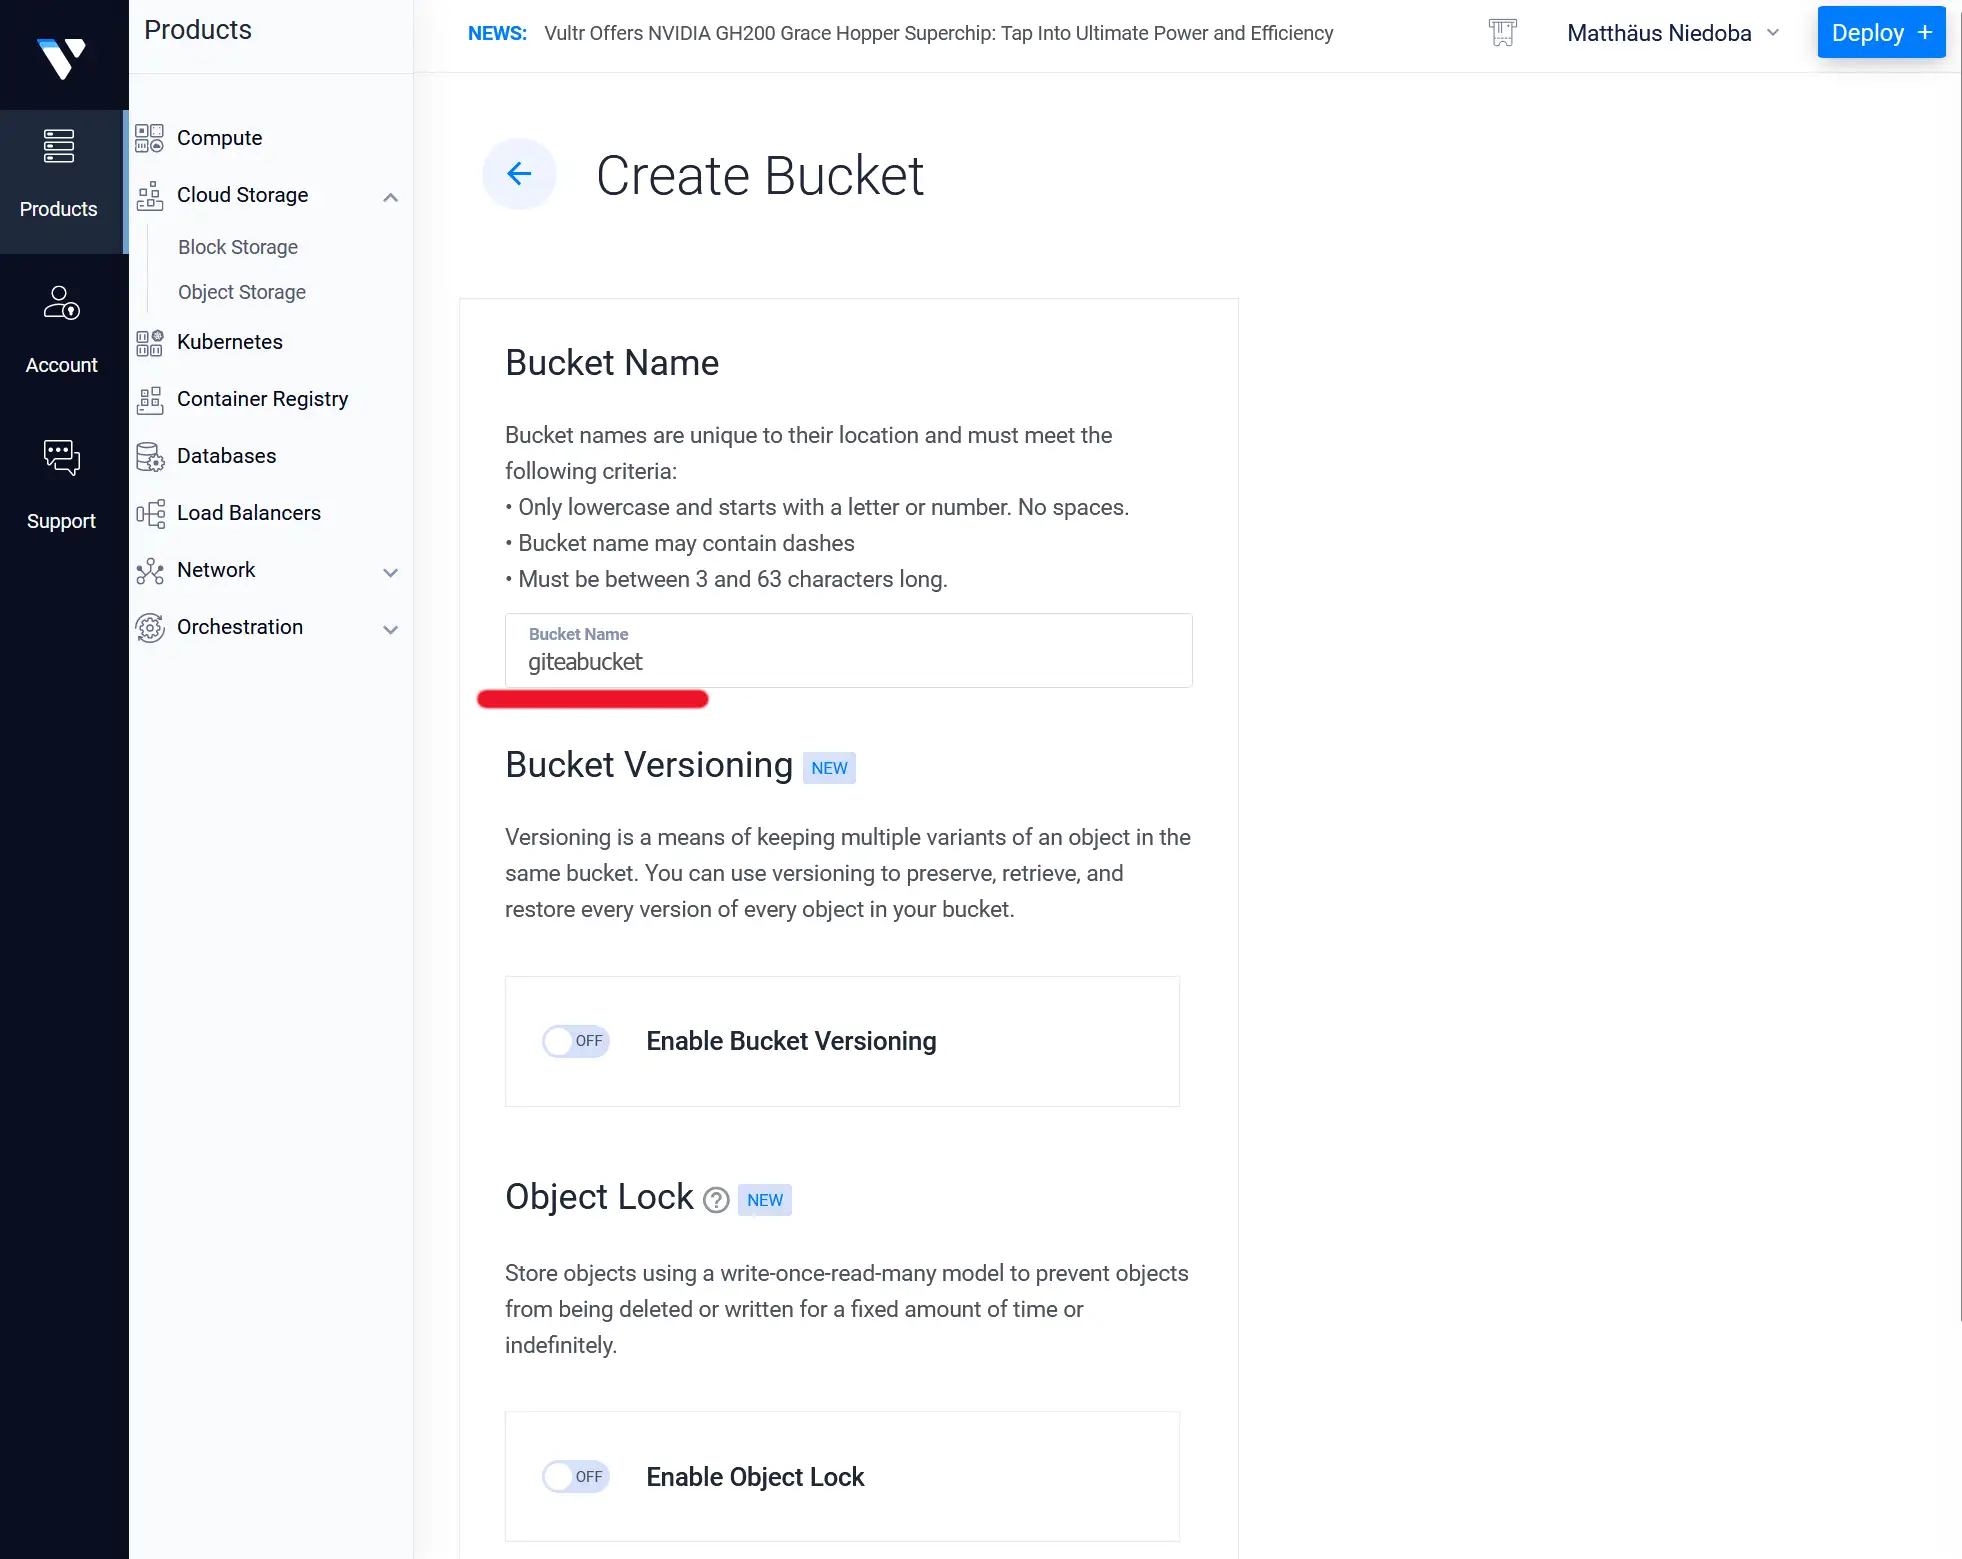
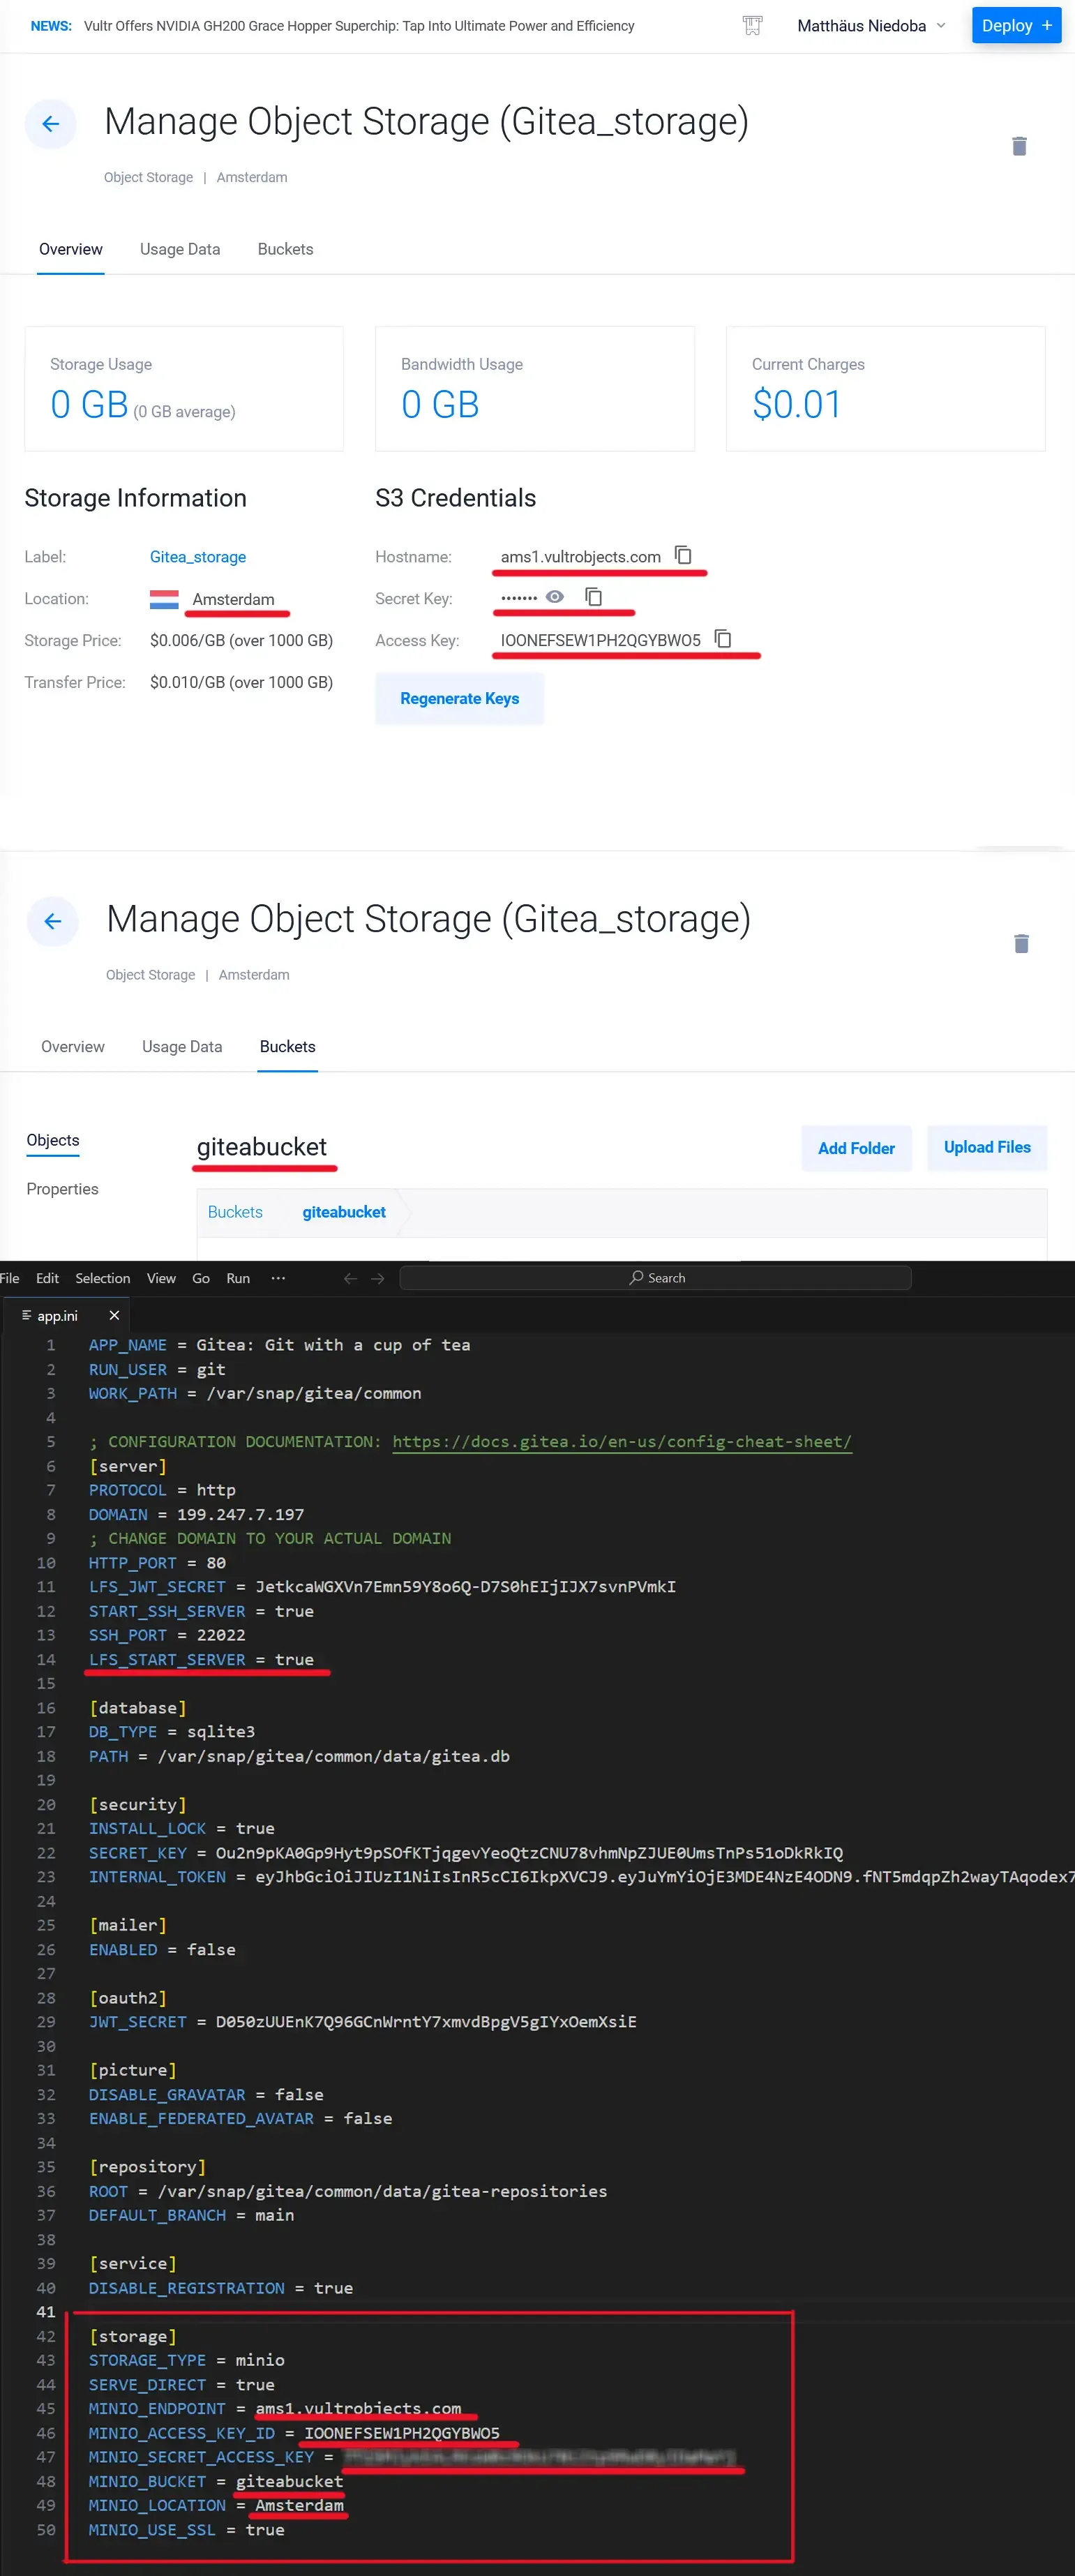
Once it’s created, click on the entry to enter the settings. We will need to create a bucket. A bucket is like a virtual hard drive. Click on create new bucket and name it “giteabucket”. Leave all settings as they are.
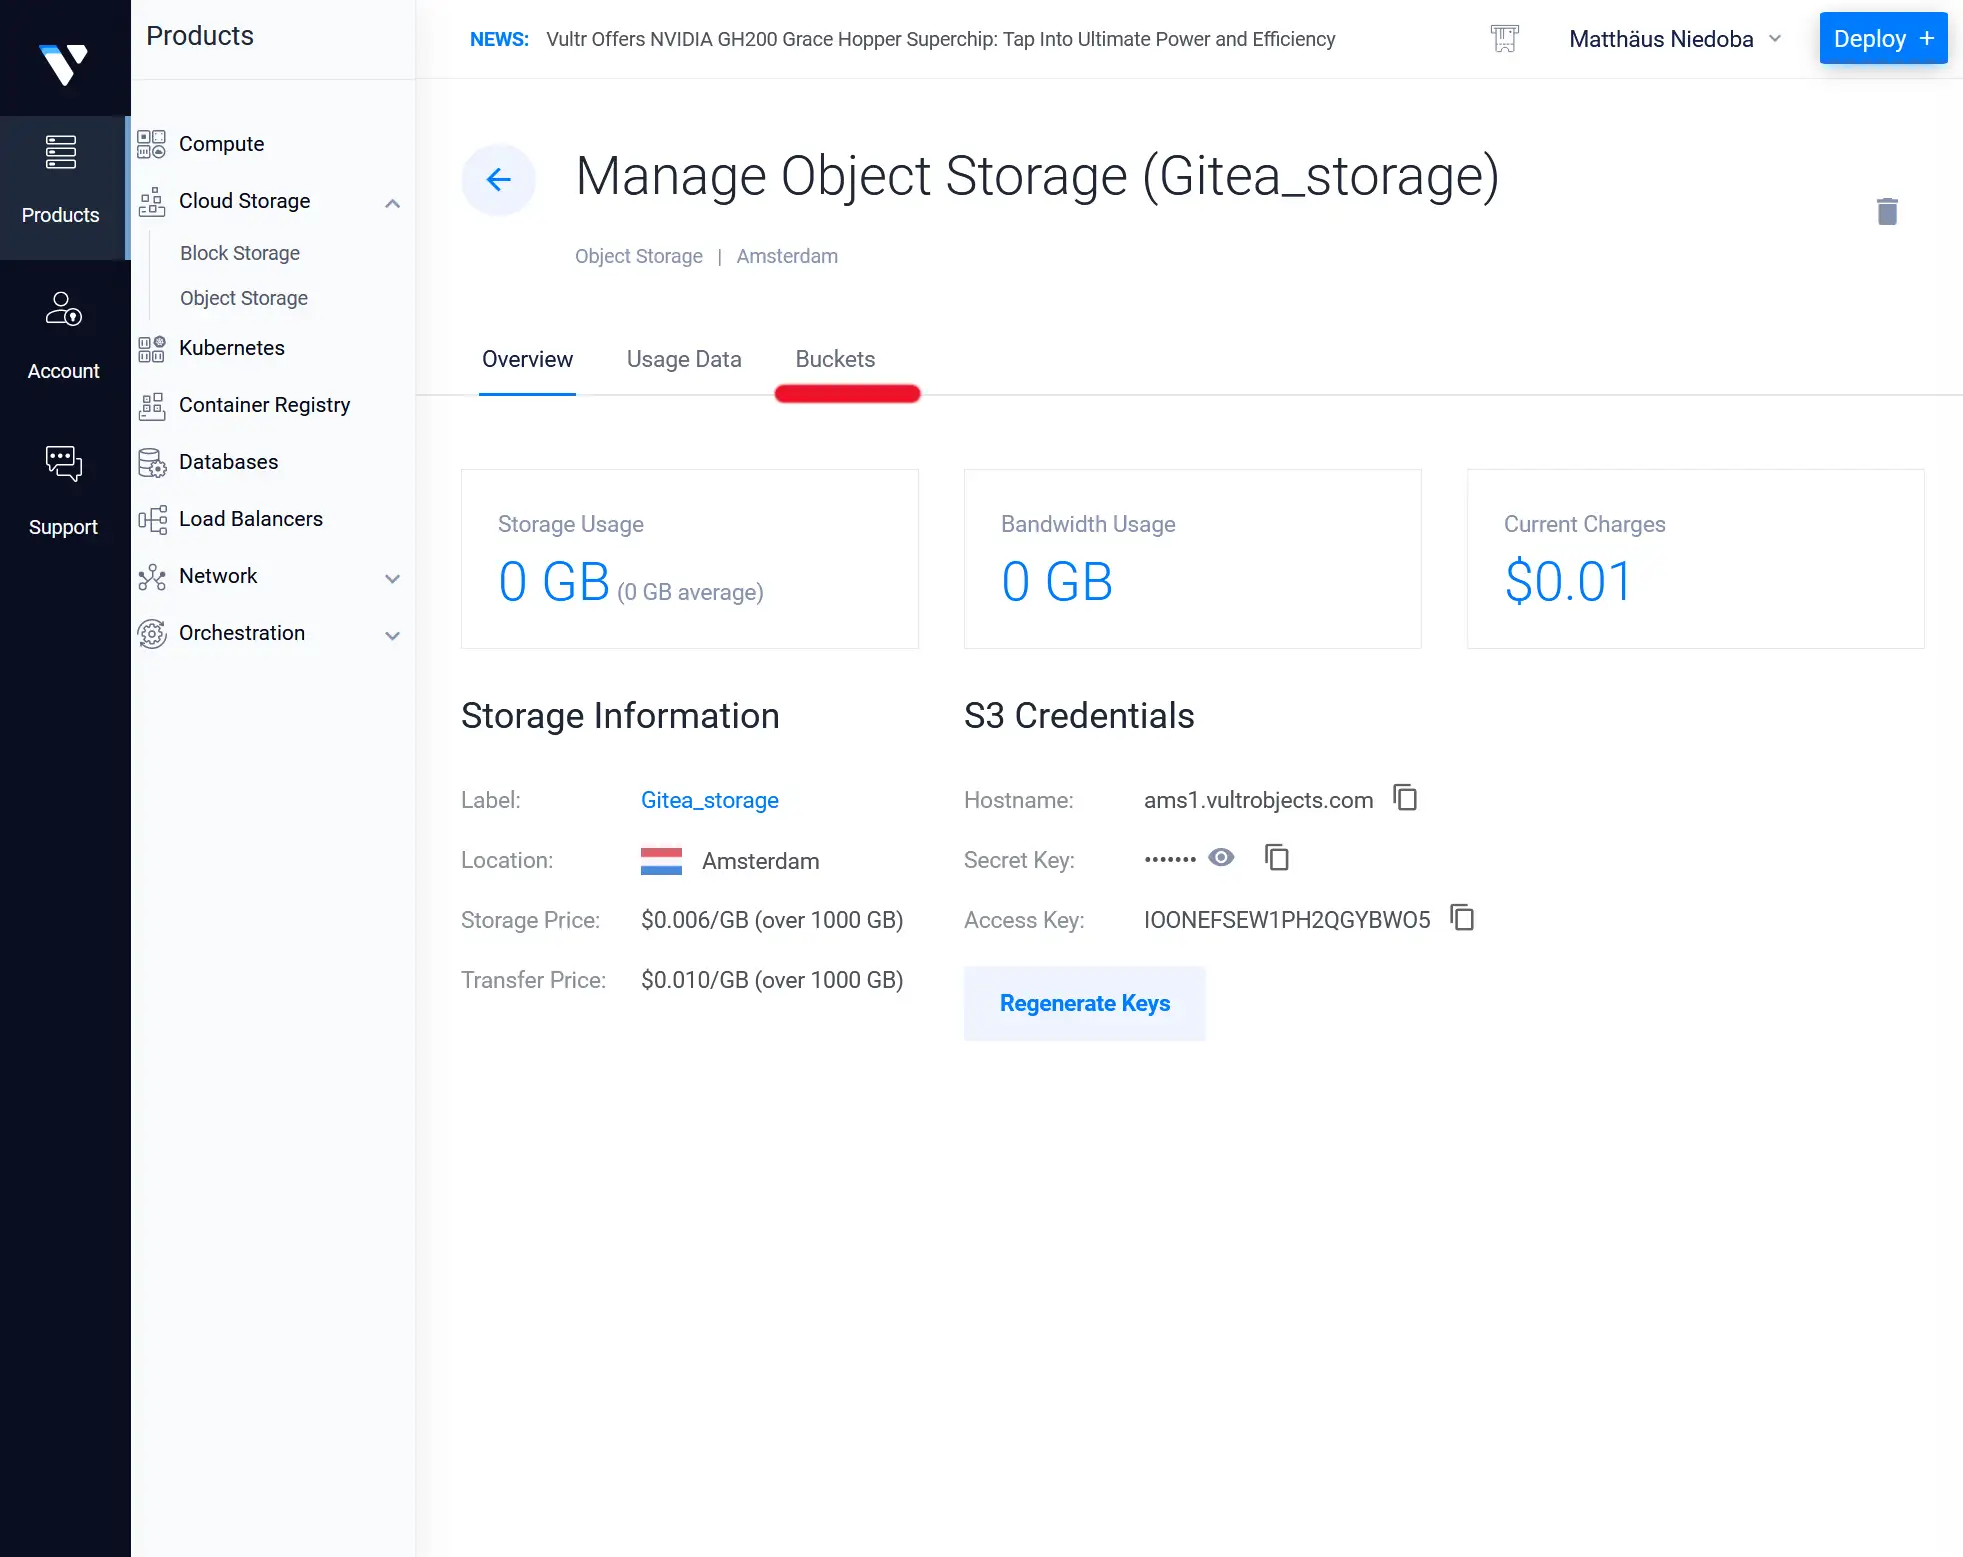
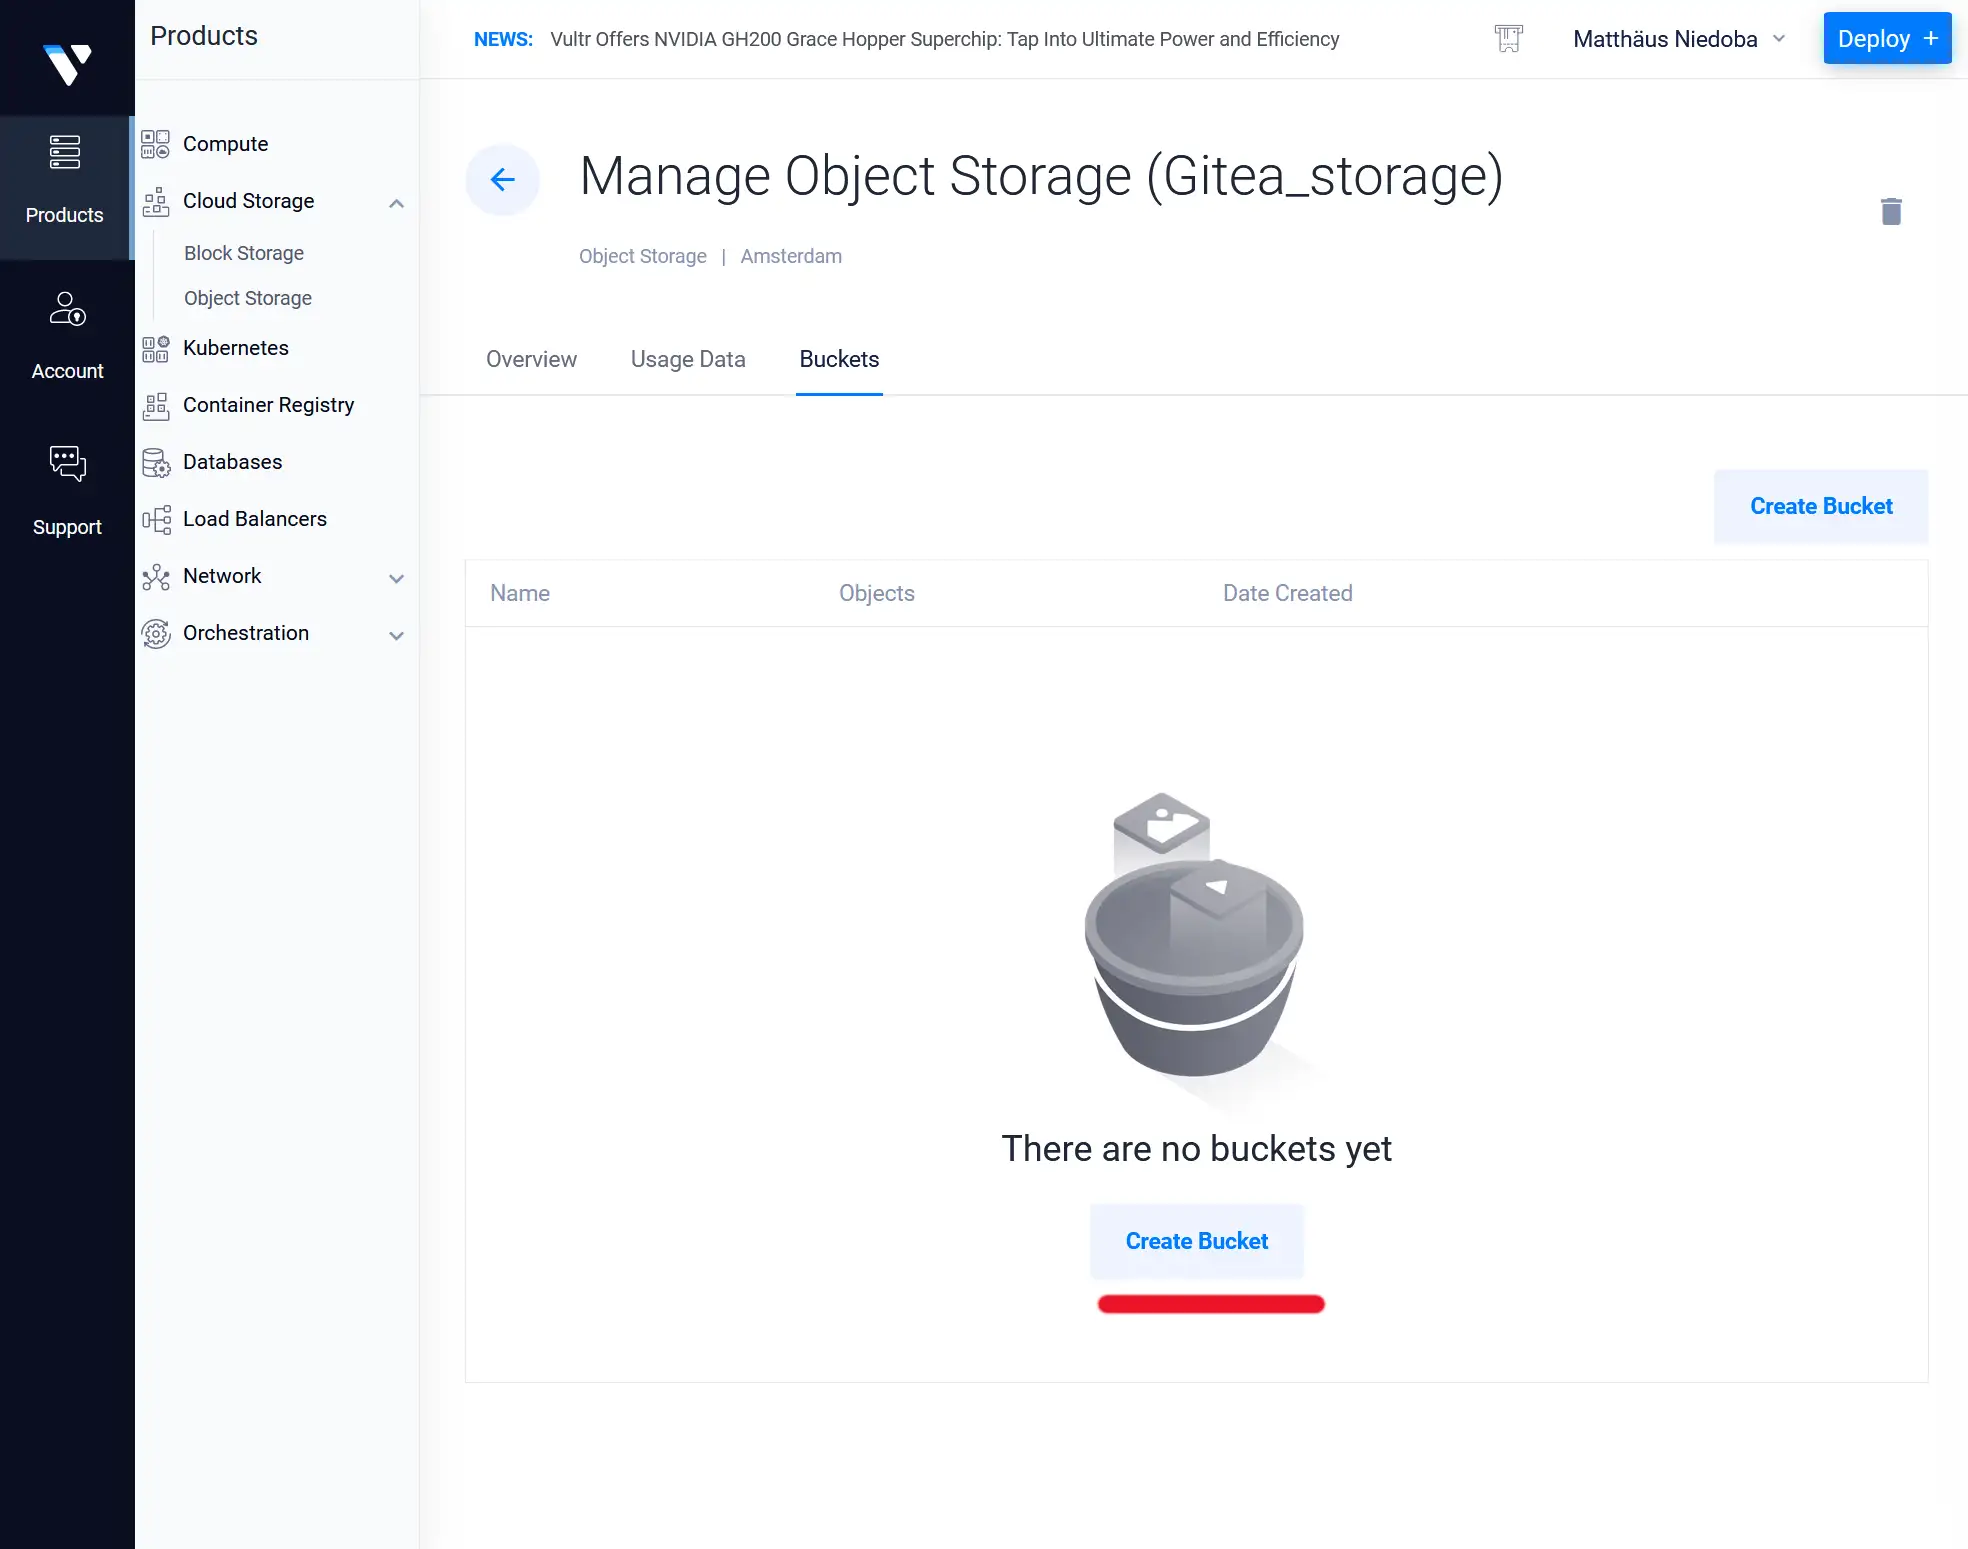
Finally, go back to the “Overview” tab, because now, we need the credentials for configuring Gitea.
We need to adjust the Gitea settings. They are in a config file that we need to download via SFTP from our server. To do this, we will need Filezilla or another FTP client.
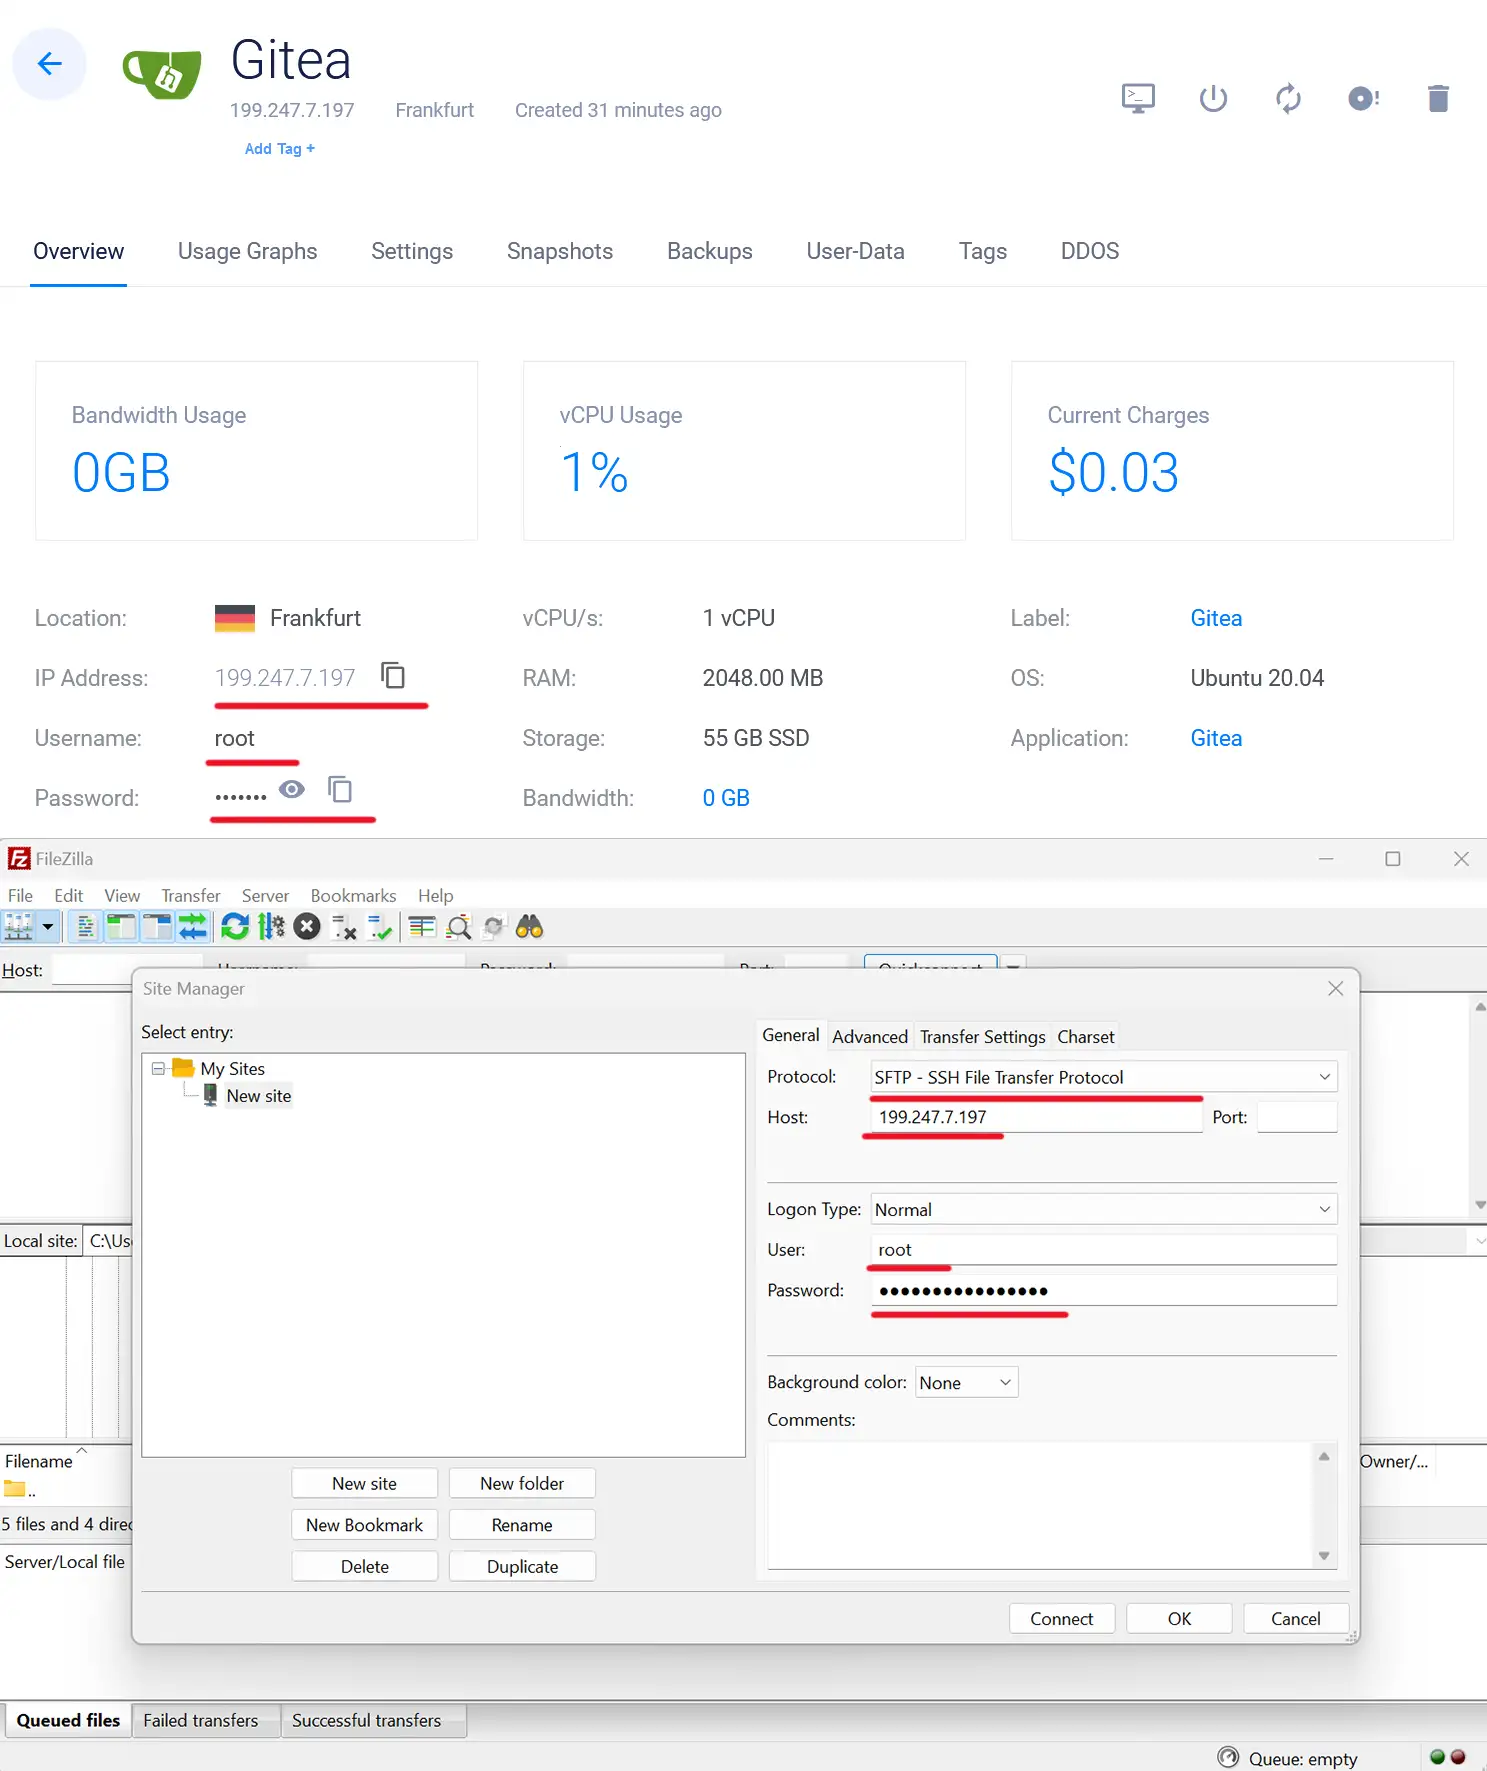
Open Filezilla and go to the "Site Manager". Then we need to enter the server credentials.
In Vultr, they are located in your server settings under “Compute” then click on your “Gitea” server. Copy the IP address, your username (which is “root”) and the password and enter it to Filezilla. Change the Protocol to “SFTP”. Finally, click on “Connect”.
Once you have connected to the server, type in this in your remote site address and press enter.
/var/snap/gitea/common/conf
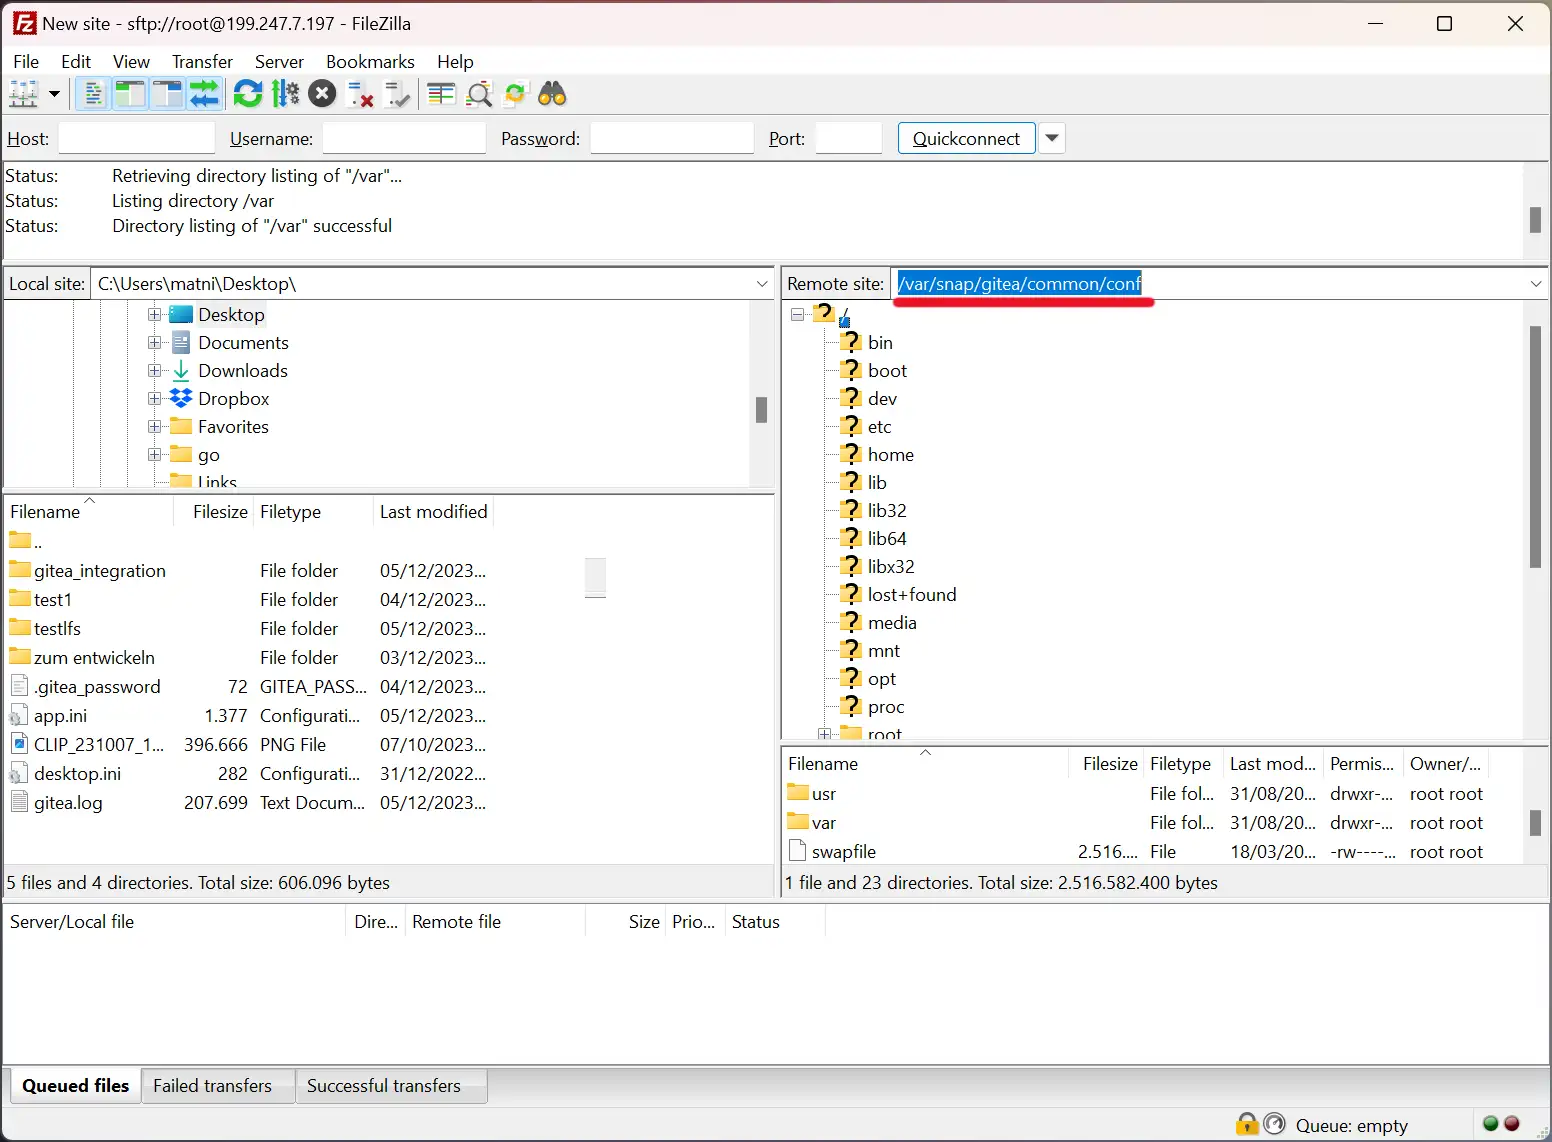
Then, in the left pane, navigate to your desktop and drag the app.ini file you see on the right to your desktop. Open the app.ini file with a text editor (such as Visual Studio Code).
Now we need to add the following:
1. In the section [server] add this:
LFS_START_SERVER = true
2. At the end of the file, create a [storage] section and add these entries:
[storage]

STORAGE_TYPE = minio

SERVE_DIRECT = true

MINIO_ENDPOINT = ams1.vultrobjects.com

MINIO_ACCESS_KEY_ID = IOONEFSEW1PH2QGYBWO5

MINIO_SECRET_ACCESS_KEY = 7******************************j

MINIO_BUCKET = giteabucket

MINIO_LOCATION = Amsterdam

MINIO_USE_SSL = true
You will need to replace these entries with the values from your bucket. Go back to your bucket settings under "Cloud Storage/Object Storage" in Vultr and click on your object storage entry.
You will need to change this to your own values:
MINIO_ENDPOINT
MINIO_ACCESS_KEY_ID
MINIO_SECRET_ACCESS_KEY
MINIO_LOCATION
MINIO_BUCKET (only if you named your bucket something other than "giteabucket")
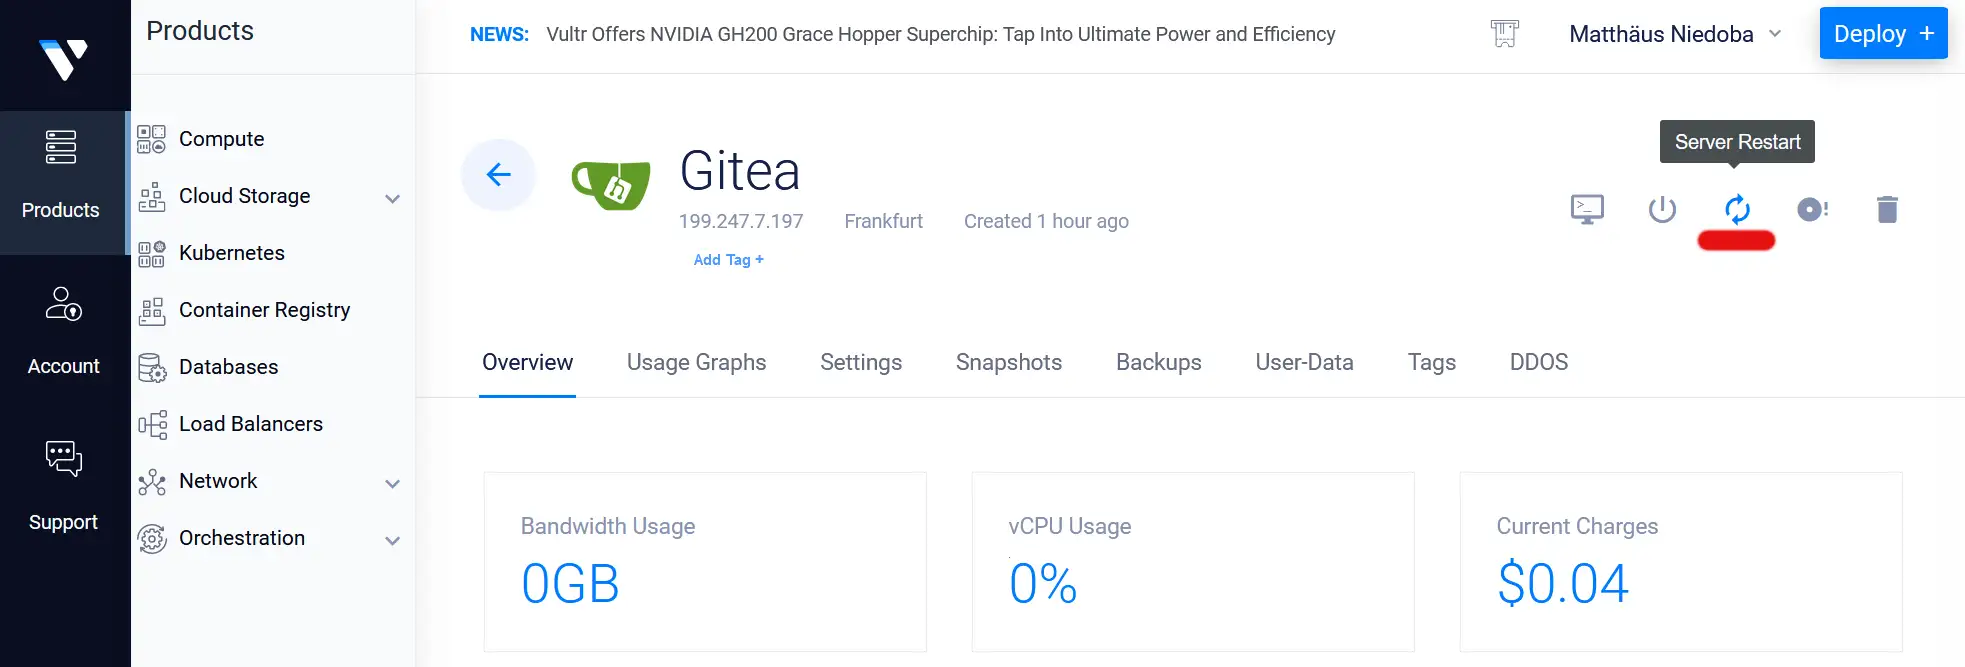
Now, upload the "app.ini" file via Filezilla to the server.
Go back to your server and restart it. Wait 3 minutes until it has started the Gitea server. Then, if you enter the IP of the server in a new browser tab, the Gitea website should load. If not, something is wrong with the configuration.
If you need to debug it, add this to the end of your “app.ini”.
[log]

MODE = file
Then upload the file via Filezilla and restart the server. Gitea will create a log file with problems in this location: "/var/snap/gitea/common/log". Paste it into Filezilla to get there. The log file will print out any errors, which are helpful for debugging.
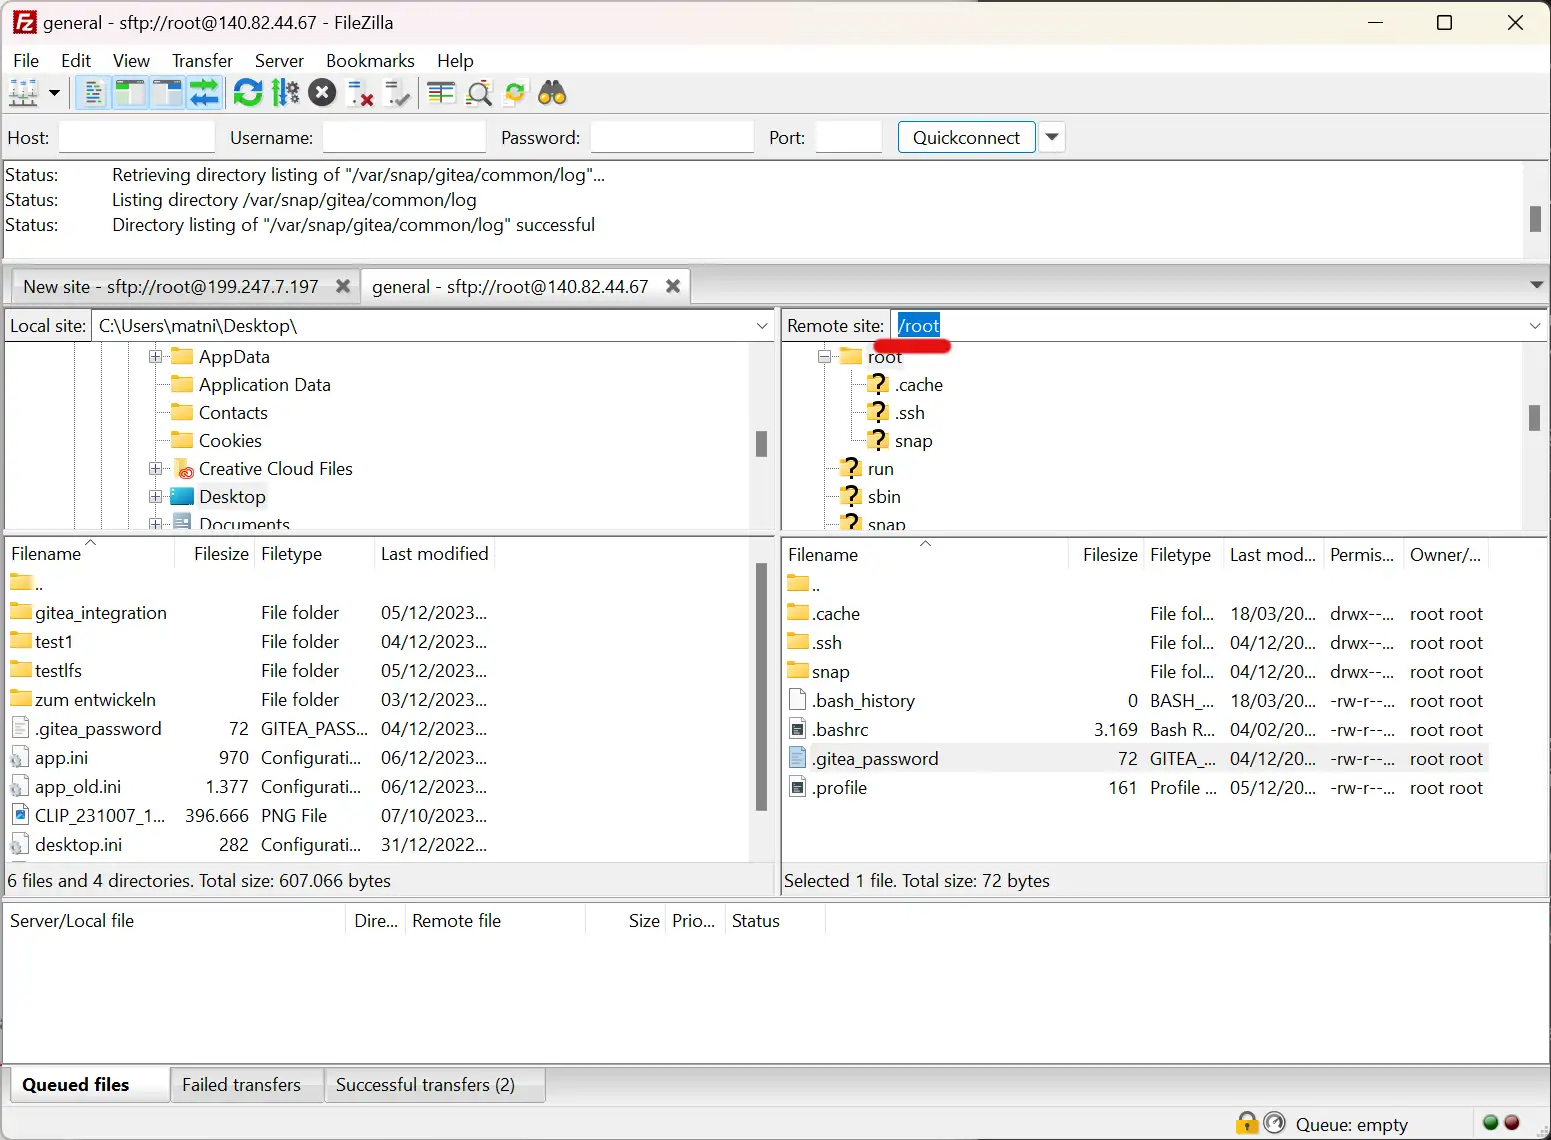
Now we need to log in to Gitea to create our first Git repository. To do this, we need our credentials. Vultr sets these defaults:
Username: gitea_admin
Password: needs to be downloaded from Filezilla. Just add "/root" to the remote site address and download the .gitea_password file.
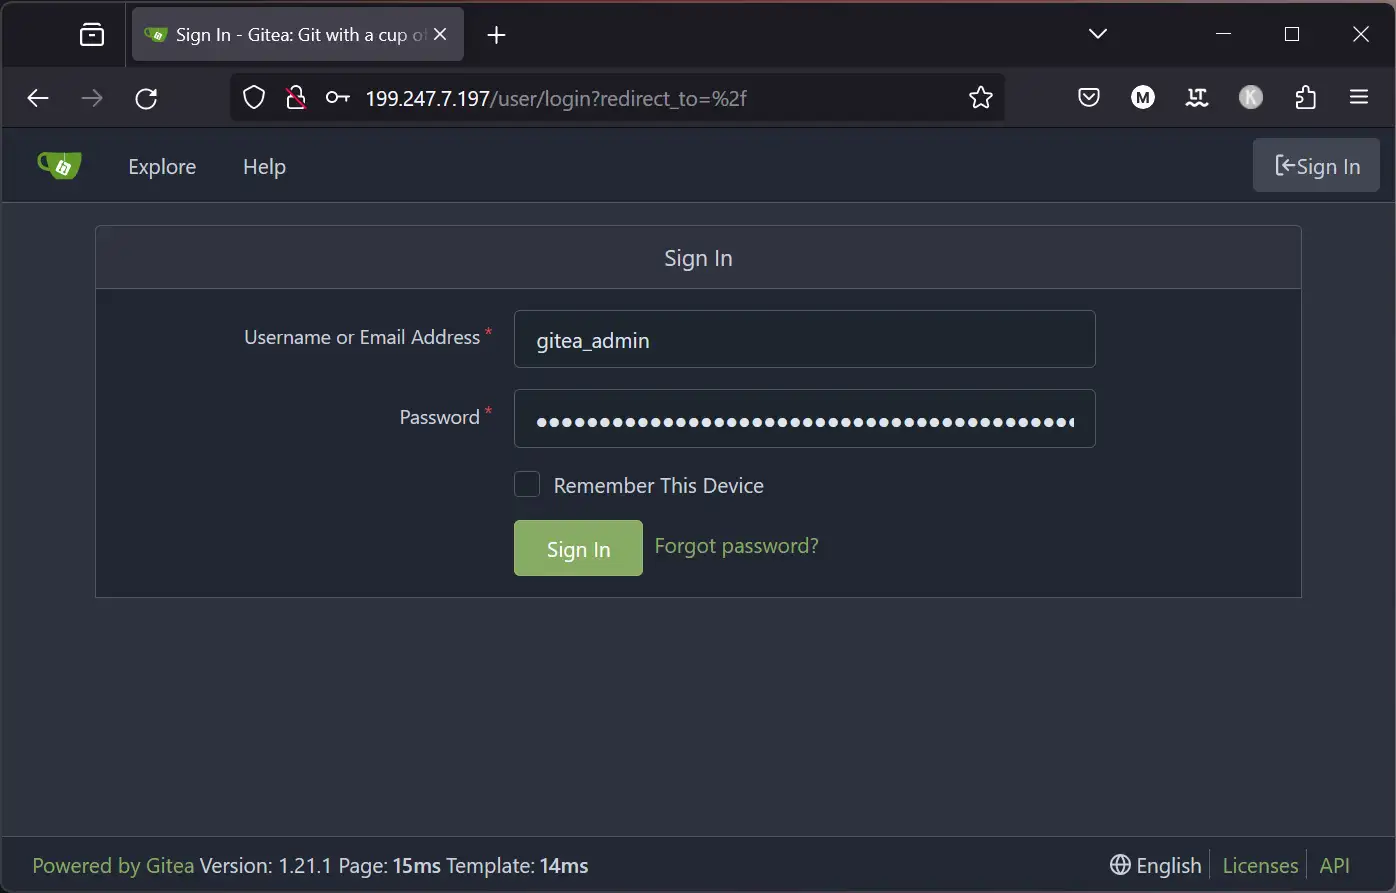
Go to your Gitea website, click on “Sign In” and enter the credentials.
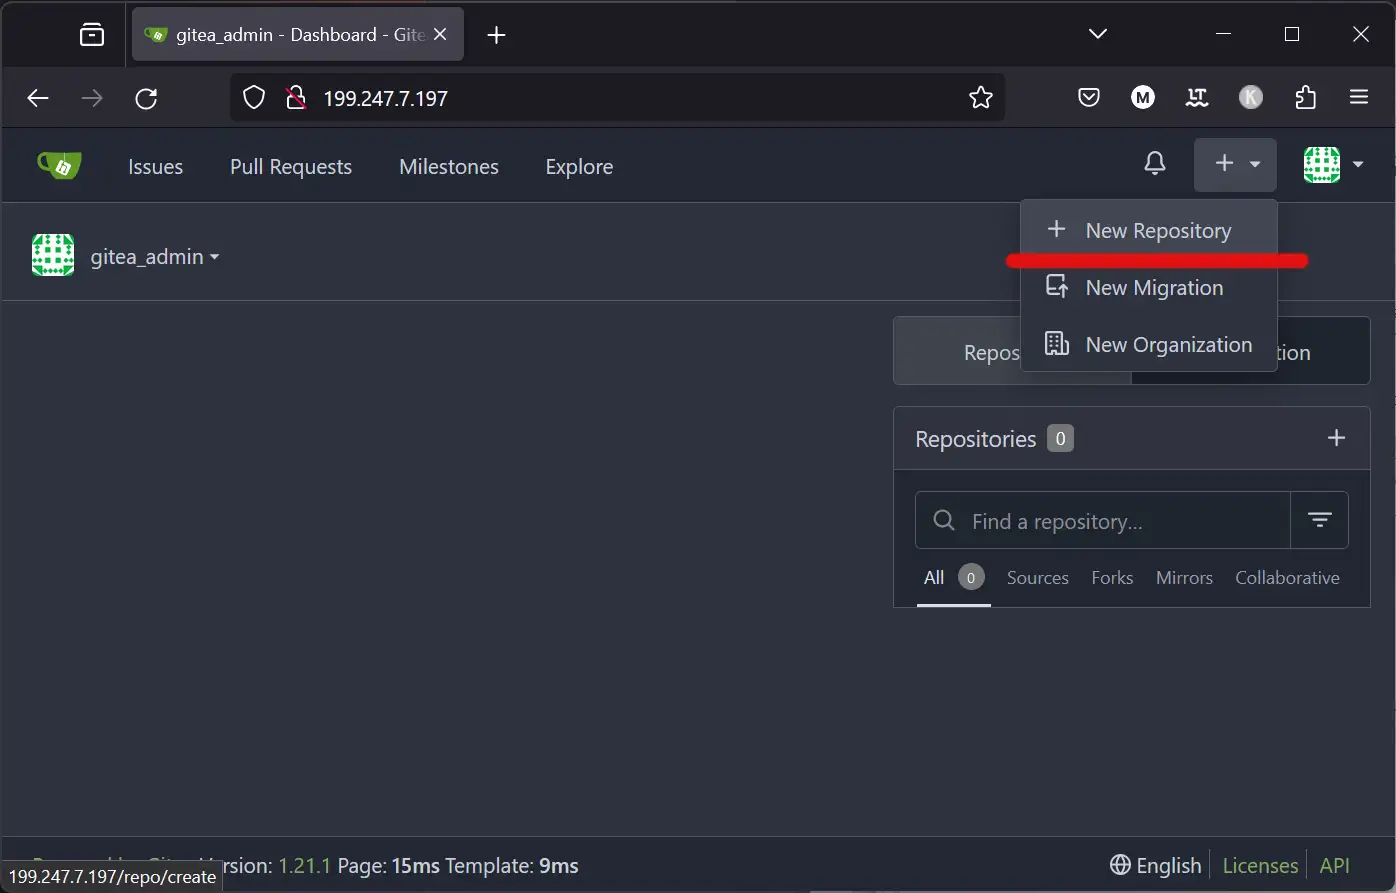
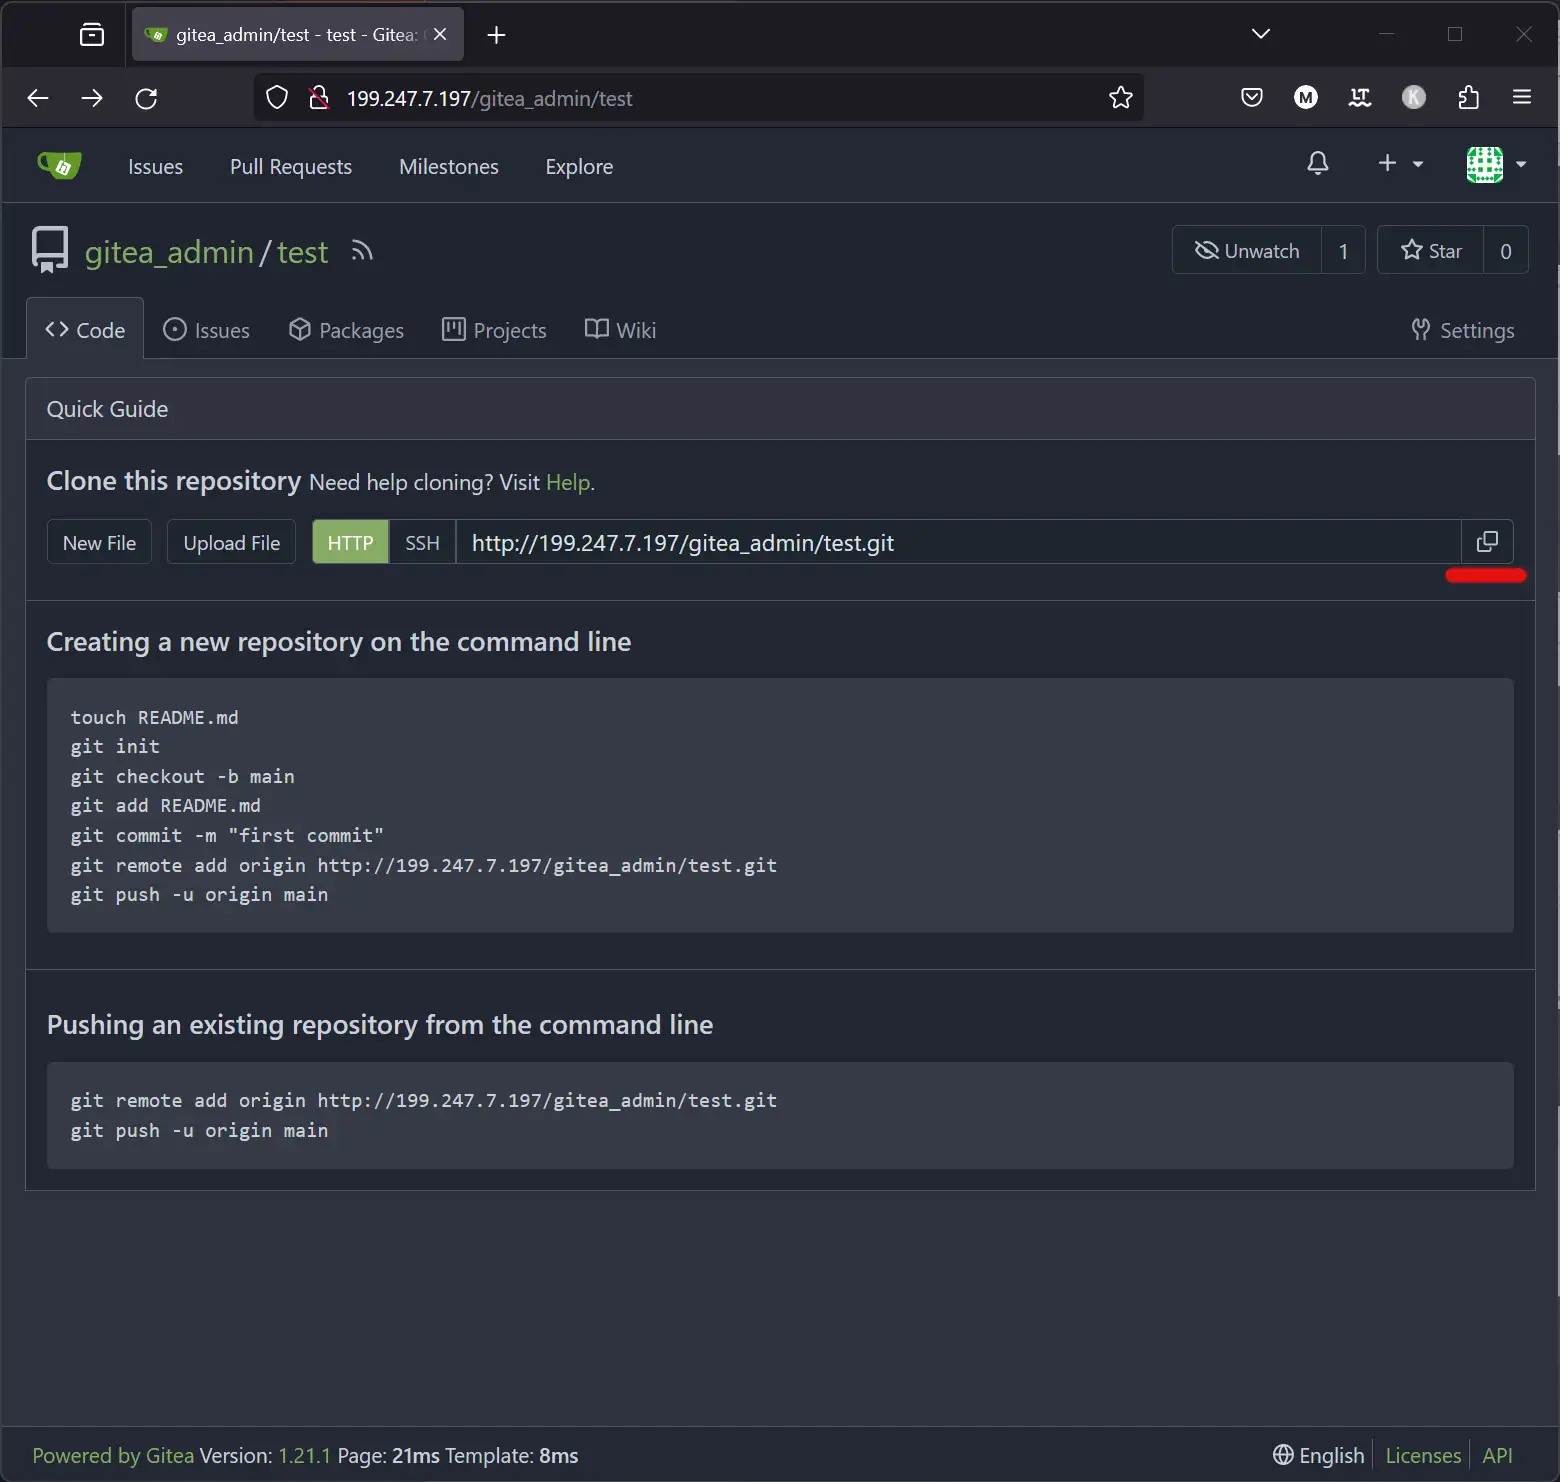
Now create a new repository, give it a name, and leave all the settings at the default.
Copy the HTTP address from your repository.
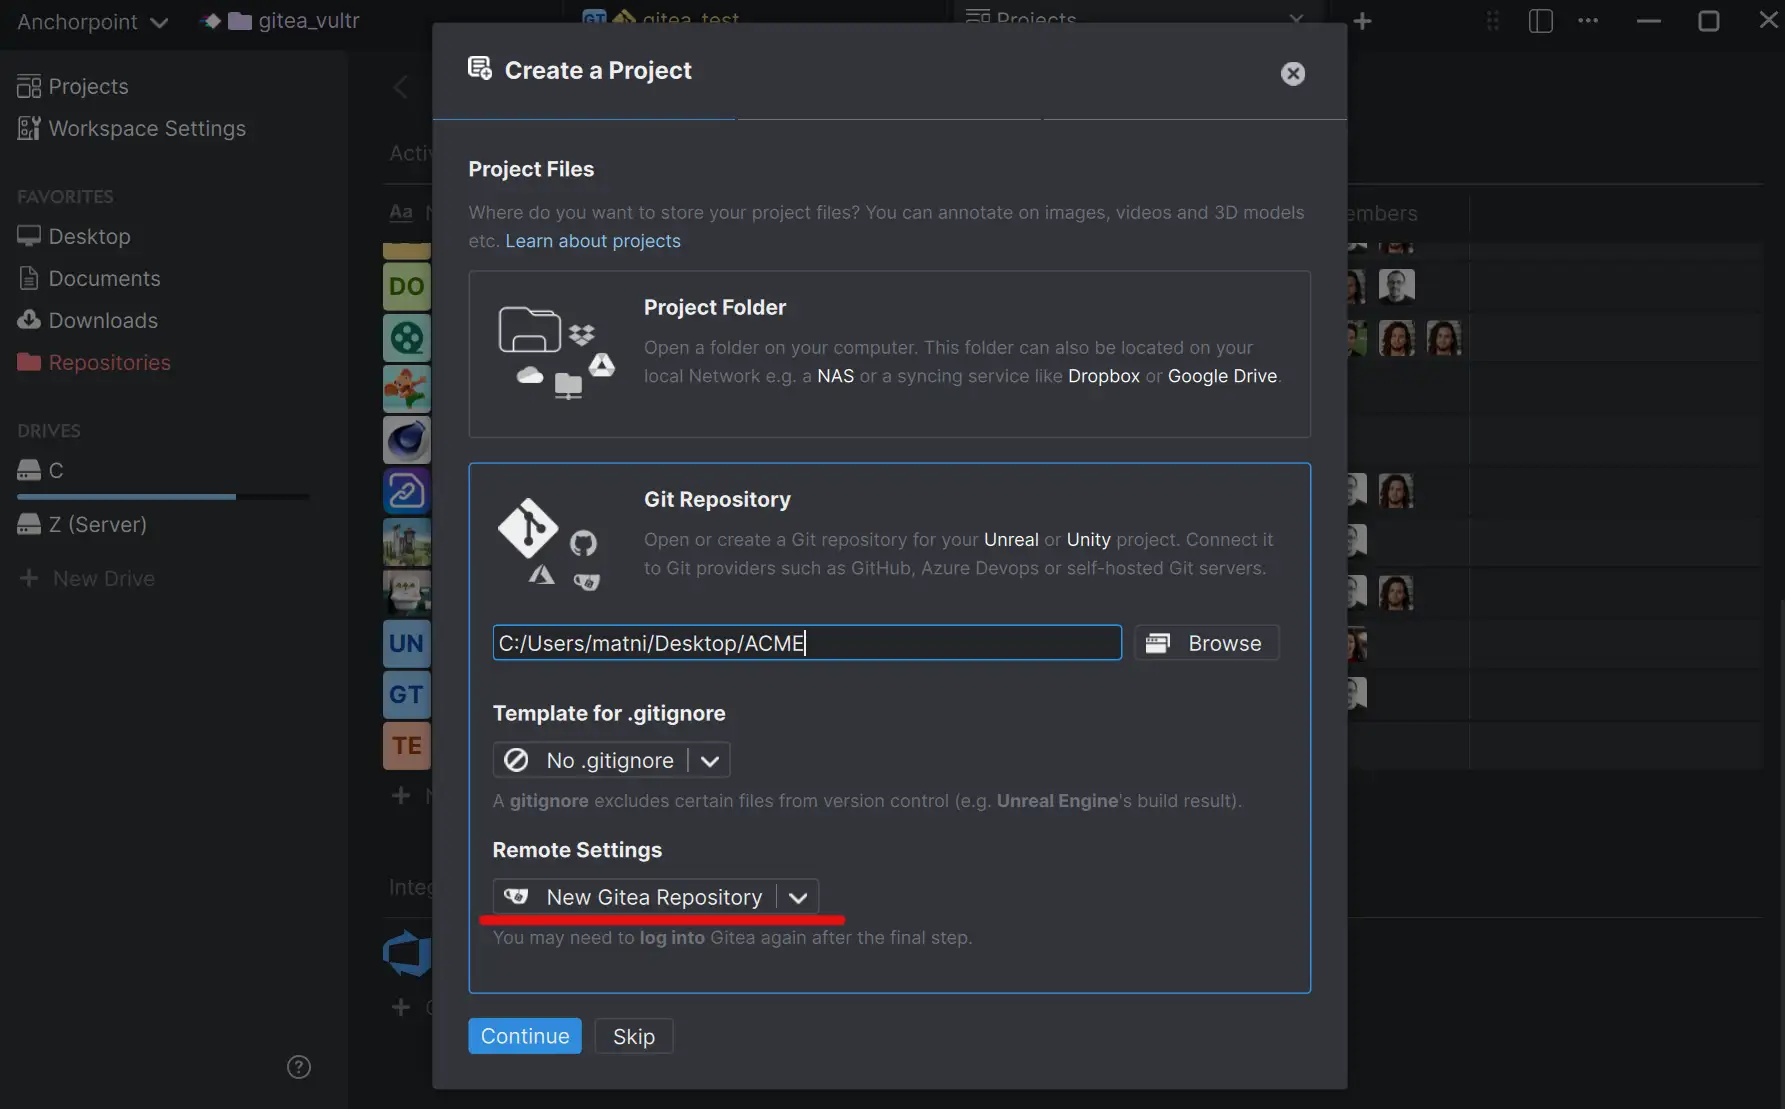
Open Anchorpoint or your Git client of chocie and create a new project. Select a project folder and add your Gitea HTTP URL in the remote settings.
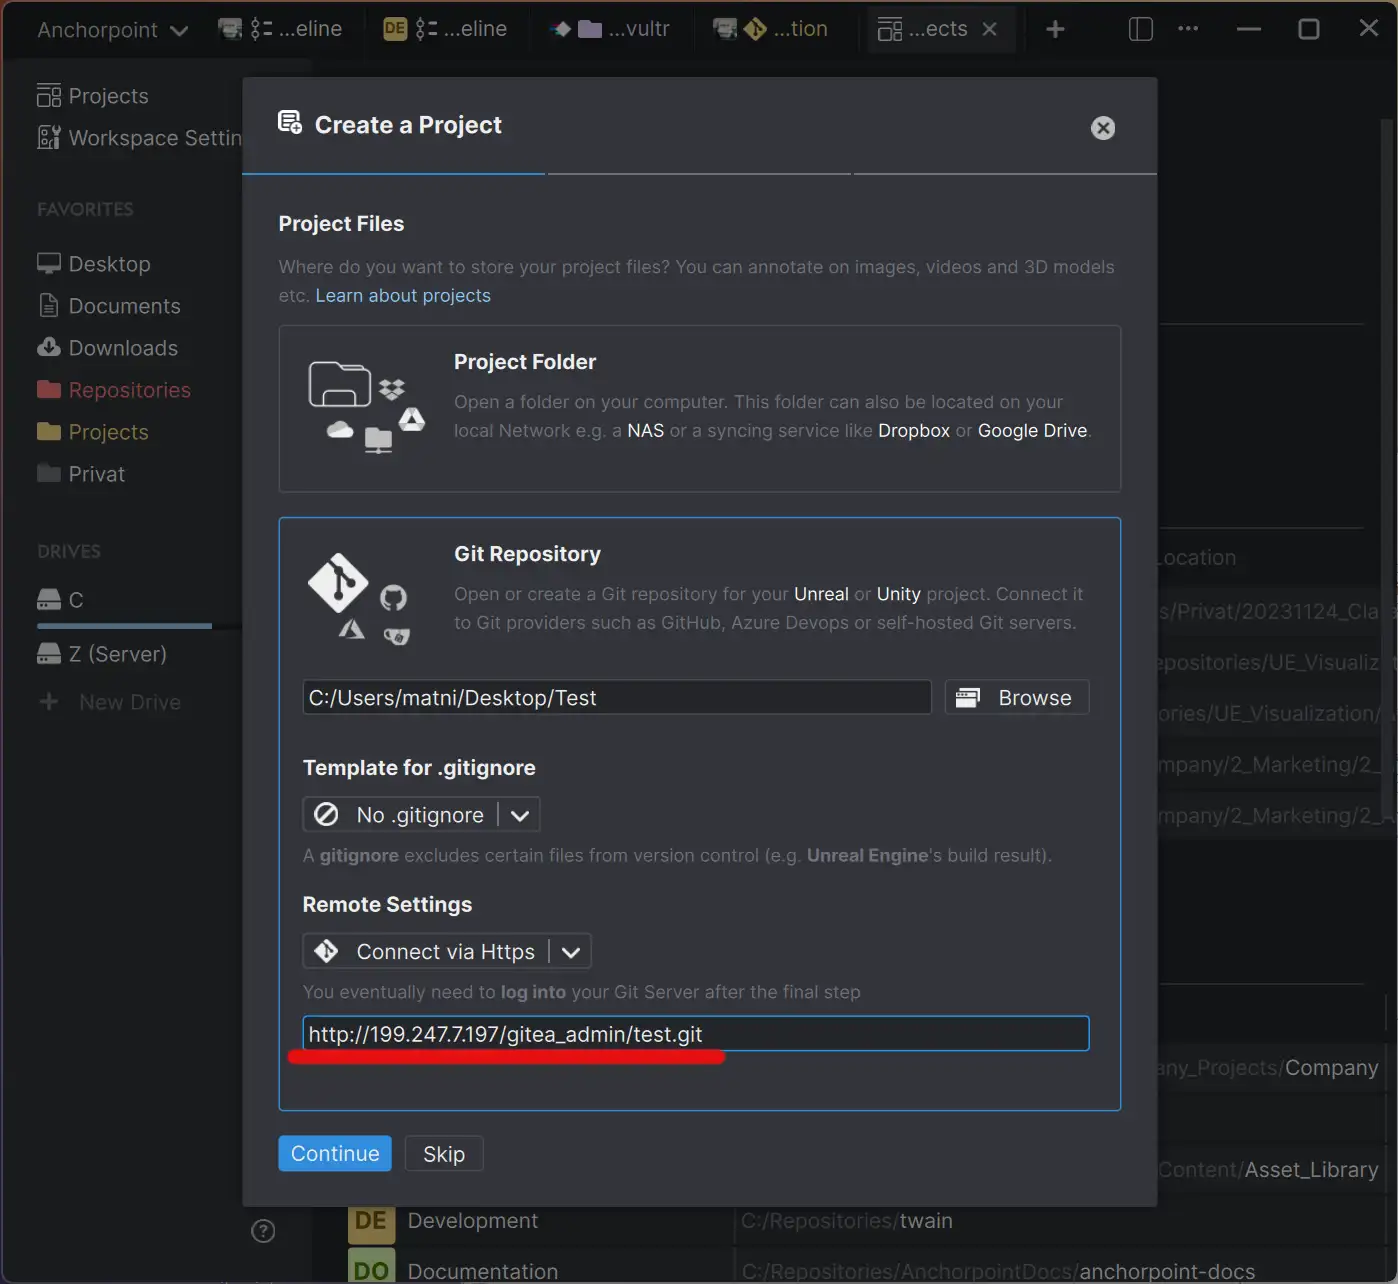
Then, finish the wizard. Once the project is created, add some files (e.g. your Unreal Engine project), then go to the Timeline and make an initial commit.
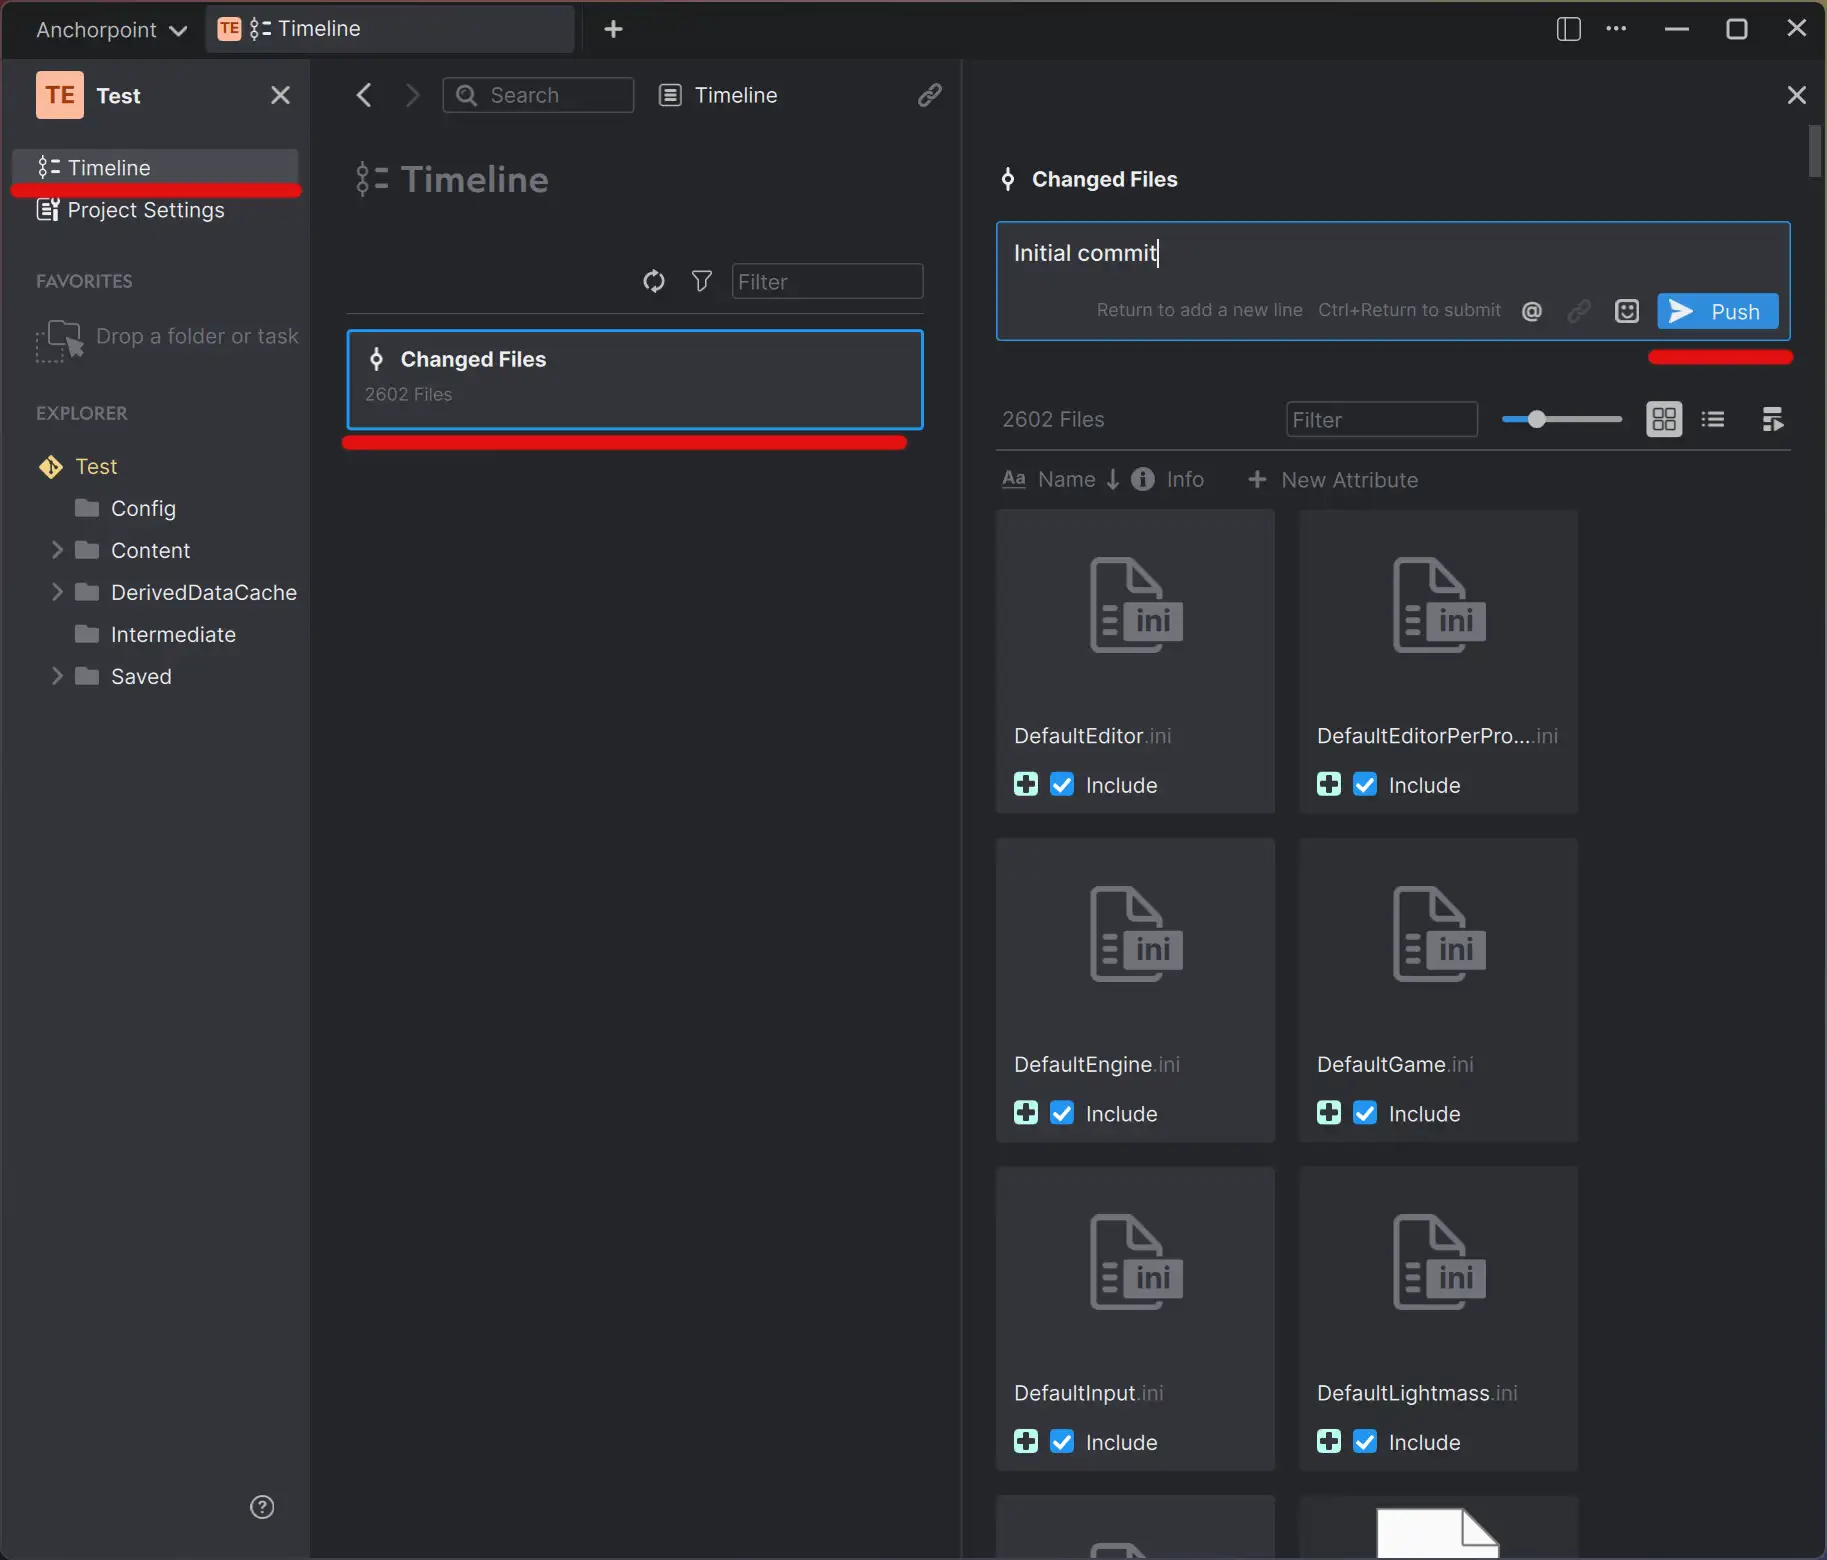
You will get the login window from Gitea. Enter the same credentials that you have used before to access the Gitea website.

After that, wait until the push is successful. If you want to check whether your files are on Vultr, go to your bucket and see if folders have been created in it.
Right now we connect to our Gitea server over plain HTTP. This is a security risk because the connection isn't encrypted, so someone could do a middleman attack and read our data. For better security we need to create an HTTPS connection.
This is what we need:
Open the "app.ini" file in your text editor and modify the `[server]` section. You will need to edit the PROTOCOL, DOMAIN and HTTP_PORT entries and add these entries:
ENABLE_ACME
ACME_ACCEPTTOS
ACME_DIRECTORY
[server]
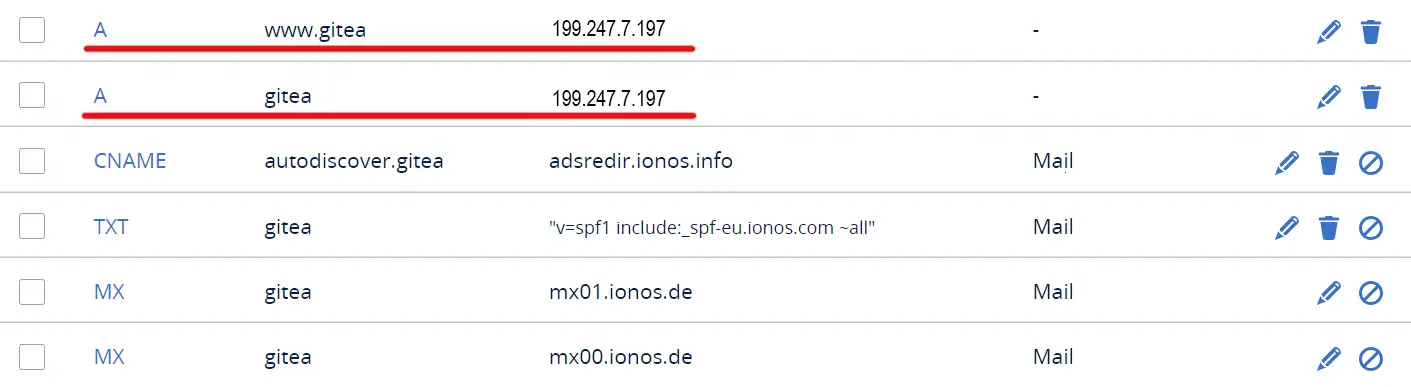
PROTOCOL = https
DOMAIN=gitea.anchorpoint.app
ENABLE_ACME=true
ACME_ACCEPTTOS=true
ACME_DIRECTORY=https
HTTP_PORT = 443
Save the config and upload it via Filezilla. Restart the Vultr server as you would if you changed the configuration to store the Git LFS on an object store.
To make your life easier, you can use the Anchorpoint integration for Gitea to create repositories and add members directly from Anchorpoint. This is also great for your team members, so they don't have to learn the Gitea interface.
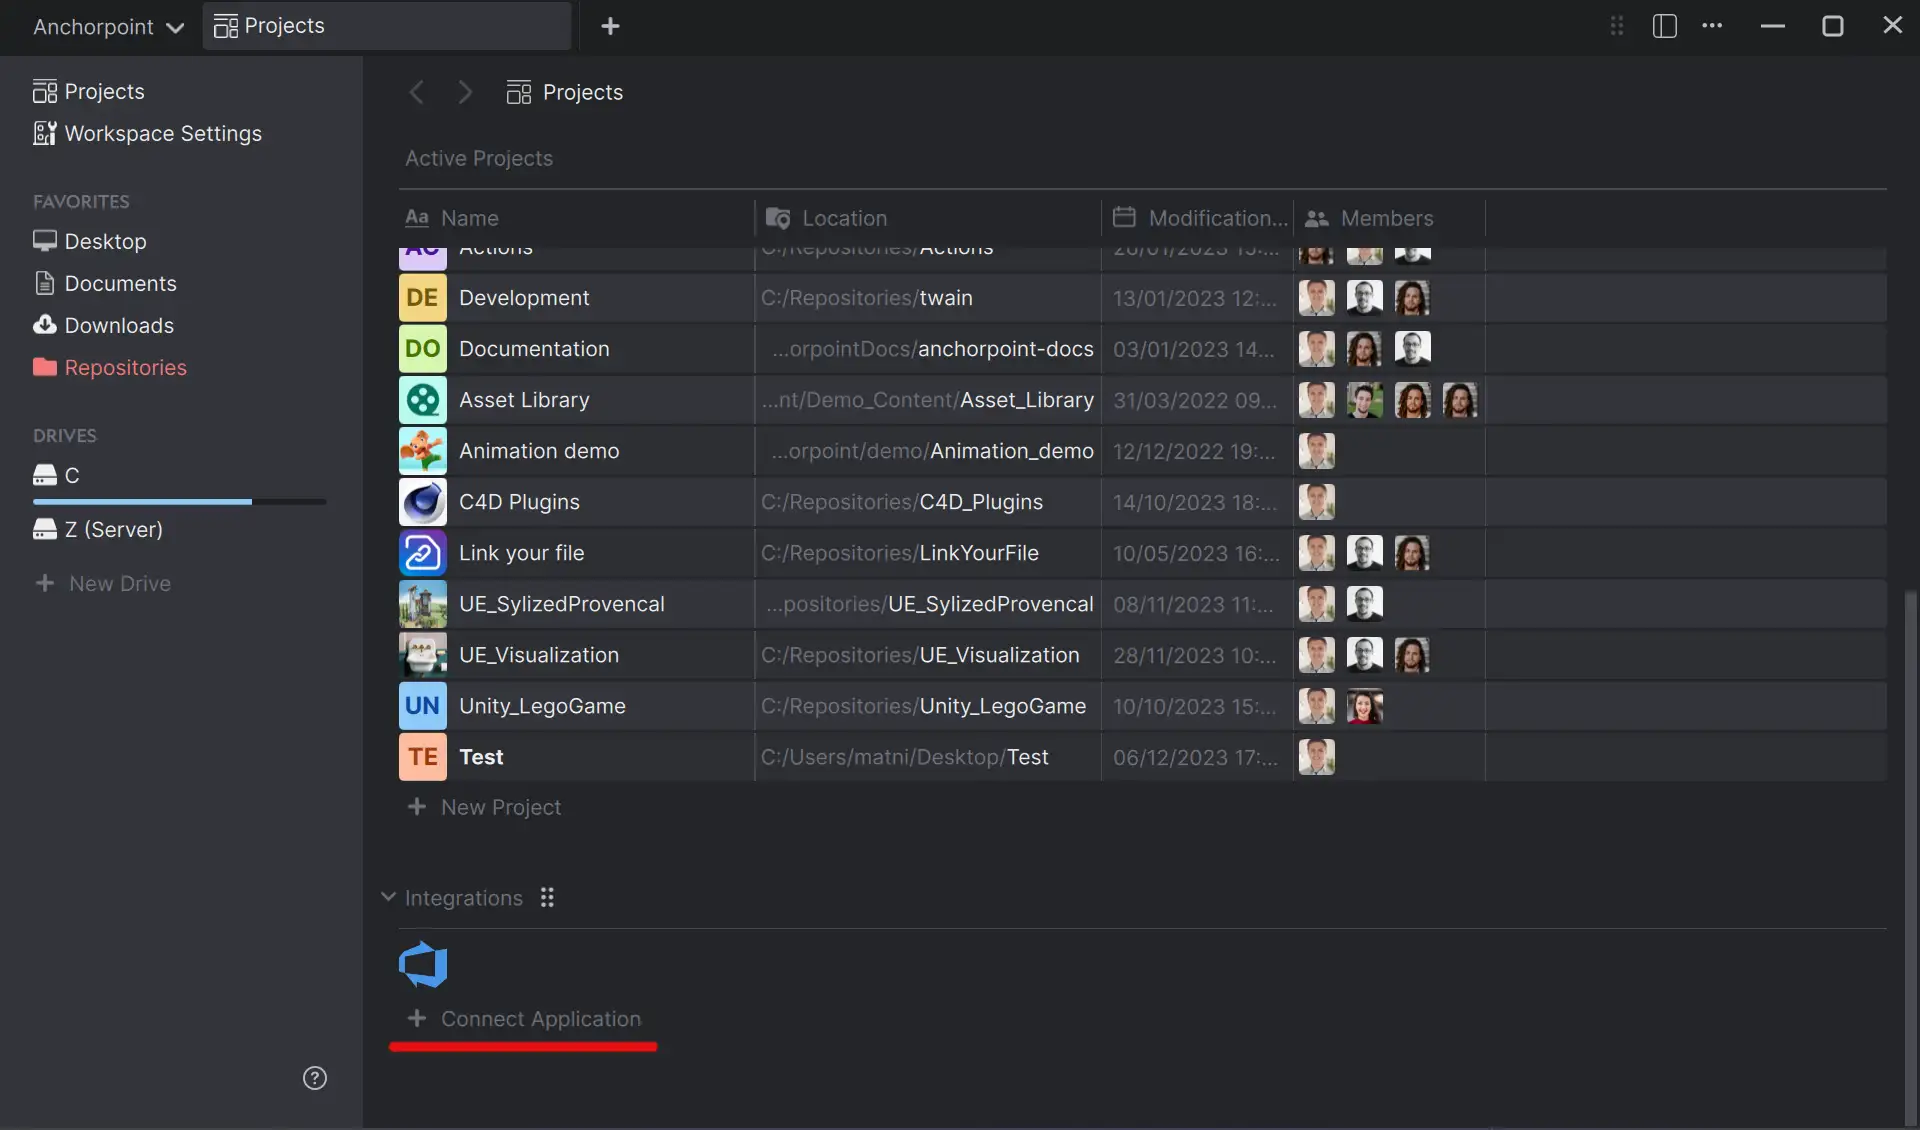
In Anchorpoint, create a new tab and scroll down to "Integrations". Then click on "Connect Application".
Then scroll down to Gitea and click on "Connect". Then enter your Gitea domain (or HTTP address if you skipped the previous part). Once you have added the domain, follow the instructions in the popup.
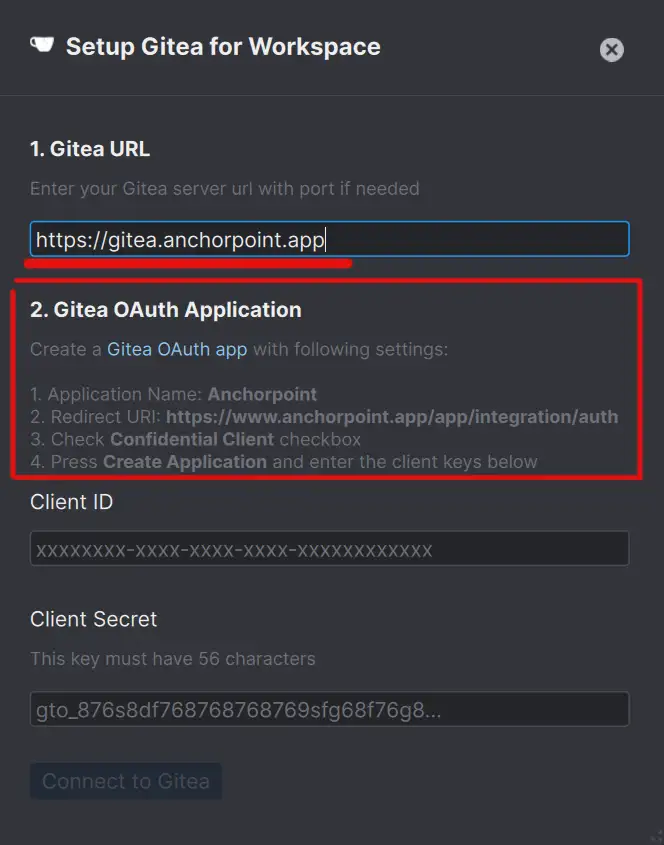
If you click on the link, it will bring you to your Gitea website, where you have to enter the information, provided in the popup, so Gitea knows that Anchorpoint is a trusted application.

Then copy the Client ID and Client Secret to the clipboard and paste them into Anchorpoint. Finally, click "Connect to Gitea".
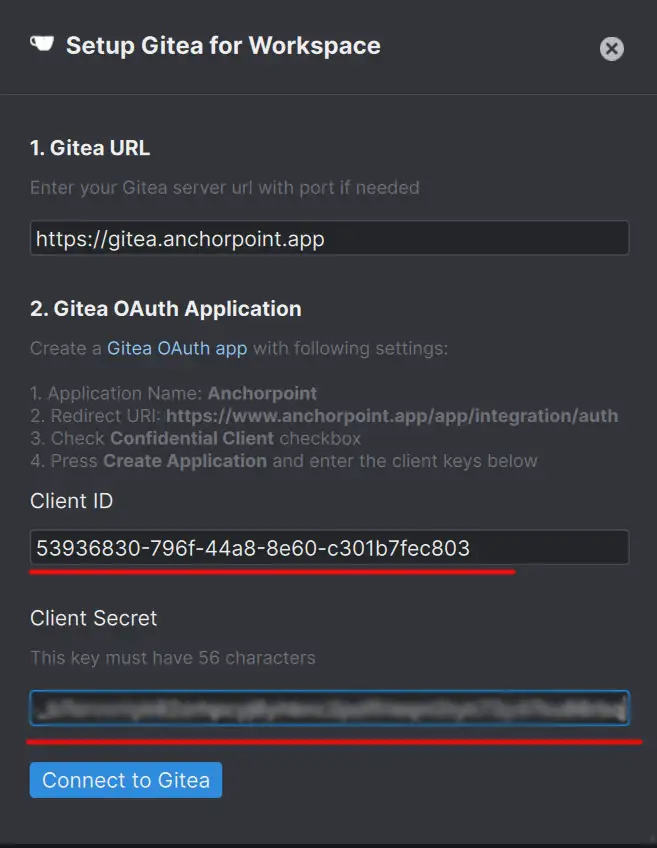
Again, the Gitea website will appear where you will have to authorize again. Finally, Anchorpoint will display another popup asking you to select an organization (which is usually your name). Then enter your Gitea credentials (your main user account) again.
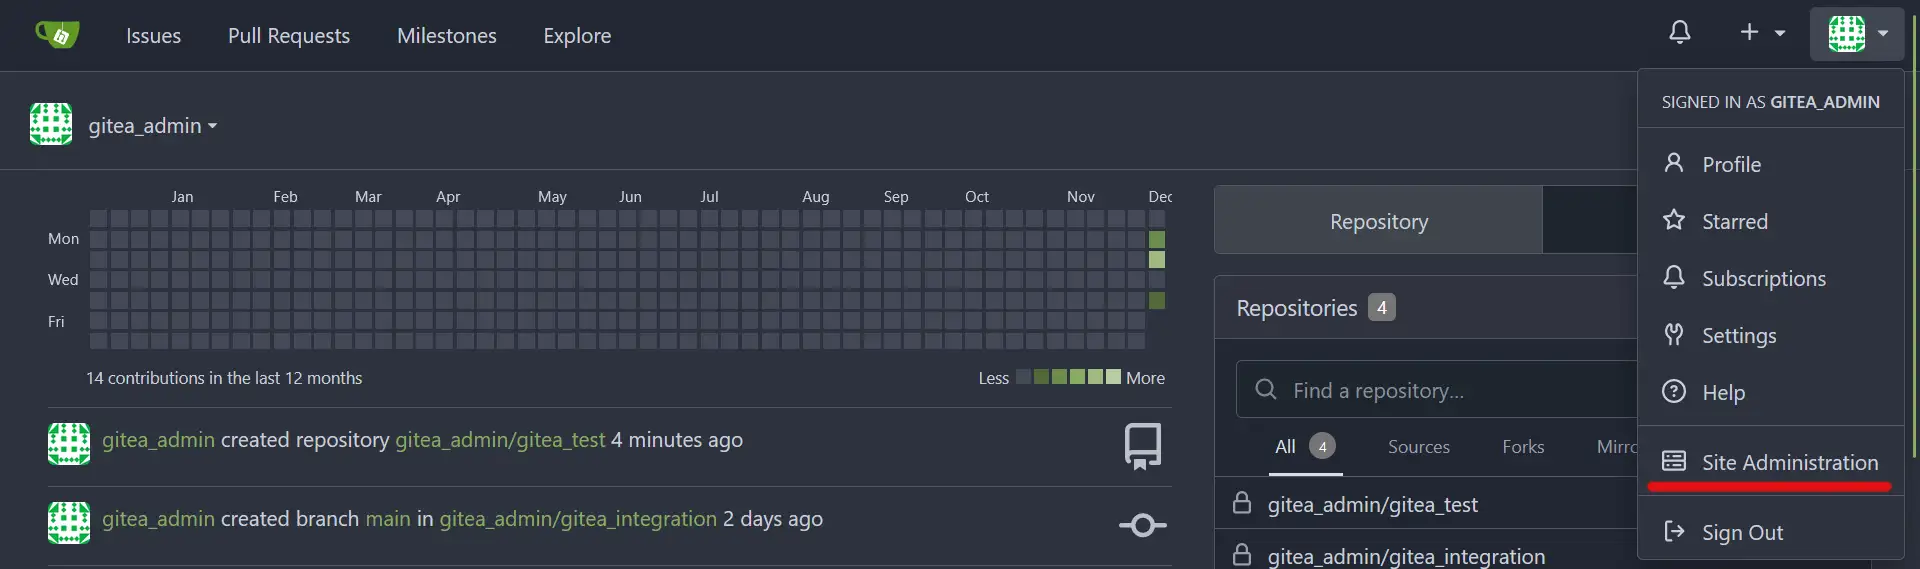
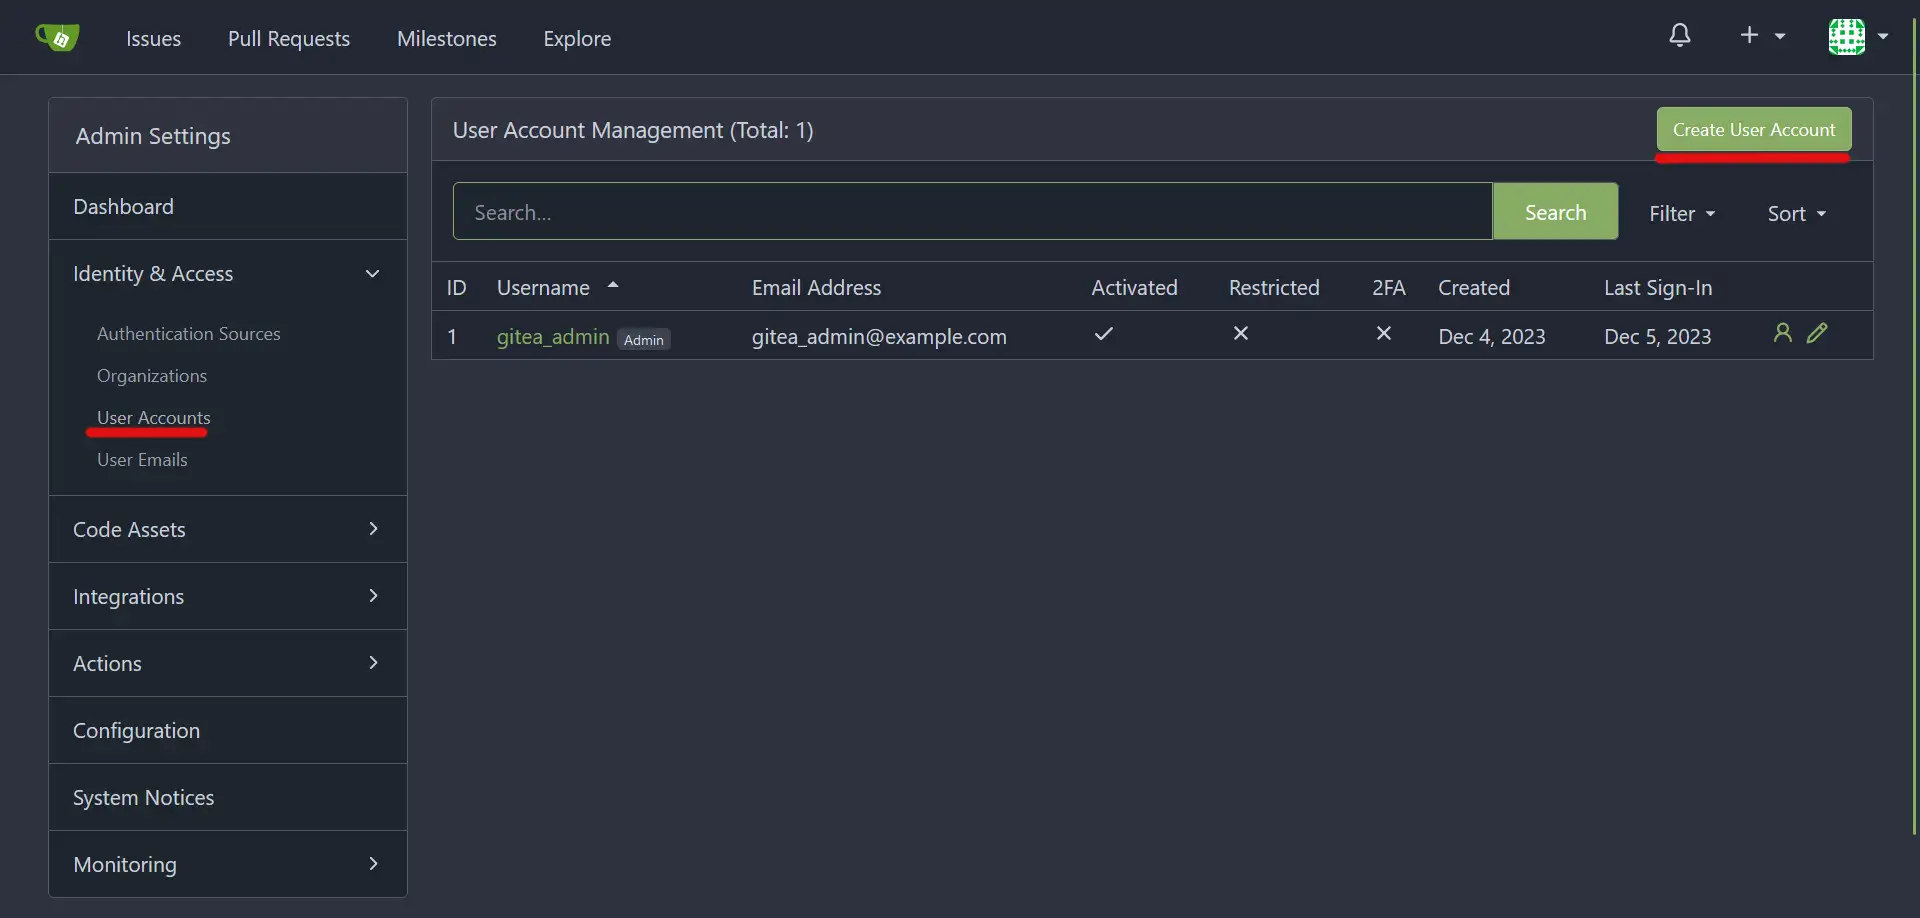
To work in a team, you must first create user accounts on Gitea before inviting them to projects on Anhorpoint. To do this, log in to your Gitea website. Click on your account in the top right corner and choose "Site management".
Under “Identity & Access” pick “User Accounts” and then “Create User Account”.
When choosing a username, choose the same username that your member has in the email. For example, "john.hunt@anchorpoint.app" will be "john.hunt". This is the only way Anchorpoint will be able to match Anchorpoint users and Gitea users in the Gitea integration.
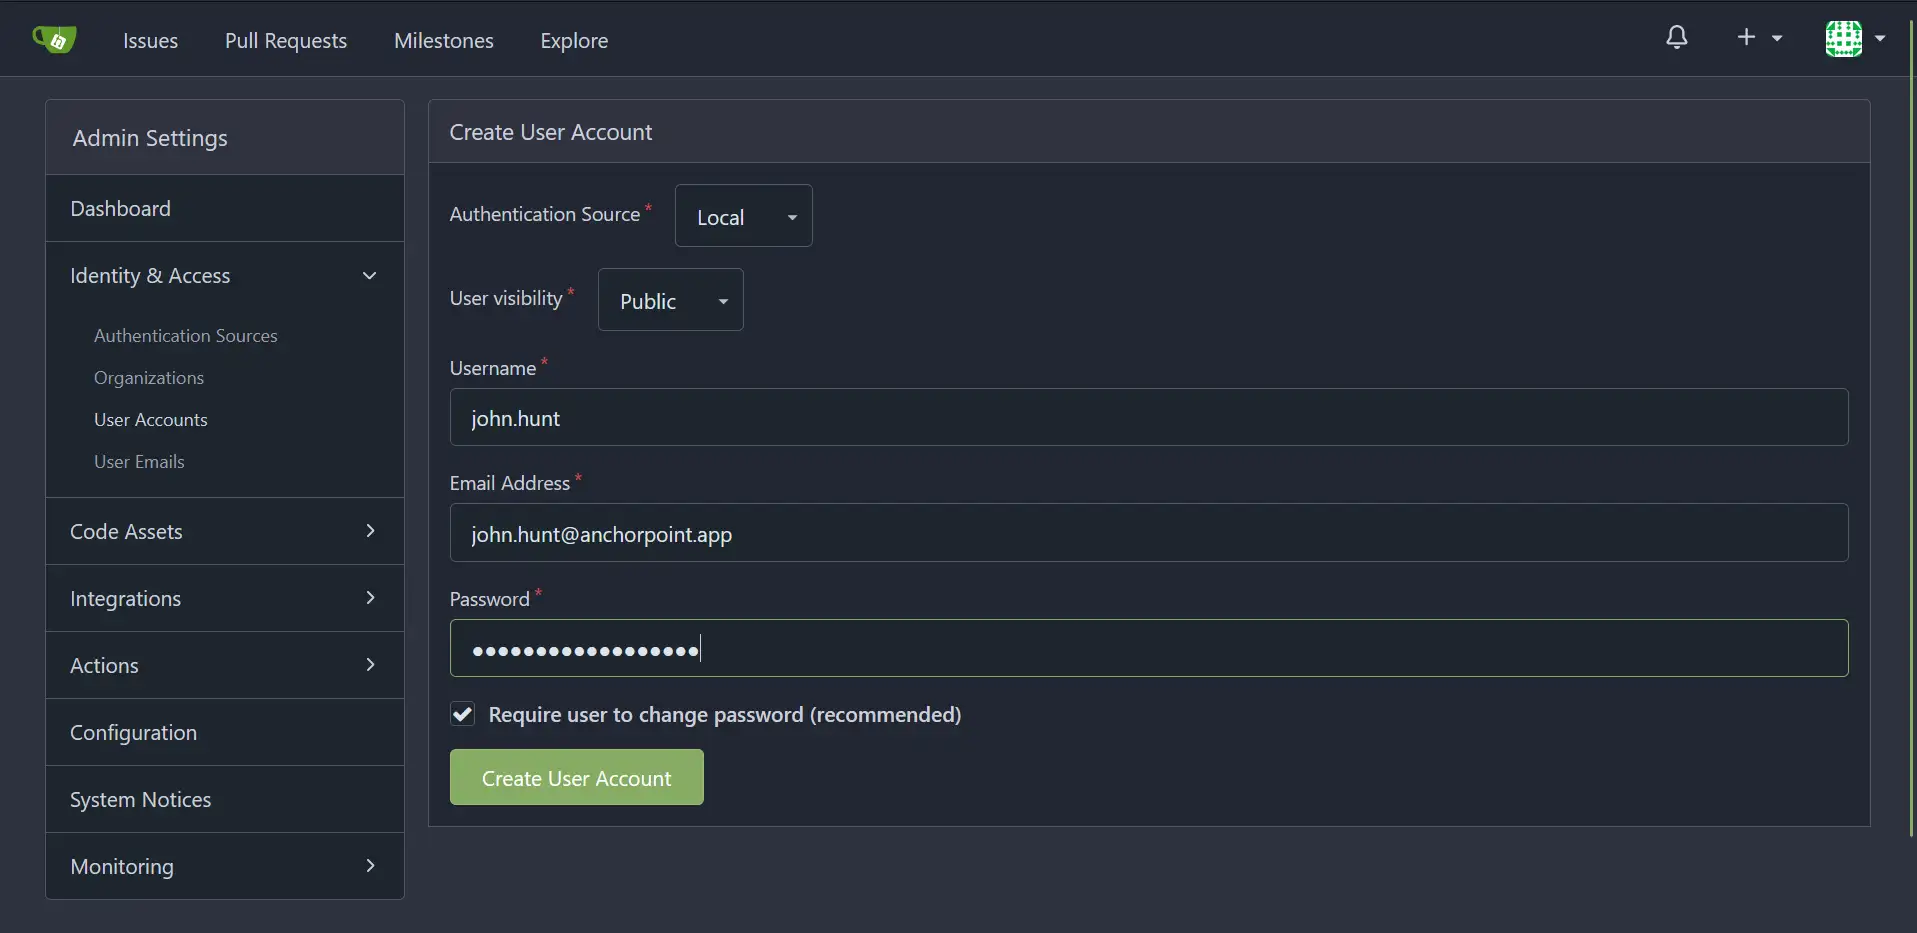
Important: Each member needs to login in once and change their password, before creating any projects with them.
Recommendation: Create an account for yourself instead of using the Vultr "admin_gitea" account. This account should only be used to administer the Gitea server.
Now create a new project in Anchorpoint. Under Git repository, select the option "New Gitea repository". The next step is to invite your members in Anchorpoint. Their Anchorpoint email must match their username in Gitea.
Now you are ready to work with your team. Gitea offers many configuration options and has an active community if you need more help. Here is the link to the official configuration cheat sheet.