Git with KiCad - Version control for PCB design workflows
Learn why KiCad’s open-source text files are the perfect complement to Git and how to use version control as the ultimate safety net for your hardware layouts.
July 1, 2026
9
min read

If you’ve ever designed a circuit board, then you know the absolute terror of pressing Ctrl+S and wondering if you just ruined a week's worth of routing work. We’ve all been there. Today, let's talk about pairing the best open-source PCB design tool, KiCad, with the ultimate safety net: Git. Whether you're an experienced hardware designer or a hobbyist building your first breakout board, using KiCad with version control will change the game.
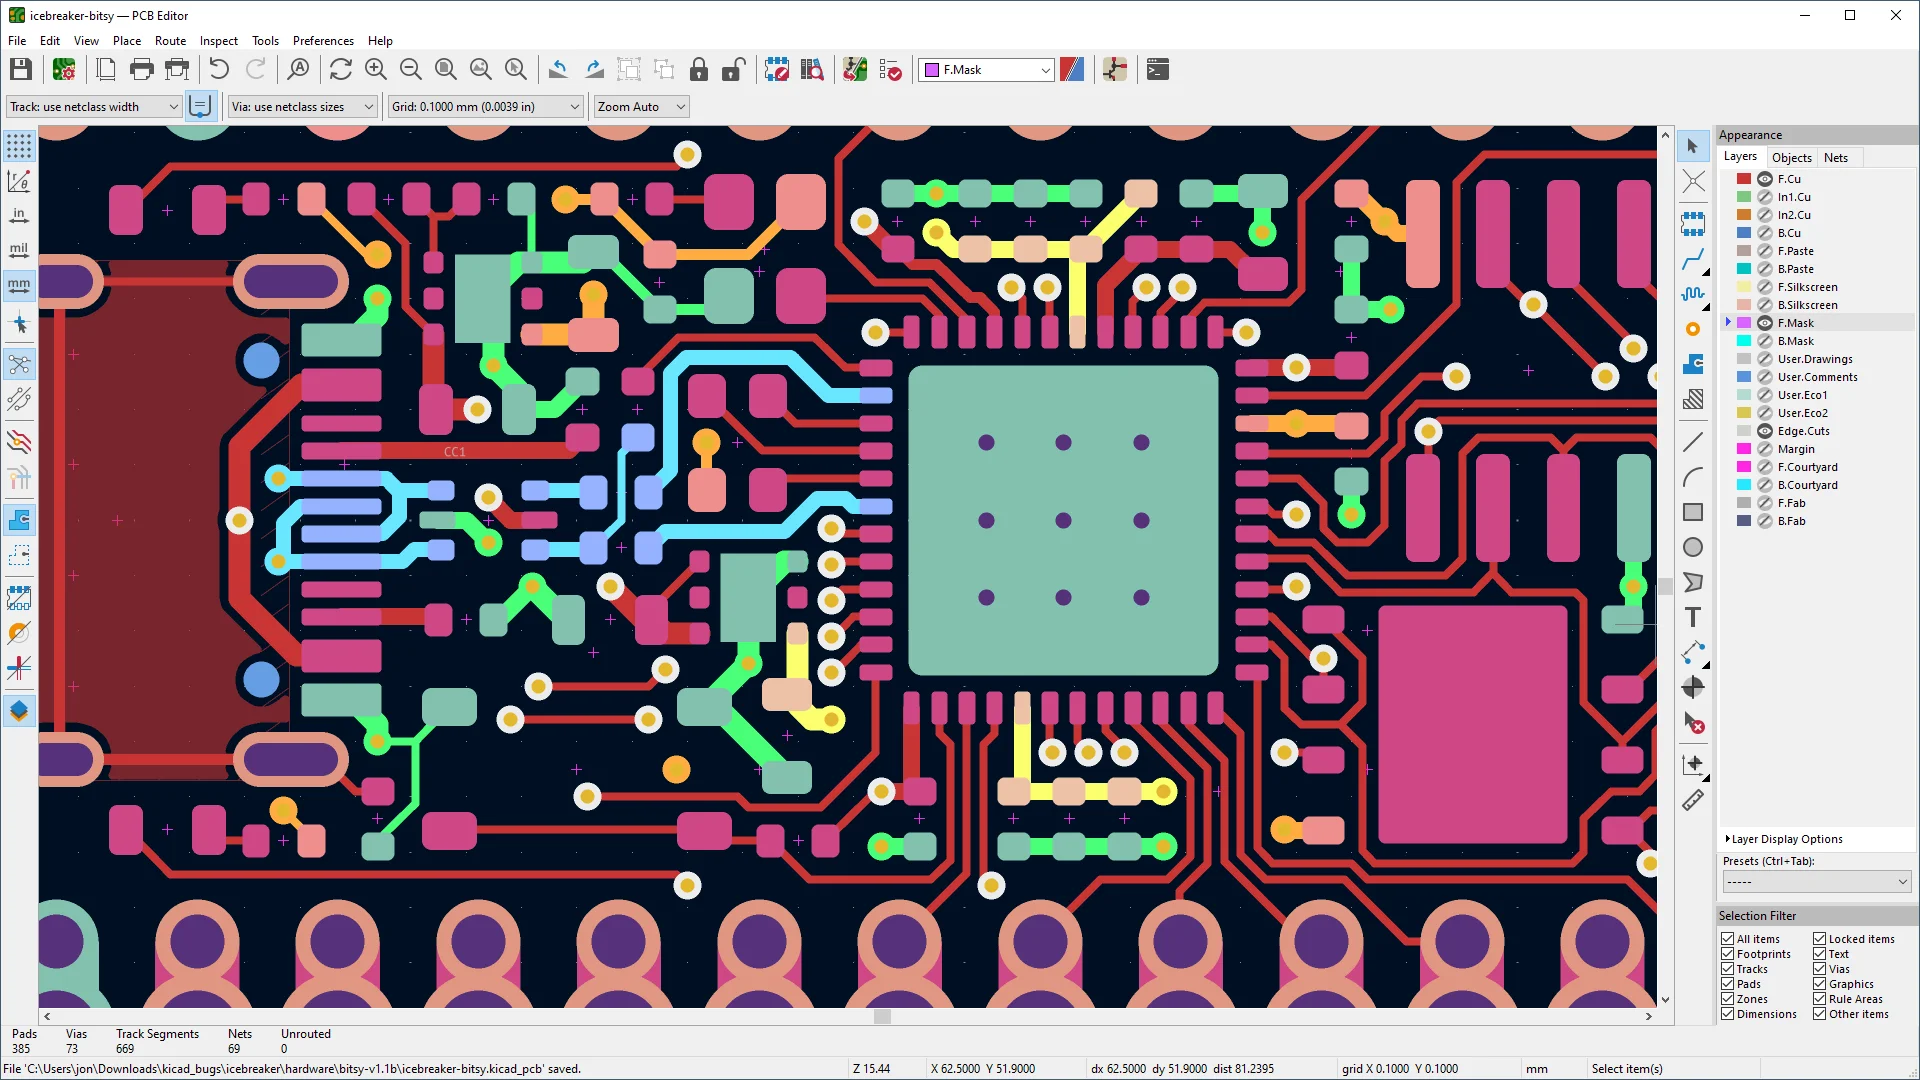
KiCad is a free, open-source electronics design suite that provides all the tools necessary to transform a circuit idea from a basic schematic into a professionally routed, 3D-modeled printed circuit board.
In recent years, KiCad has evolved from an obscure academic project into a powerful tool and unlike some EDA tools that save your precious designs in unreadable, proprietary binary files, KiCad saves everything, schematics, footprints, and PCB layouts in plain text files. This design choice makes it a perfect match for version control, as text files can be merged but binary files cannot.
Version control (or source control) is the practice of tracking and managing alterations to project files over time. It serves as both a collaboration engine and a safety net, allowing teams to develop in parallel, maintain a flawless history of modifications, and collaborate without stepping on each other's toes.
Sync solutions such as Dropbox or Google Drive are not ideal for version control because they lack file locking, a history view of the change list, and the ability to easily revert to a clearly defined state.
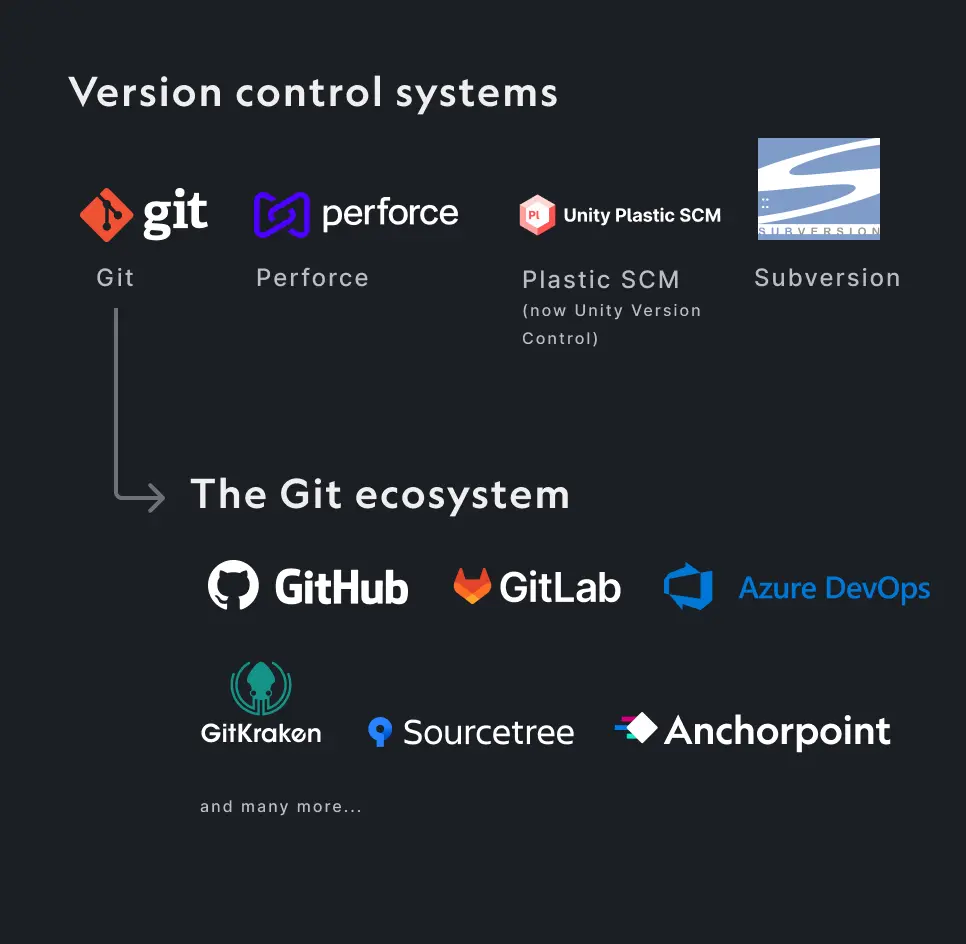
Git has emerged as the most widely adopted version control system, sharing the stage with tools like SVN, Perforce, and Unity Version Control. Originally built for managing software code, Git is a decentralized version control system. "Decentralized" just means that you have a full copy of your project’s history right on your local machine with no internet connection required to save your progress. Its open-source foundation has spawned a massive, robust ecosystem that accommodates every type of workflow:
To use KiCad with Git, we need two things:
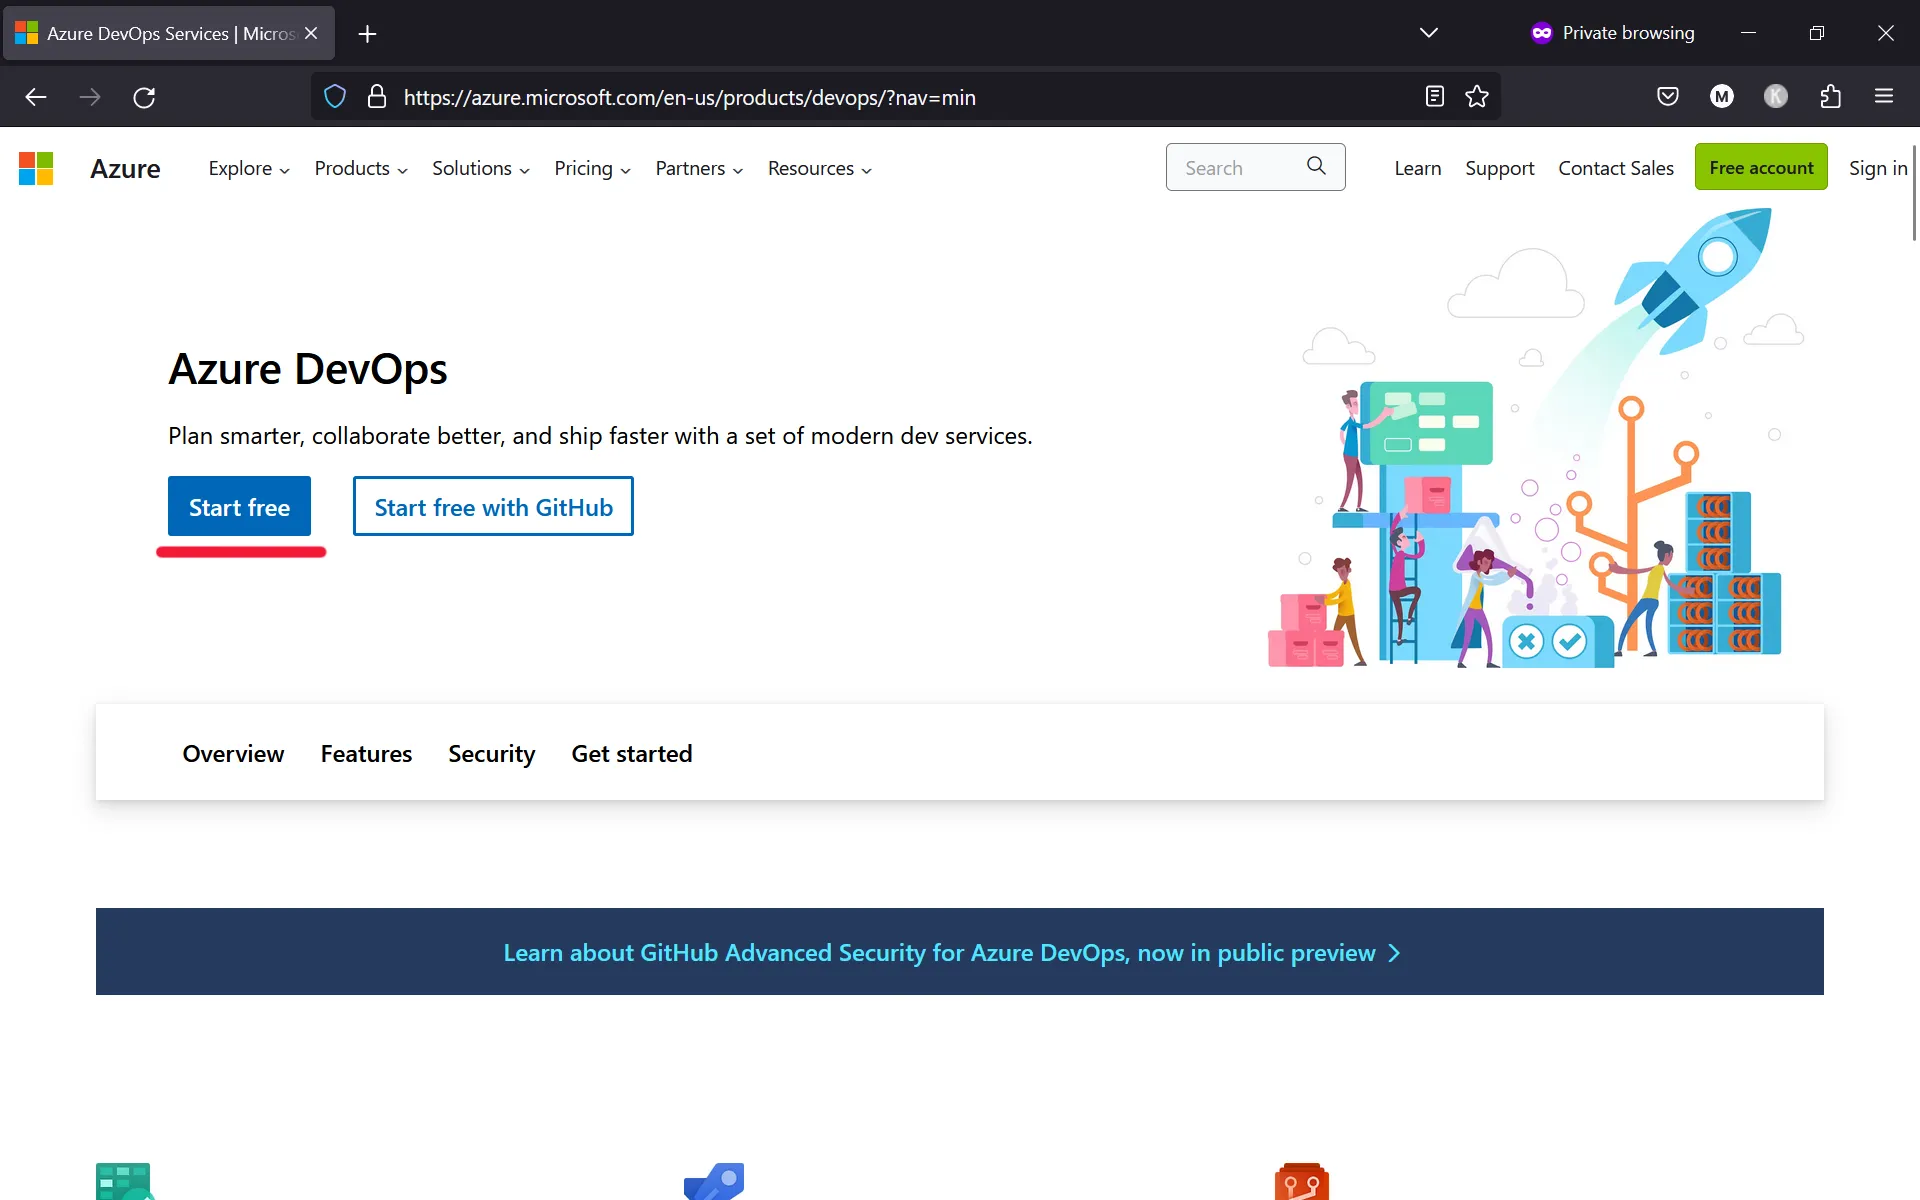
If your project mostly uses text-based files, like those from KiCad, GitHub’s free plan is usually sufficient. However, if your projects rely heavily on large binary files, such as videos, extensive documentation, or 3D models, the file size limits become a major factor. In this case, Azure DevOps is a better choice.

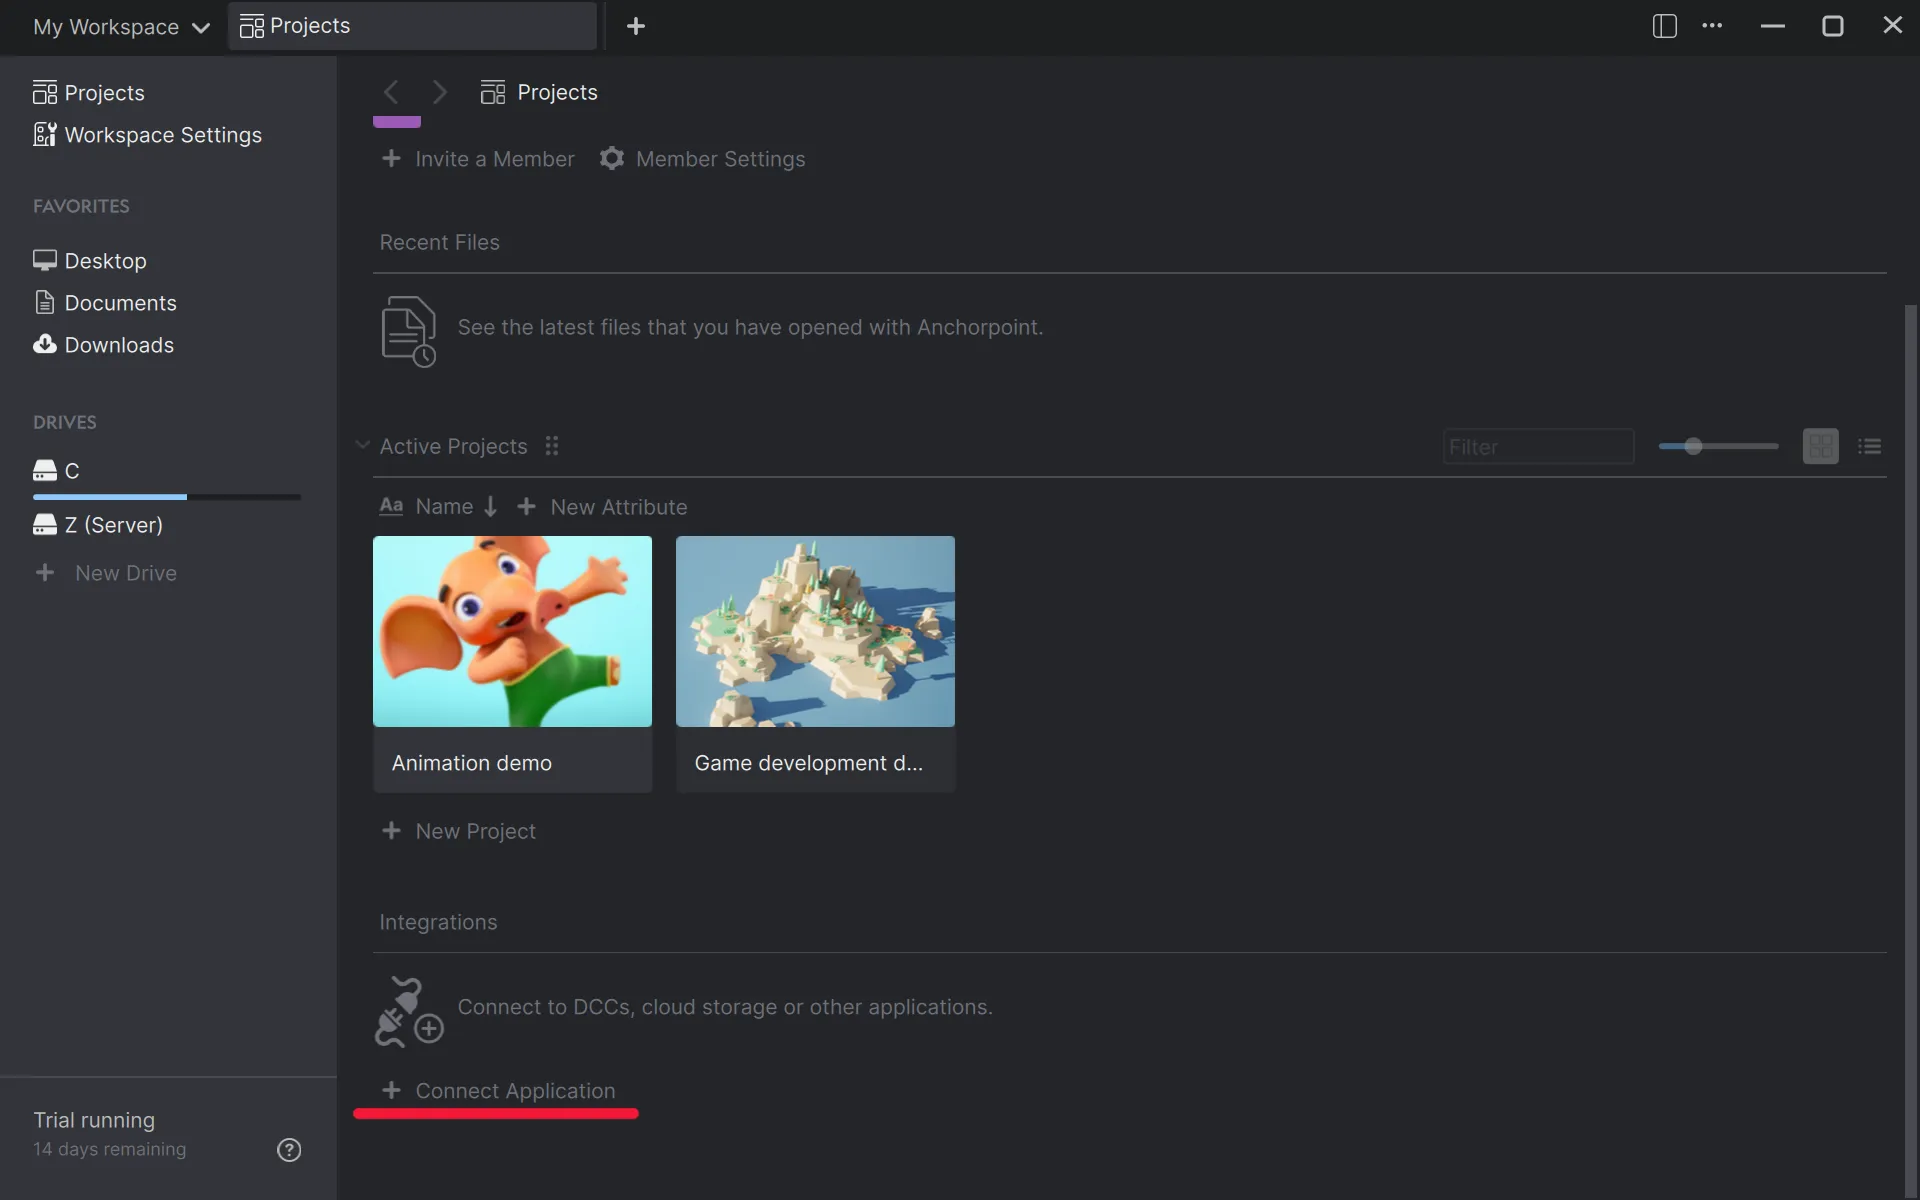
In this tutorial, we will use Anchorpoint because it is ideal for artists and engineers. It has Git LFS installed by default and offers file locking.
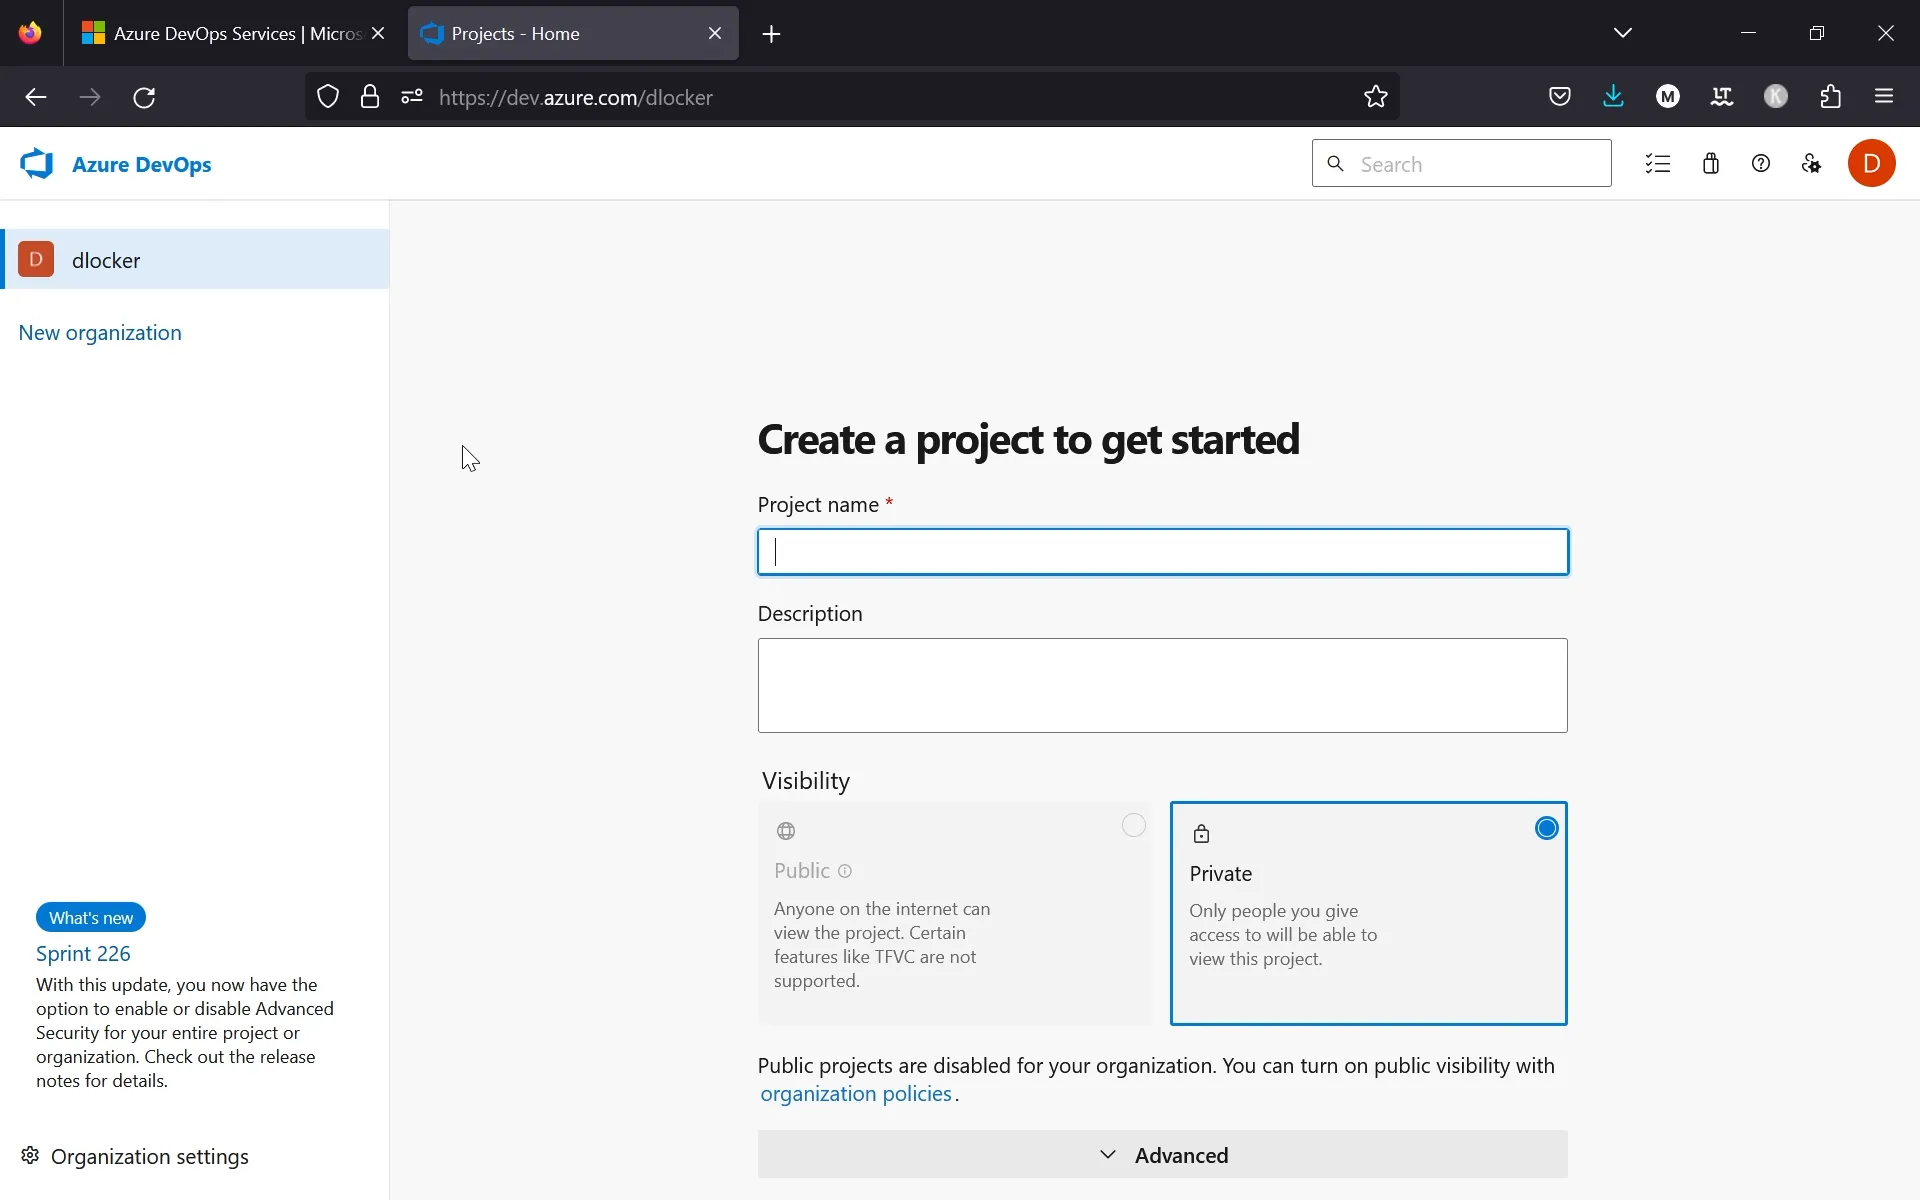
Head over to dev.azure.com to register an account and create your first project. While the initial configuration can feel a bit tedious, it is a one-time setup. Future projects will be significantly faster to get off the ground.
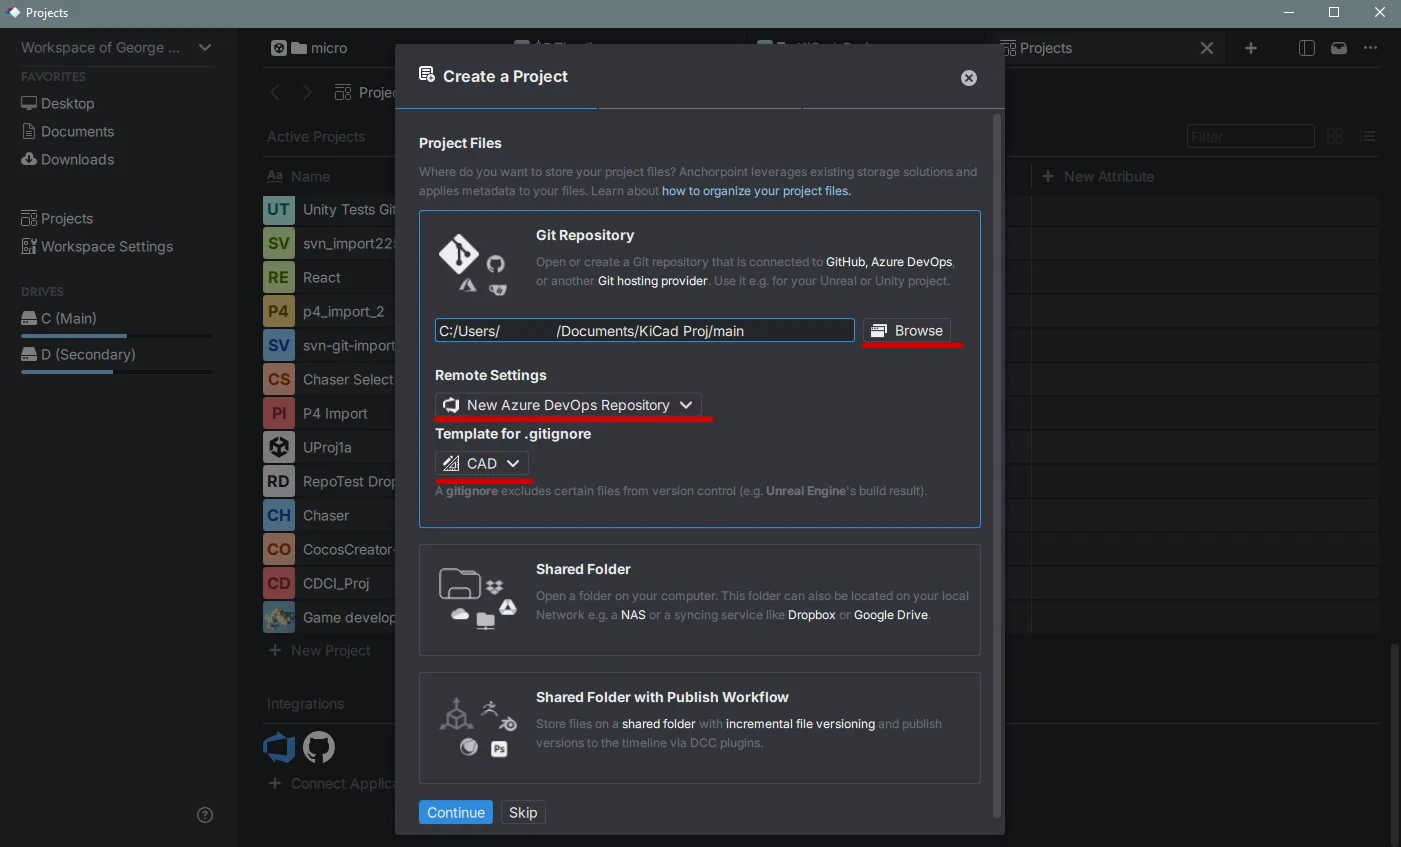
To link Azure DevOps with Anchorpoint, follow the setup instructions outlined below. If you plan to work offline, you can opt for the Shared Folder method when initiating a new project.
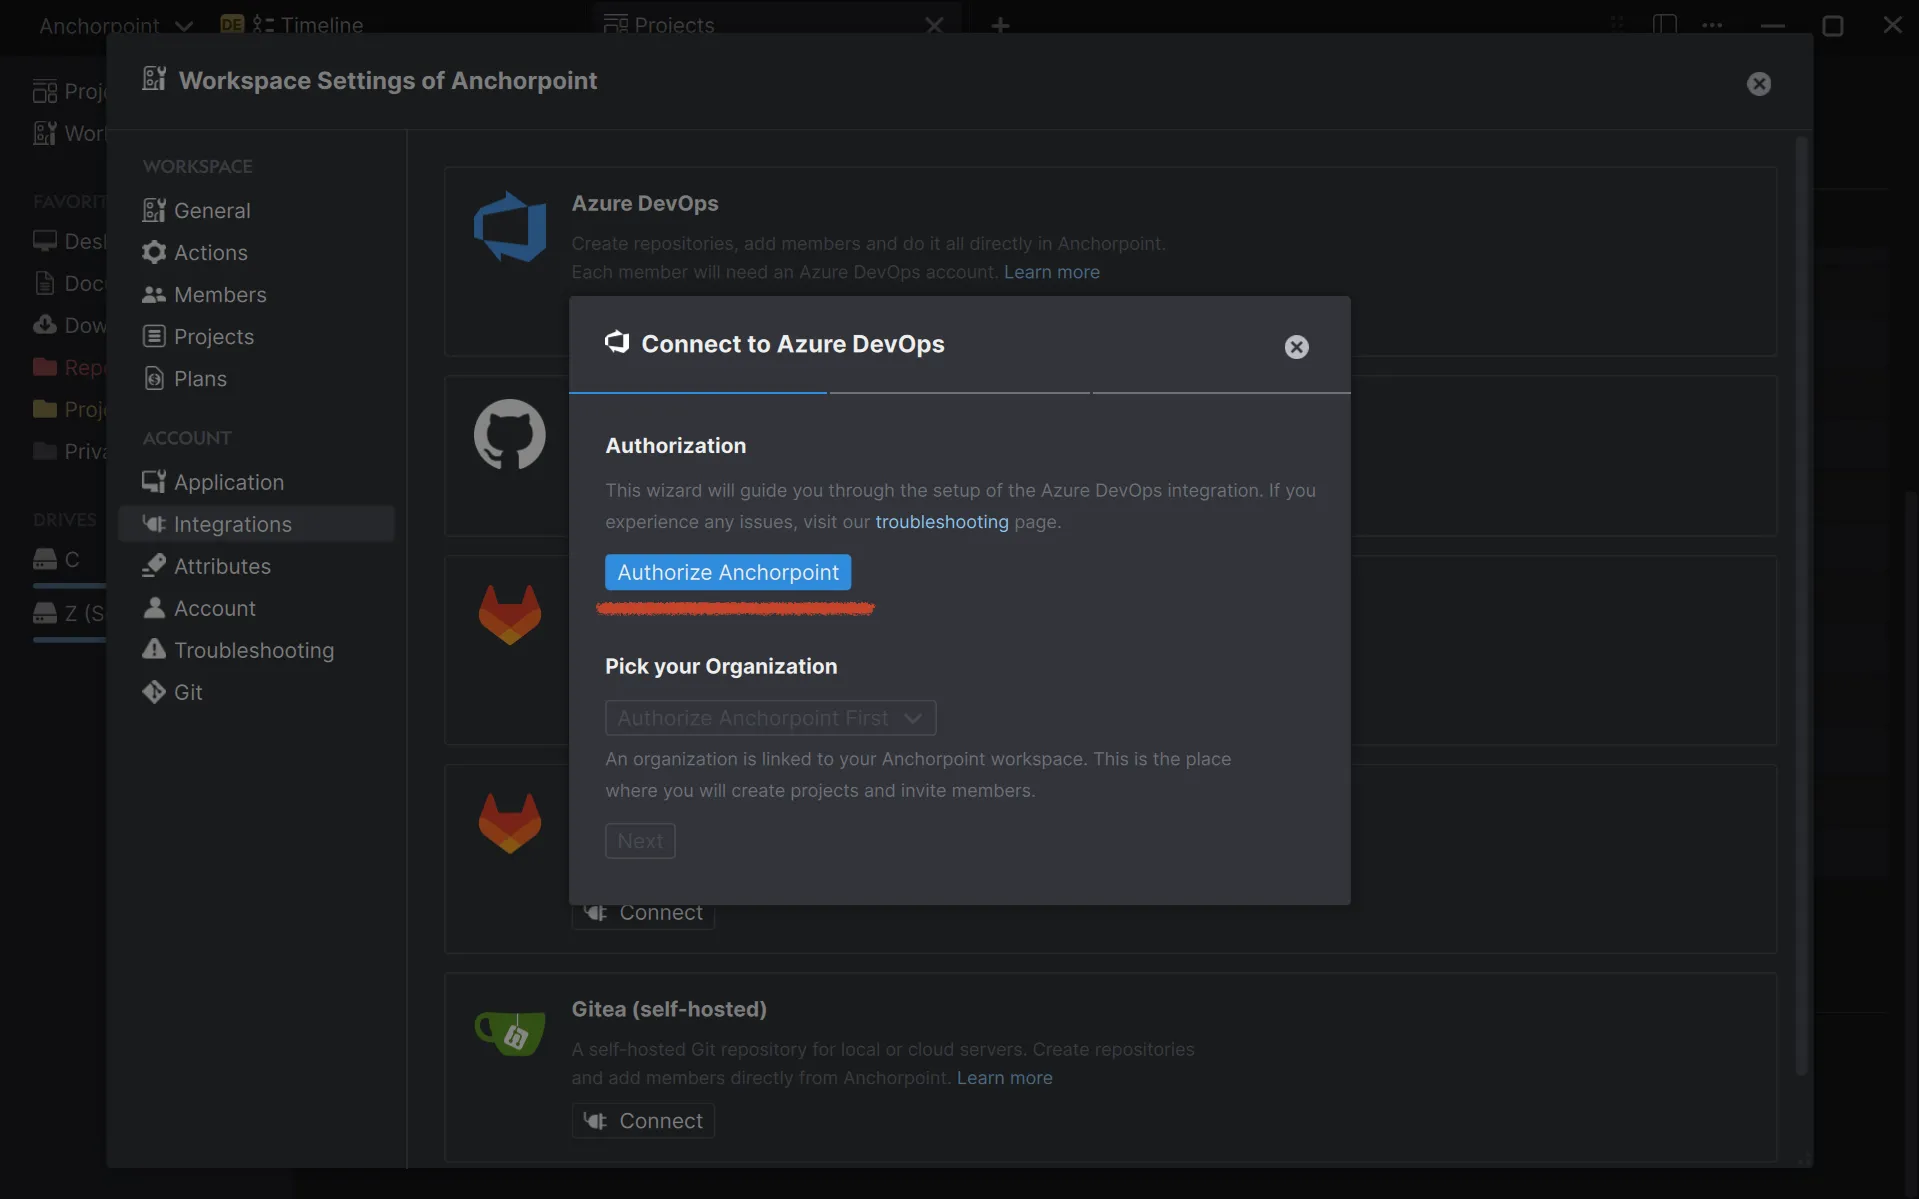

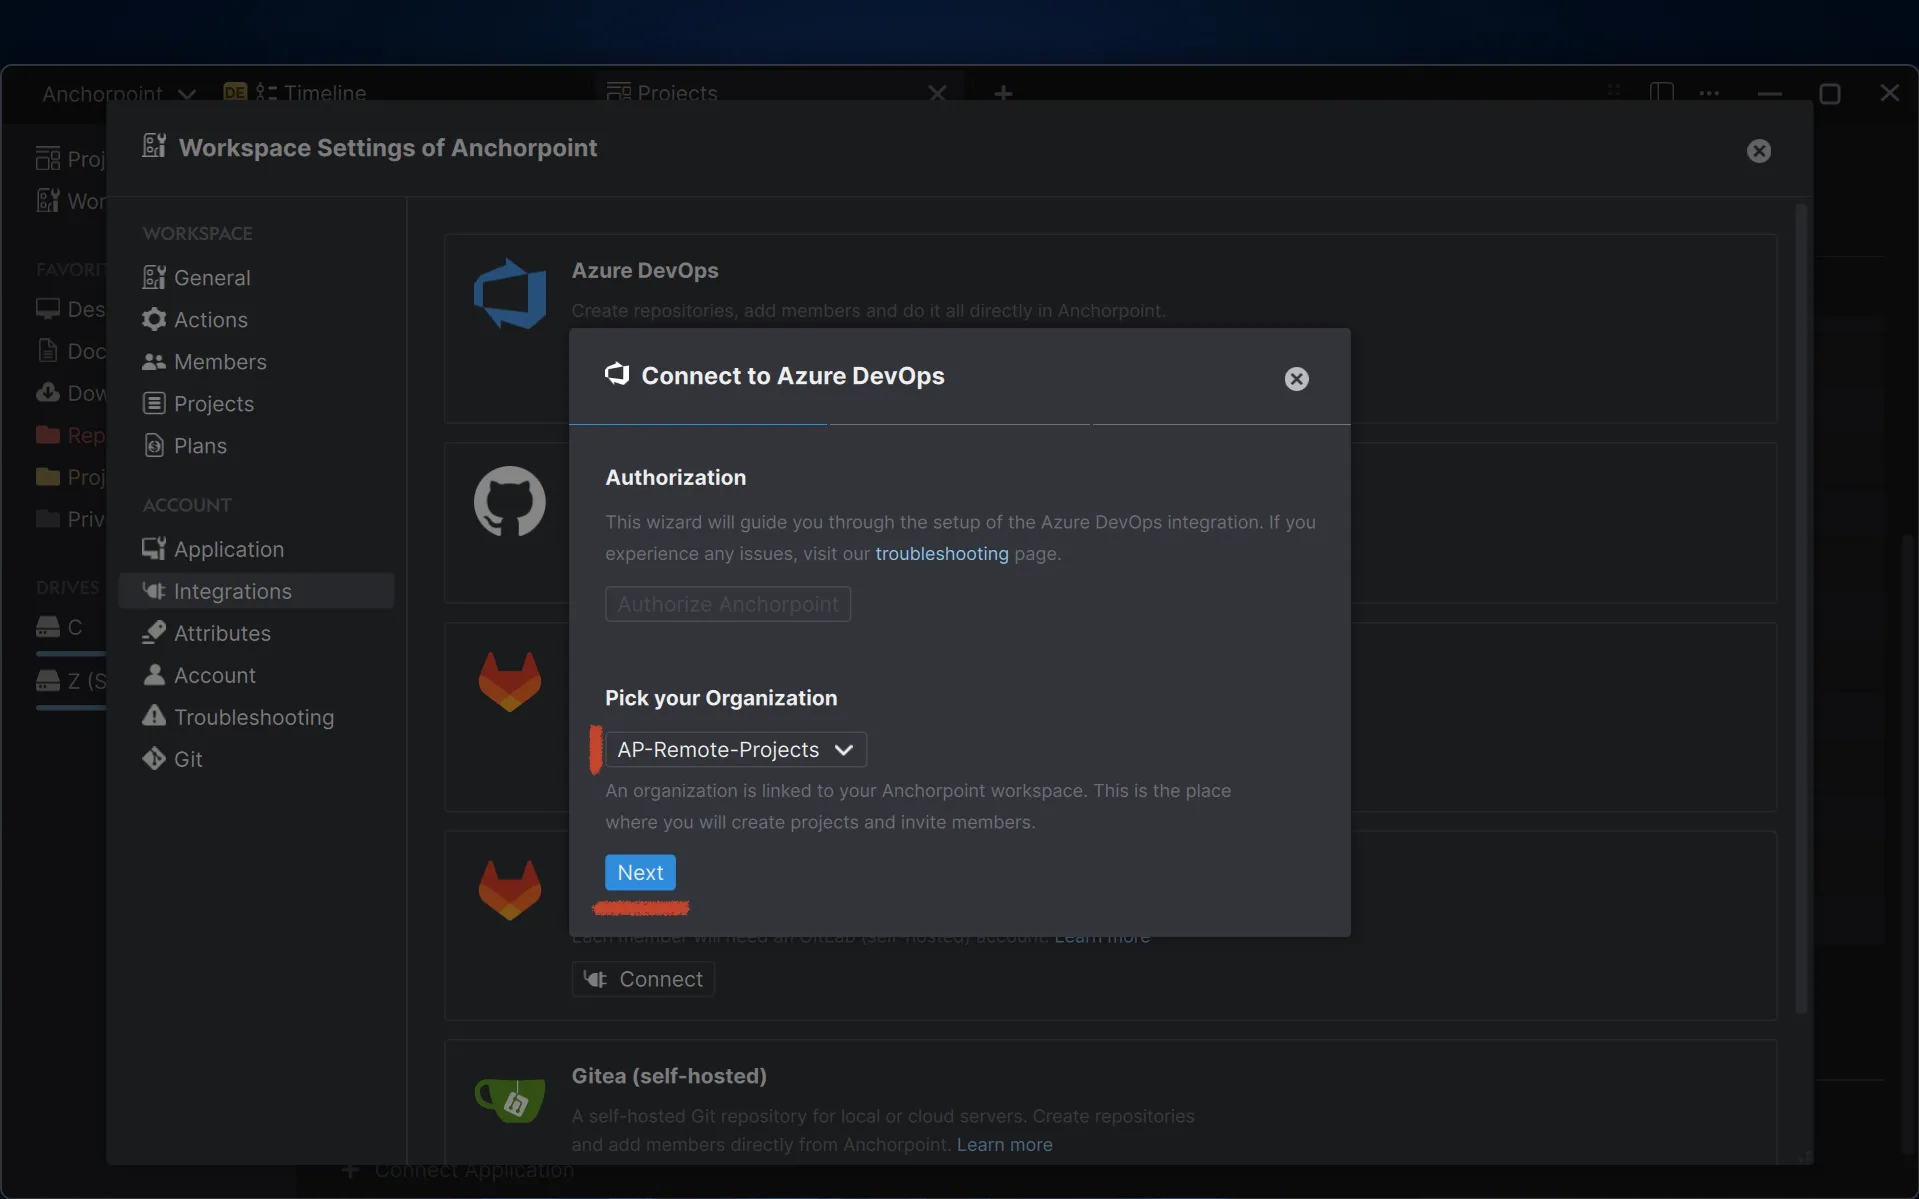
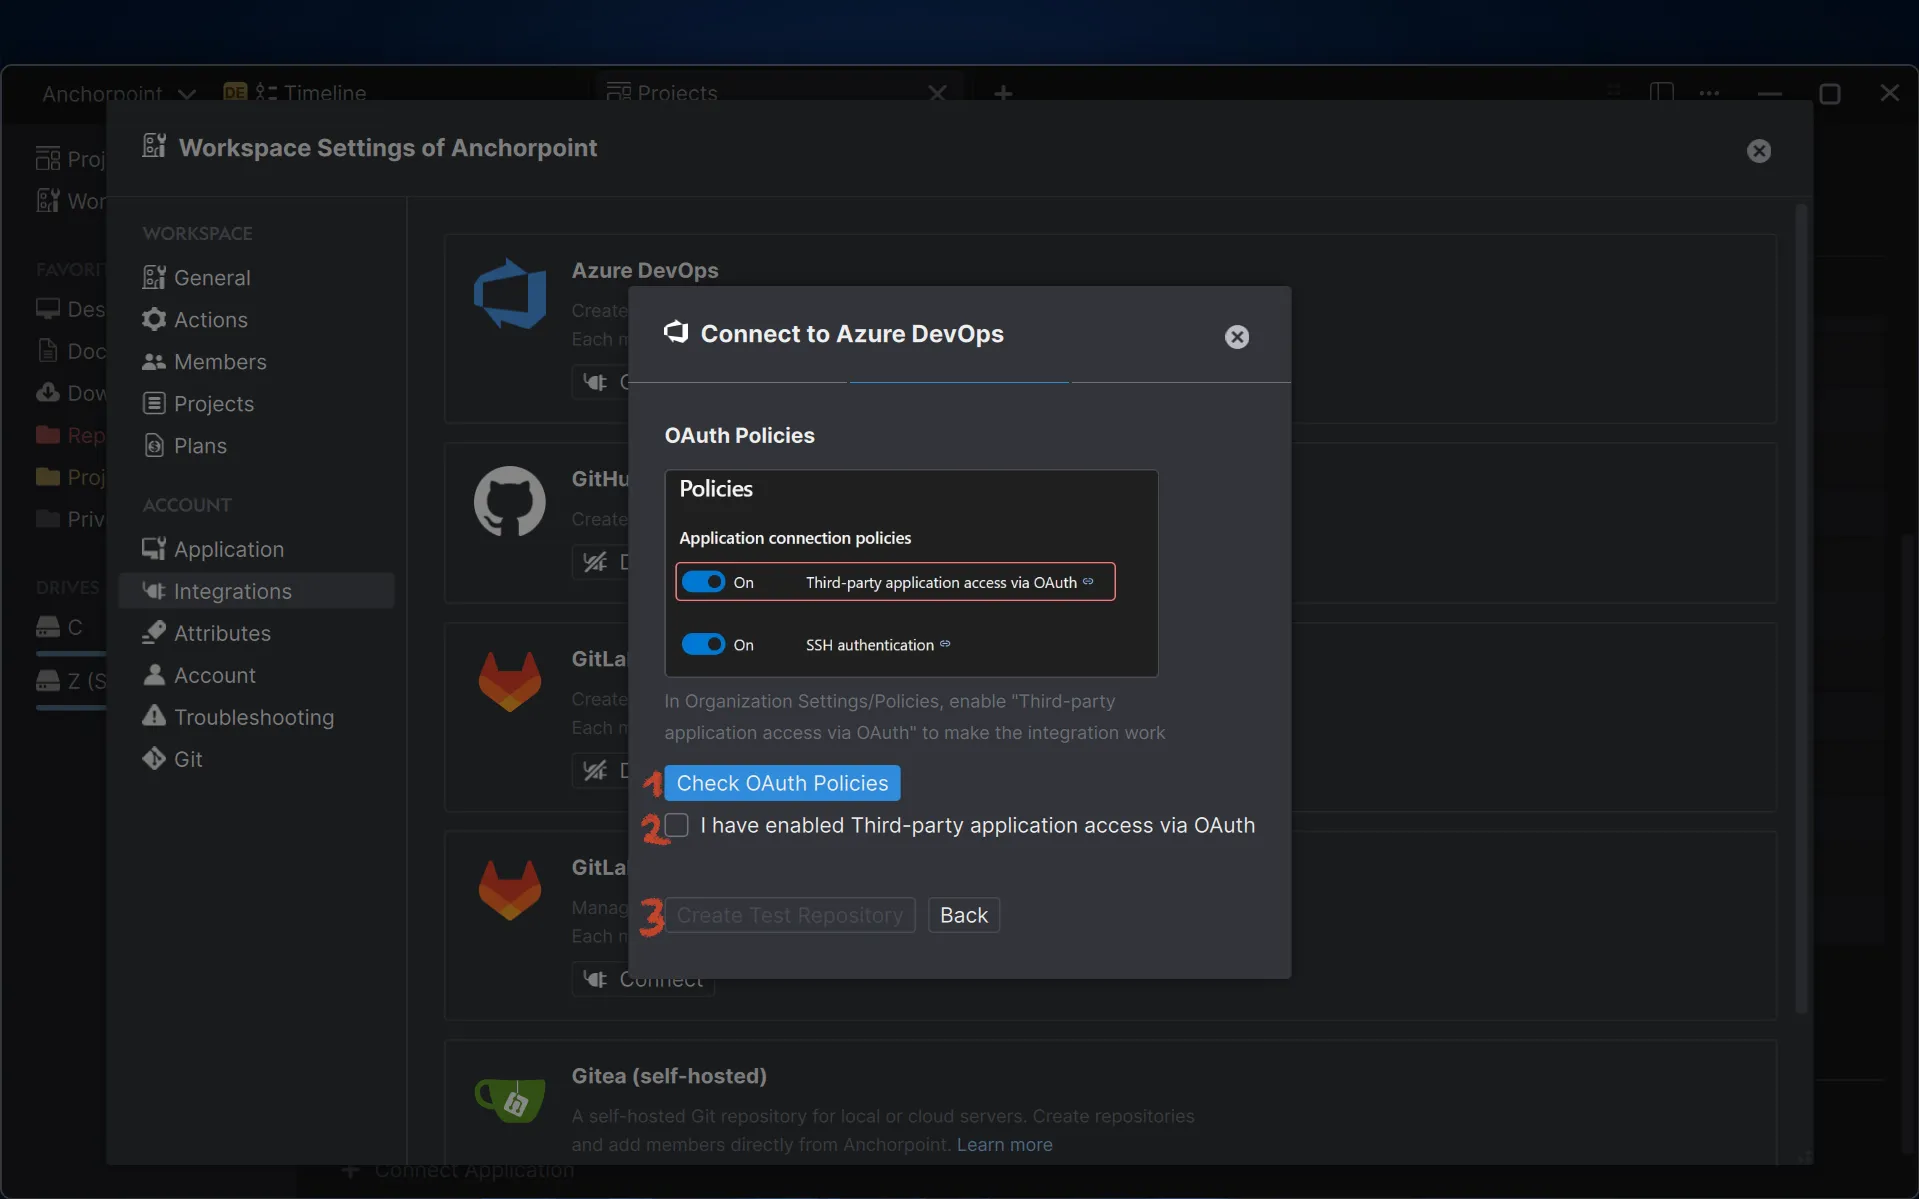
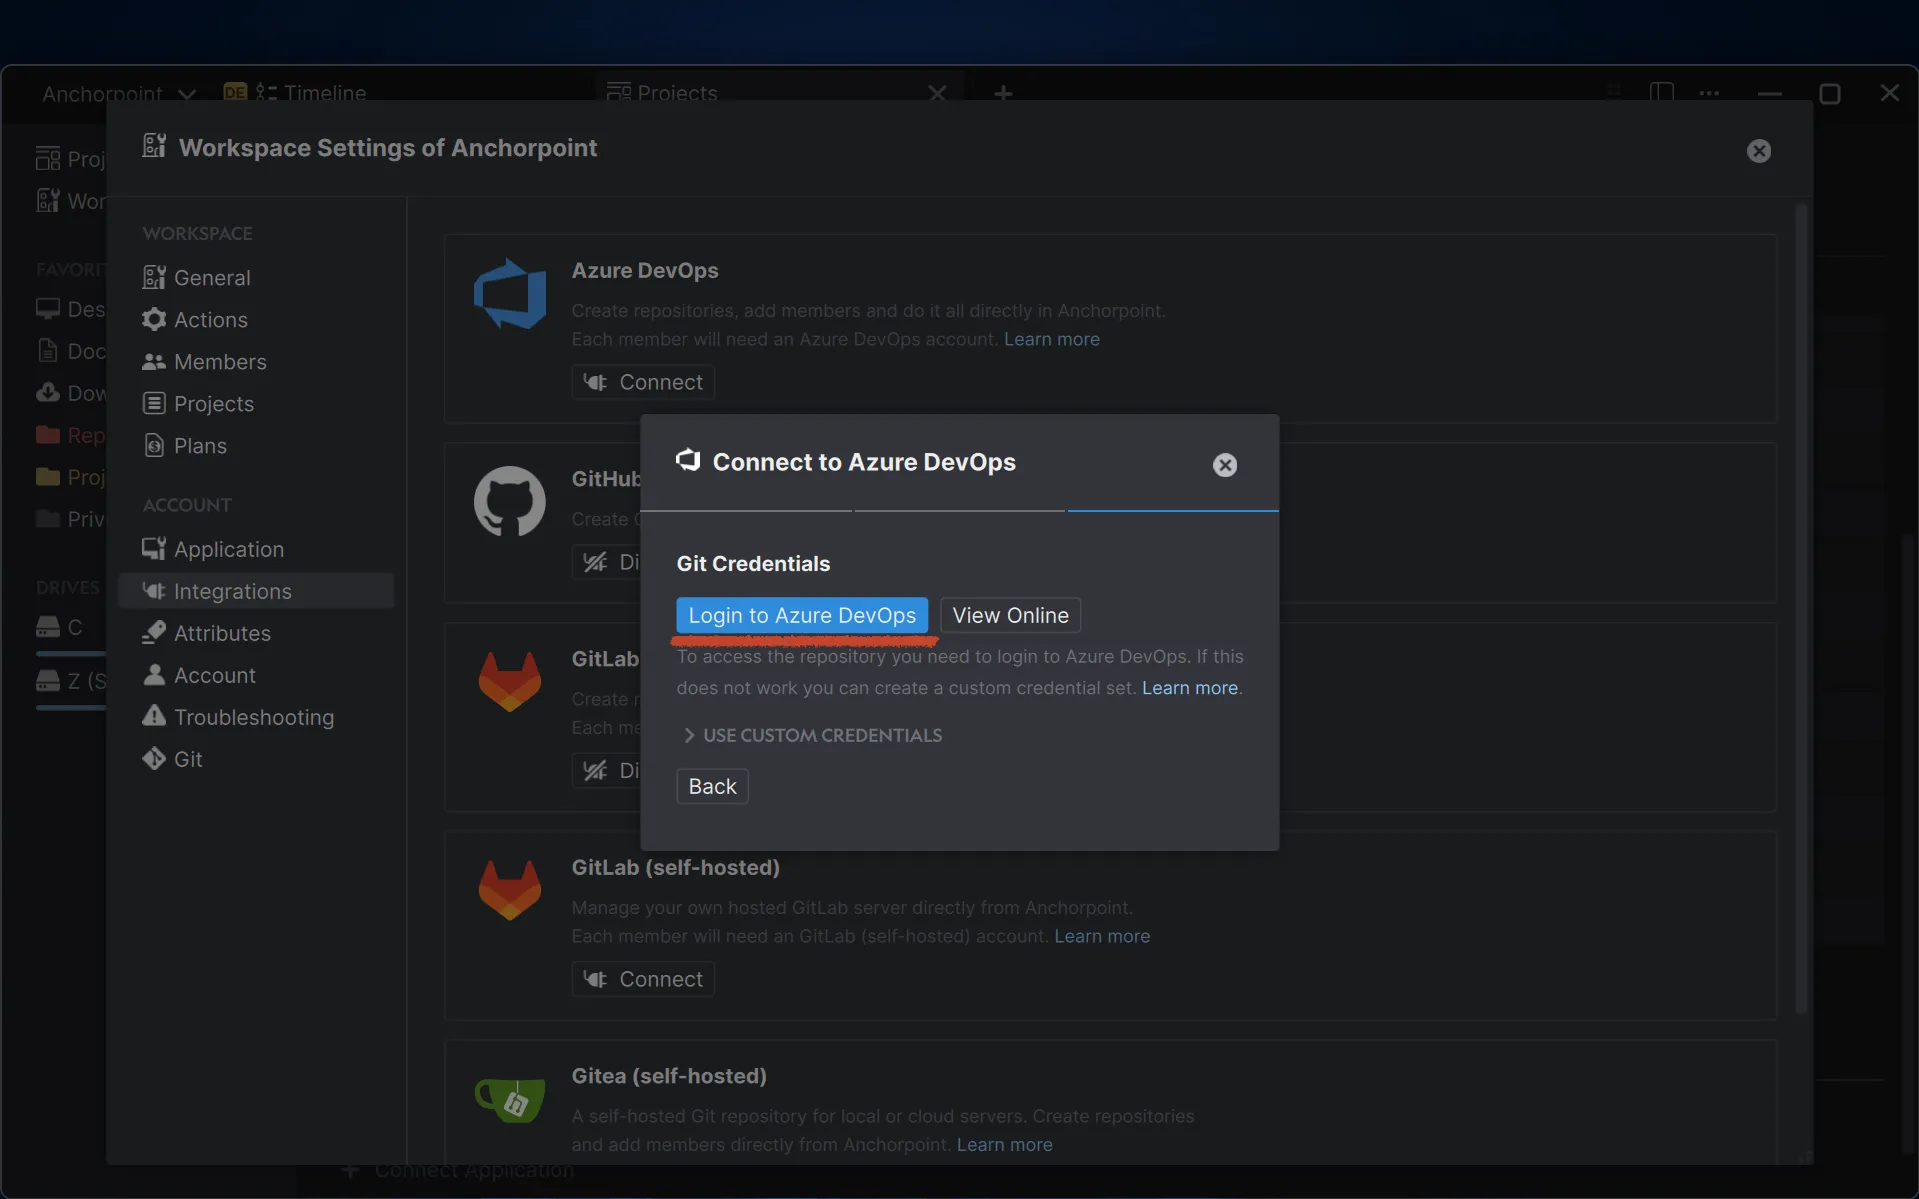
During the Azure DevOps setup, you might face some common issues like login difficulties. These can usually be resolved by selecting the Use custom credentials option and following the provided steps.
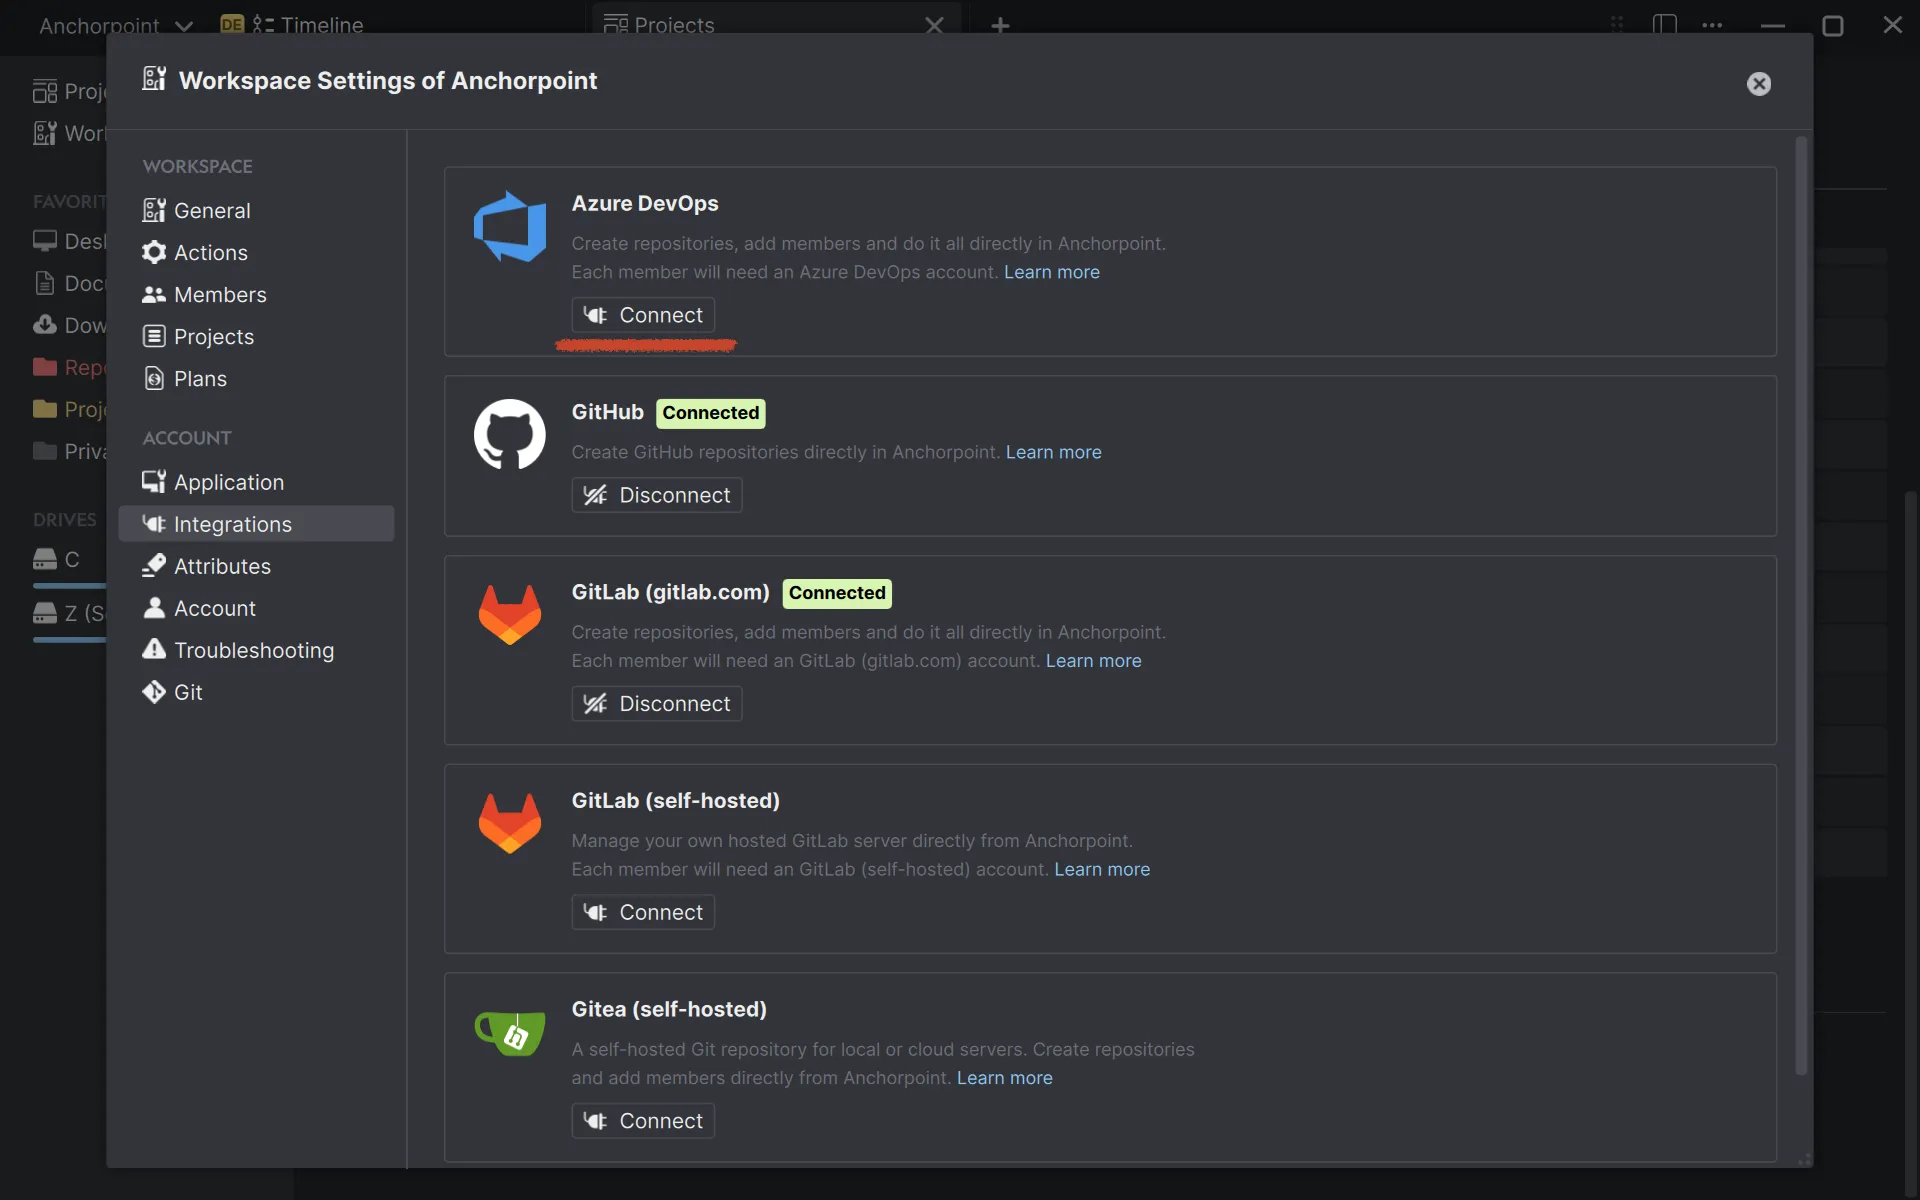
GitHub integration is similar, but simpler with fewer steps and headaches. First, create a free account. Then, open Anchorpoint, go to Workspace Settings > Integrations > GitHub, and follow the on-screen instructions.
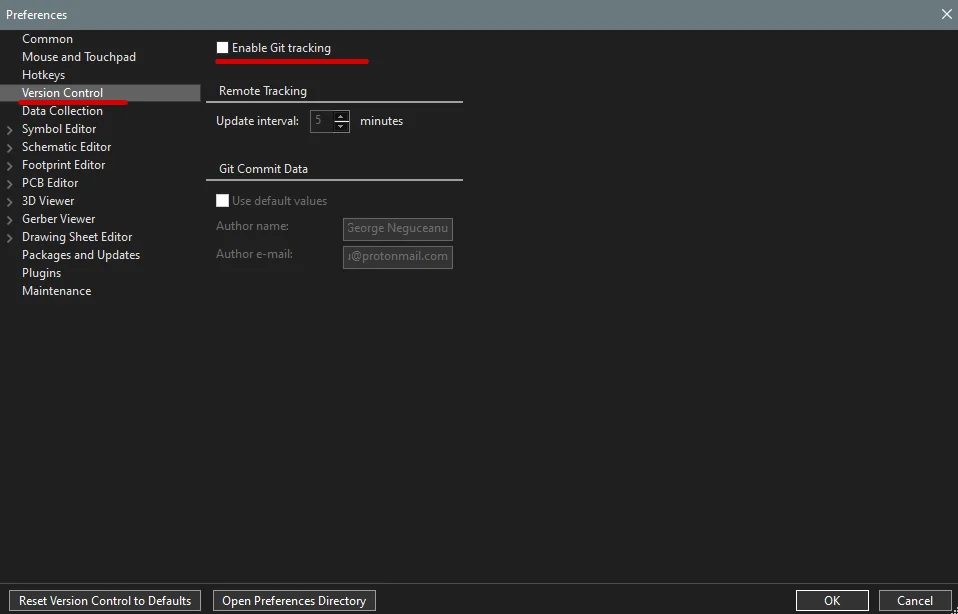
Before creating the project in Anchorpoint, KiCad comes .git enabled in .history folder for each project, this will conflict with Anchorpoint, so to avoid this, we need to make some changes. In KiCad go to Preferences tab, and click on Preferences to find common and version control tabs.

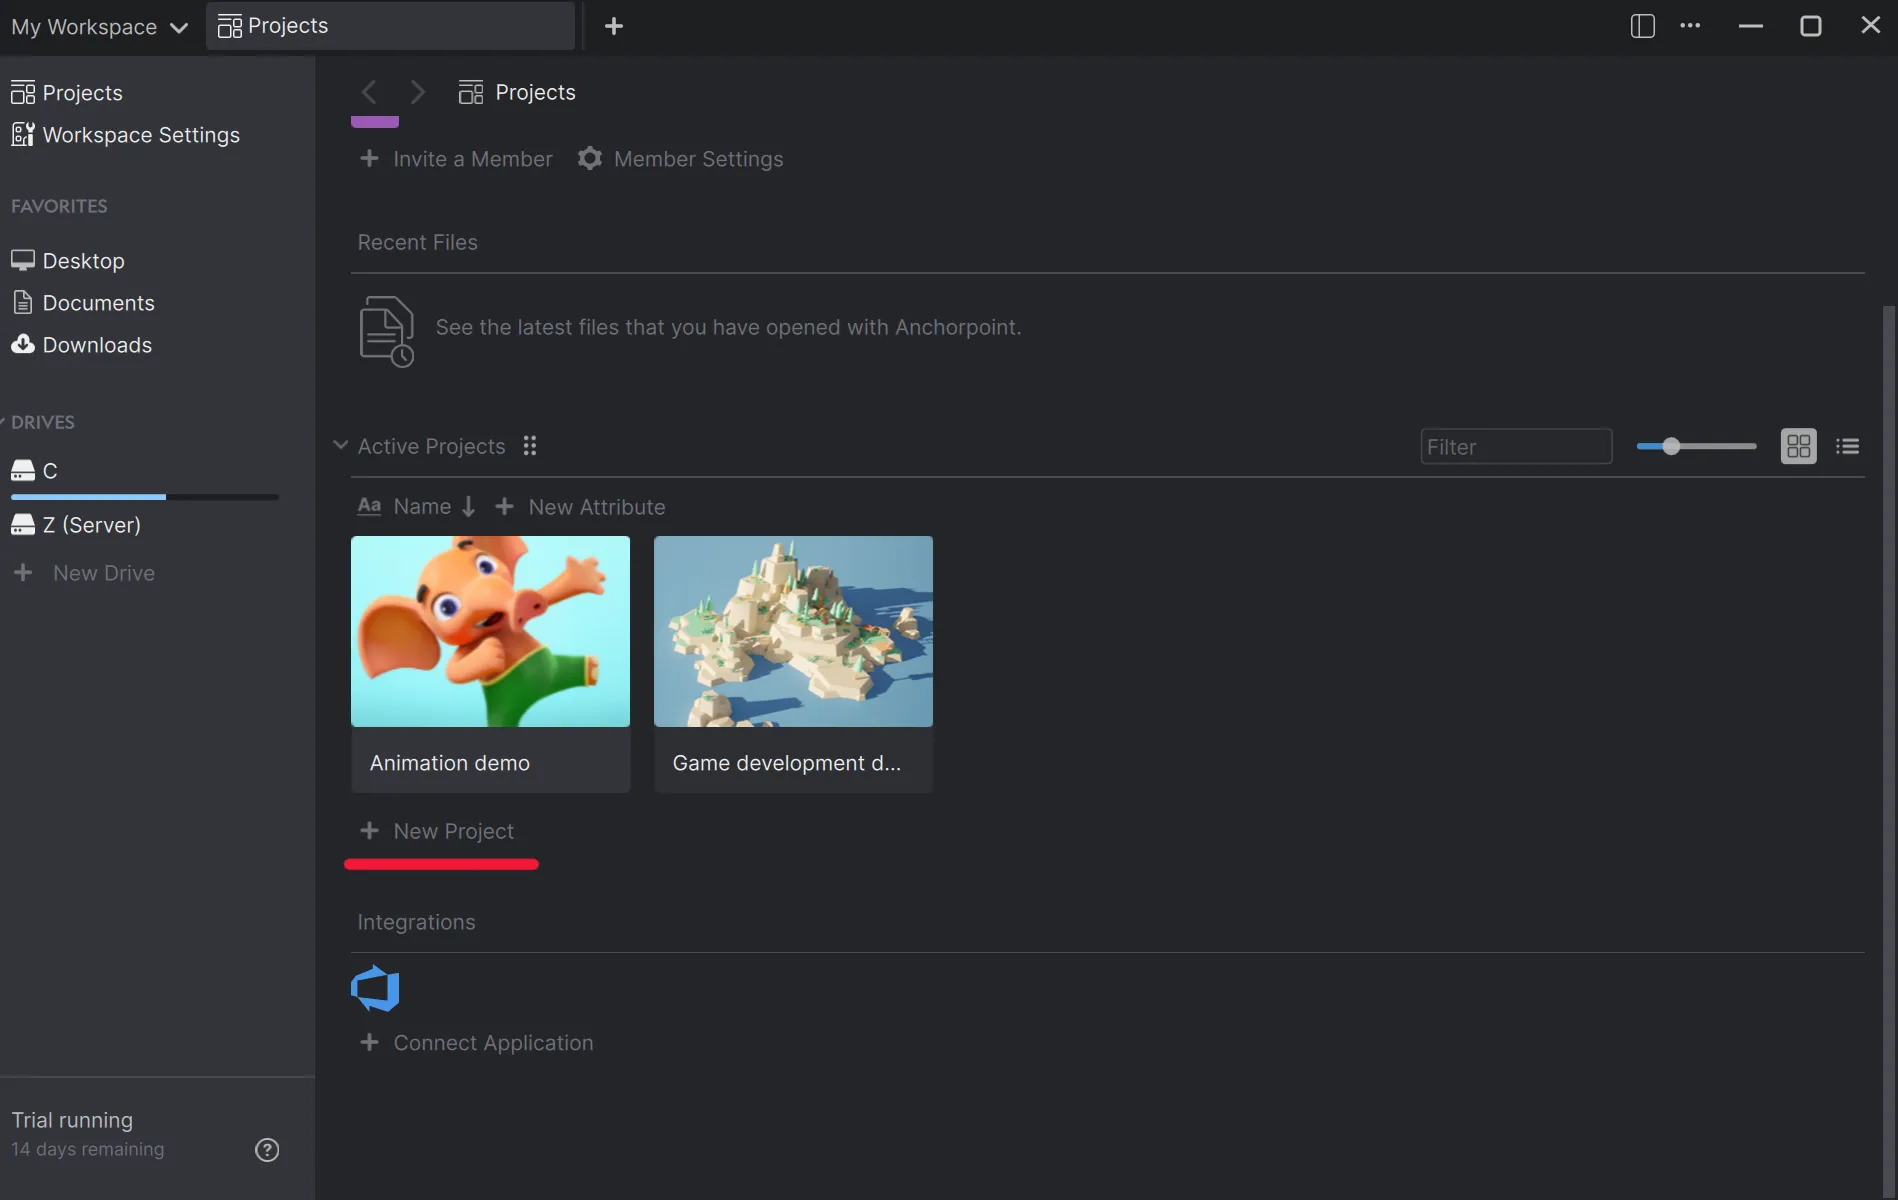
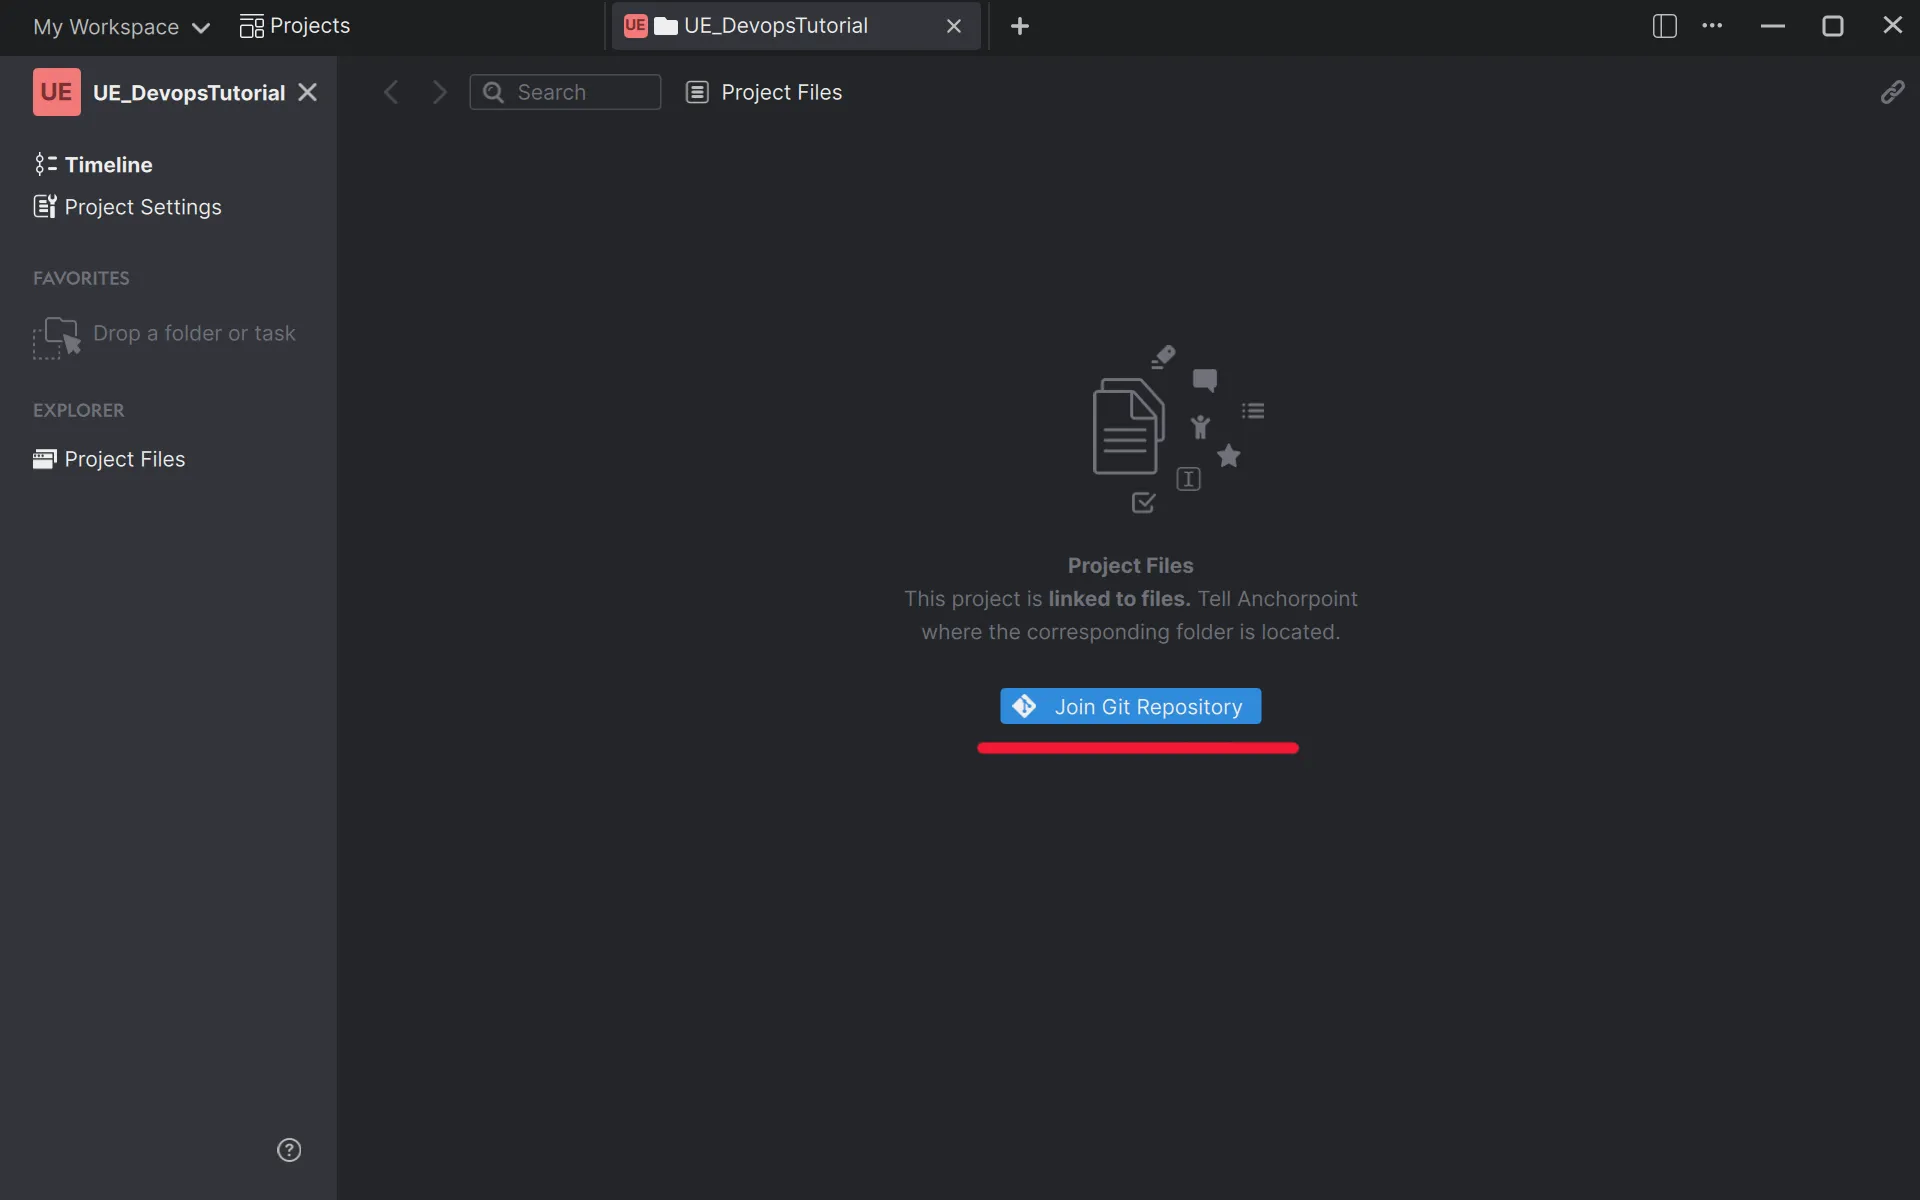
Open Anchorpoint and create a new project. Choose the local project folder on your hard drive. Once set up, Anchorpoint will automatically begin syncing with Azure DevOps.
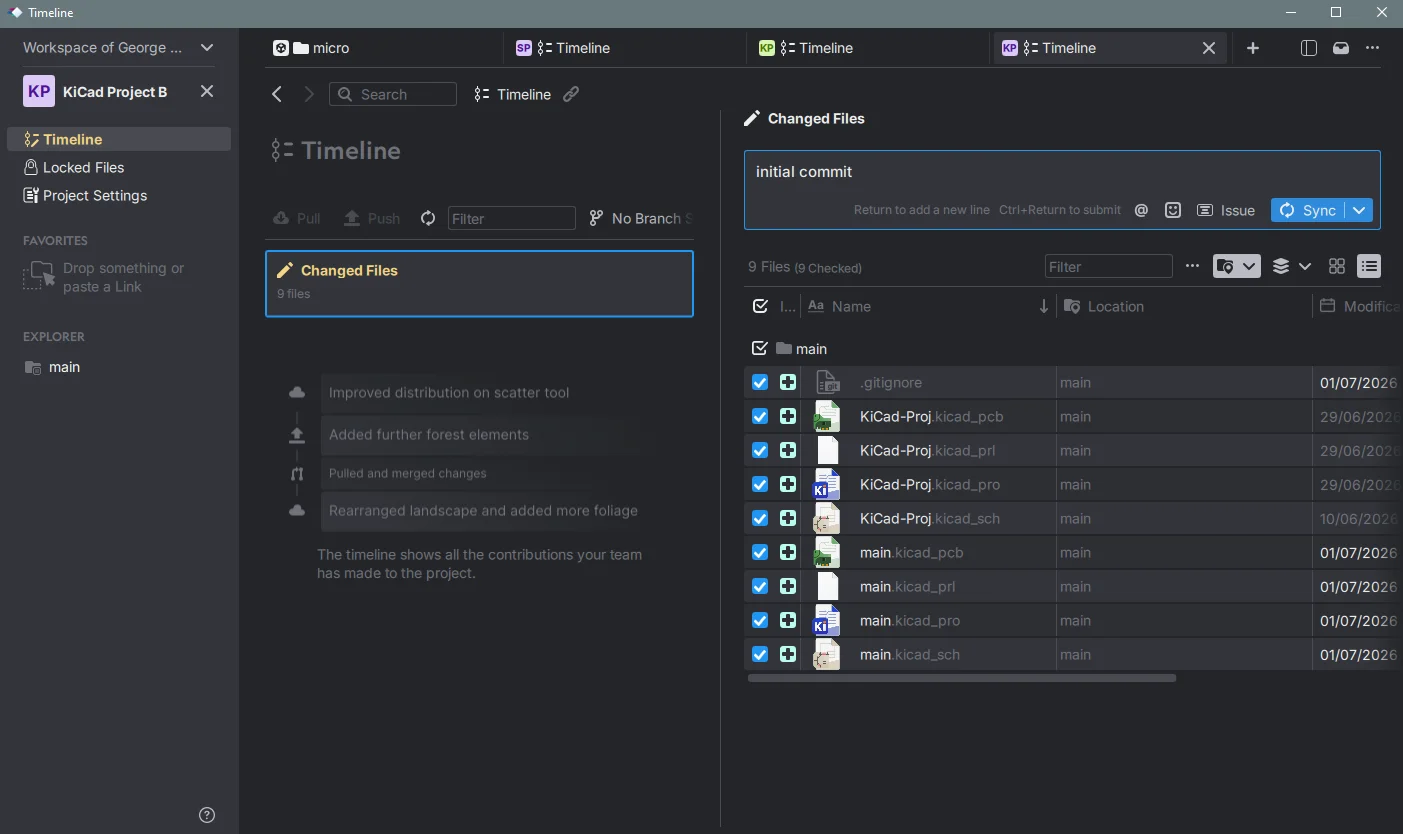
Uploading your KiCadproject is straightforward. When Anchorpoint detects uncommitted changes in your project folder, it will prompt you to enter a message, think of this as a checkpoint description. Once you click 'Sync', Anchorpoint pushes your files to Azure DevOps.
Before clicking sync, verify that your .gitignore in the project root contains these lines:
# KiCad local history exclusions. Edit to add your own rules.
fp-info-cache
*-backups/
.history/
~*.lck
If not, add them with a notepad type editor, to ignore temporary files, and then you can Sync.
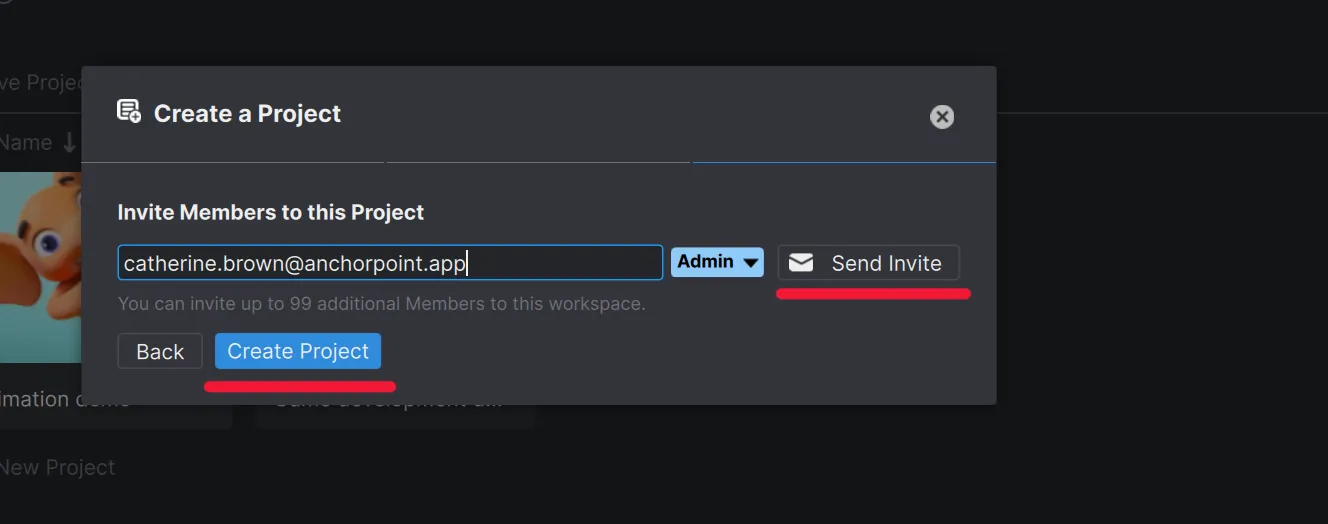
All team members must have active accounts for both Azure DevOps and Anchorpoint. Once you invite them to the project, they'll receive a notification. They'll need to select an empty folder on their system, which Anchorpoint will use to download the project from Azure DevOps.
This type of version control system simplifies the process: instead of saving multiple incremental files, you can work continuously and push updates directly to the cloud. Although it may take some time to adjust, this method enhances efficiency, keeps your file structure clean, and streamlines collaboration.
Your daily workflow becomes:
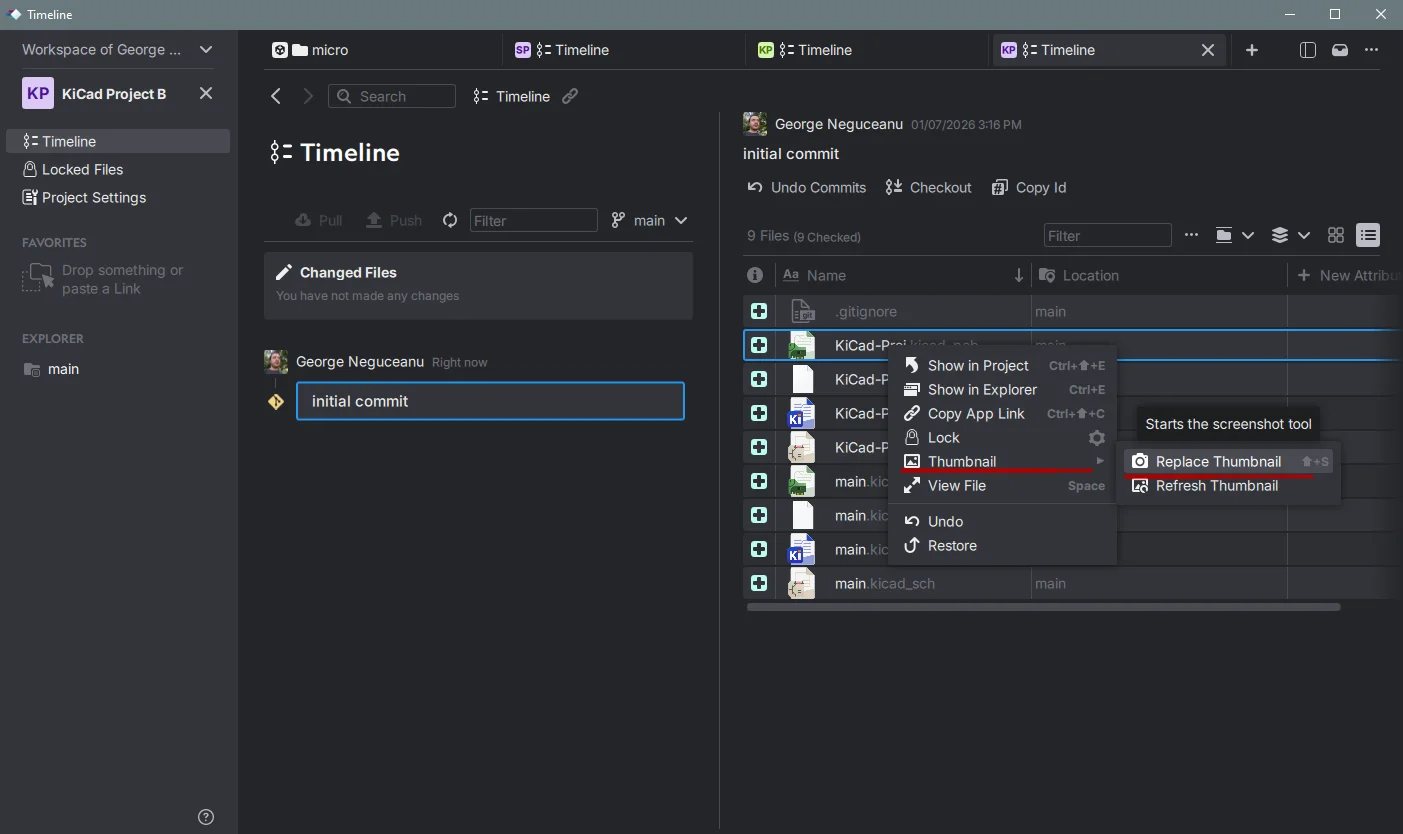
Anchorpoint allows you to replace visual asset thumbnails with custom screenshots directly from your viewport or tool engine:
Nope! Git is a decentralized version control system, which means your entire project history, including every snapshot and branch you create, lives locally right on your computer. You only need the internet if you want to push your code to a cloud hosting service like GitHub or GitLab to share it or back it up.
Absolutely. In fact, that's the whole point! With Git, you keep just one cleanly named file (e.g., my_project.kicad_pcb). Instead of duplicating files and creating clutter, Git remembers the entire timeline of that single file. If you ever need to go back to a previous version, you just tell Git to jump back to that specific snapshot.
Think of a branch as a parallel universe. If you want to try swapping out a chip for a cheaper alternative or want to attempt a completely different board shape, you can spin up a new branch. You can experiment freely without touching your stable, working design on the main branch. If it works, you merge it back into your main branch; if it fails, you just delete it and pretend it never happened.